Restoring traditional silk fabric making
Katsuyama-san: The Silk Magician
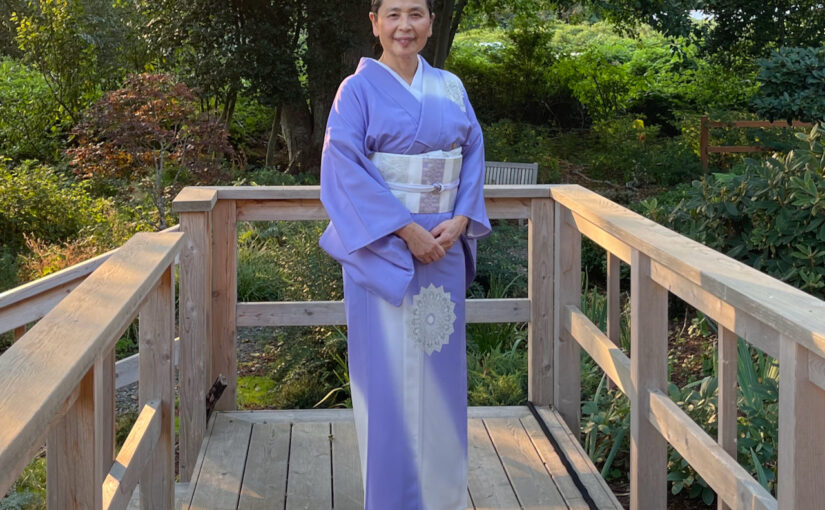
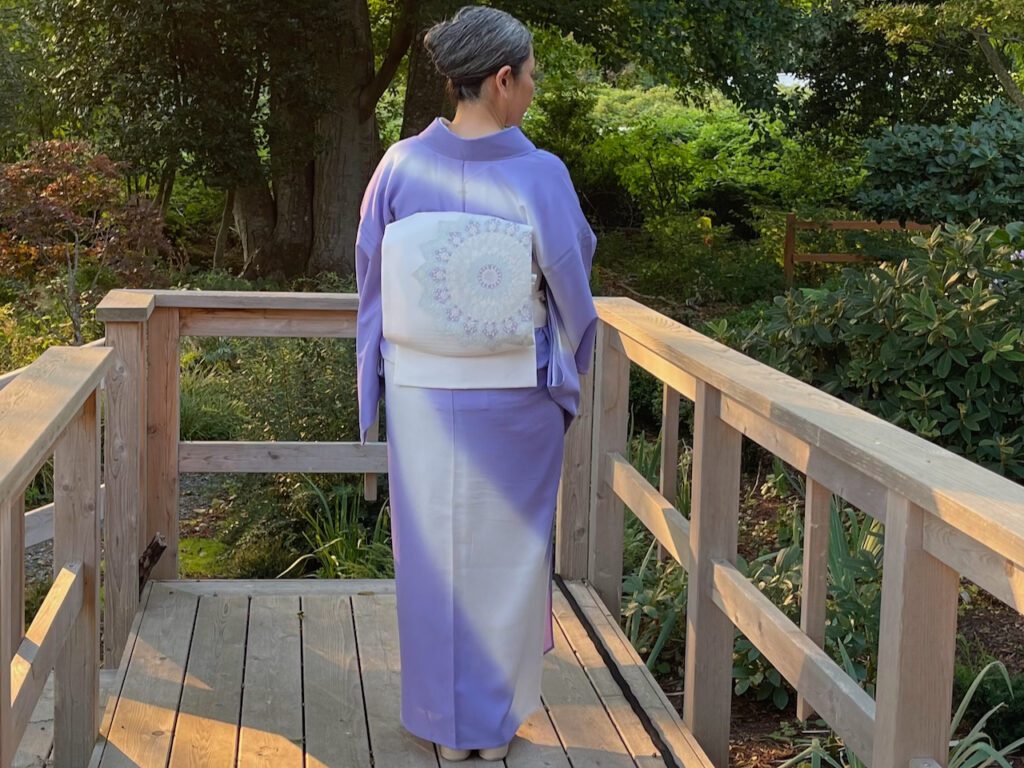
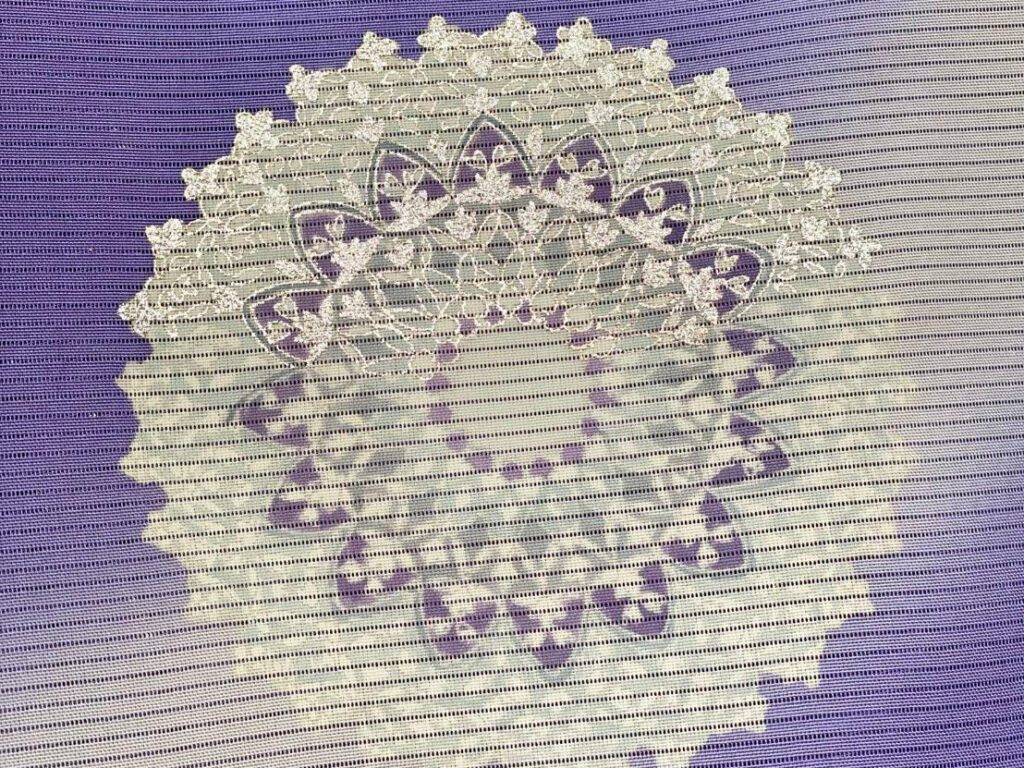
The obi fabric that Katsuyama-san (Katsuyama Takeshi 勝山健史) makes is nothing like I’ve ever seen.
Obi is a sash worn with kimono, traditional Japanese clothing. Its original function was to simply keep the kimono closed, since kimino doesn’t have buttons or fasteners. As kimono became more decorative over time, obi became wider and also more decorative as an aesthetic companion of kimono.
Formal obi are made of silk with brocade weaves. Obi with more colors of the decorative threads are considered more luxurious. Some obi are woven with gold and silver threads to add a gorgeous look. More decorative threads also add more weight, making it heavier to wear.
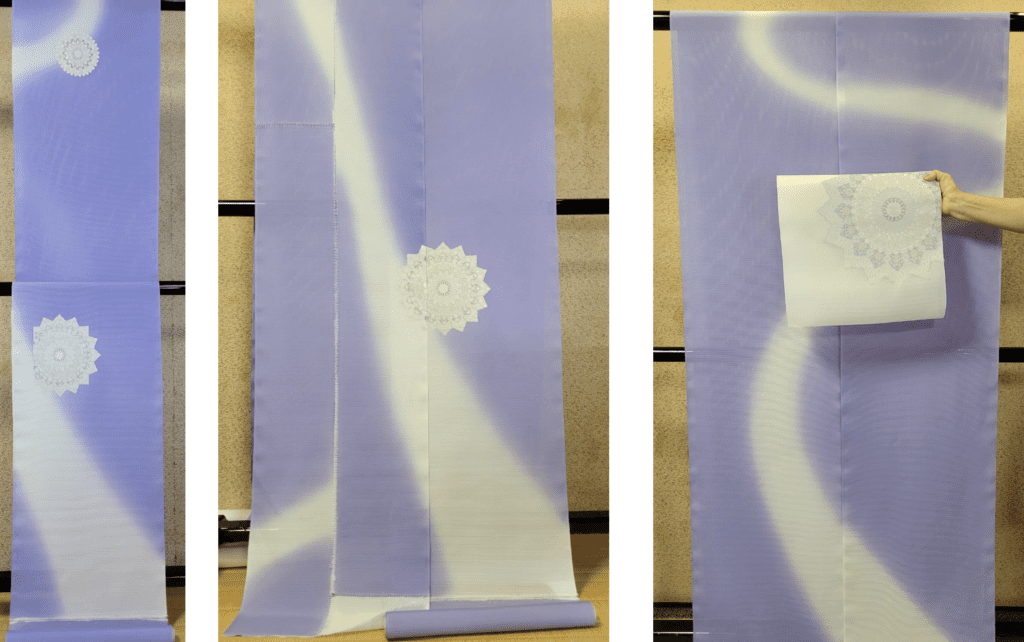
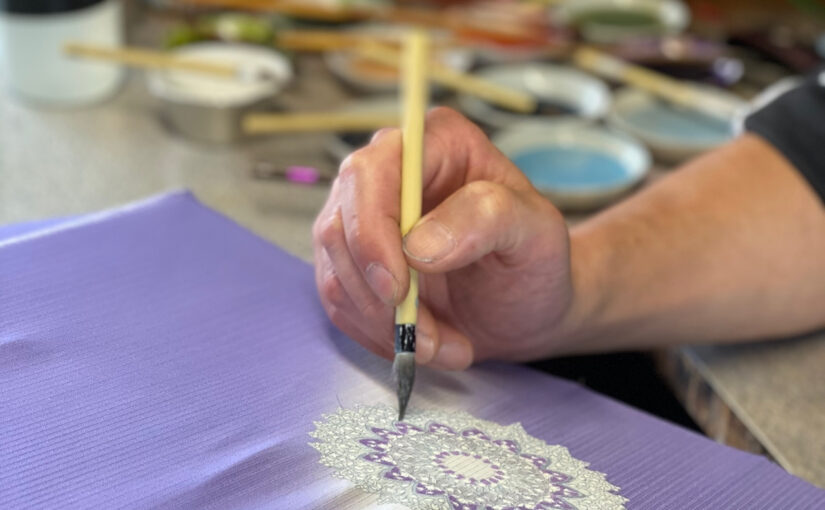
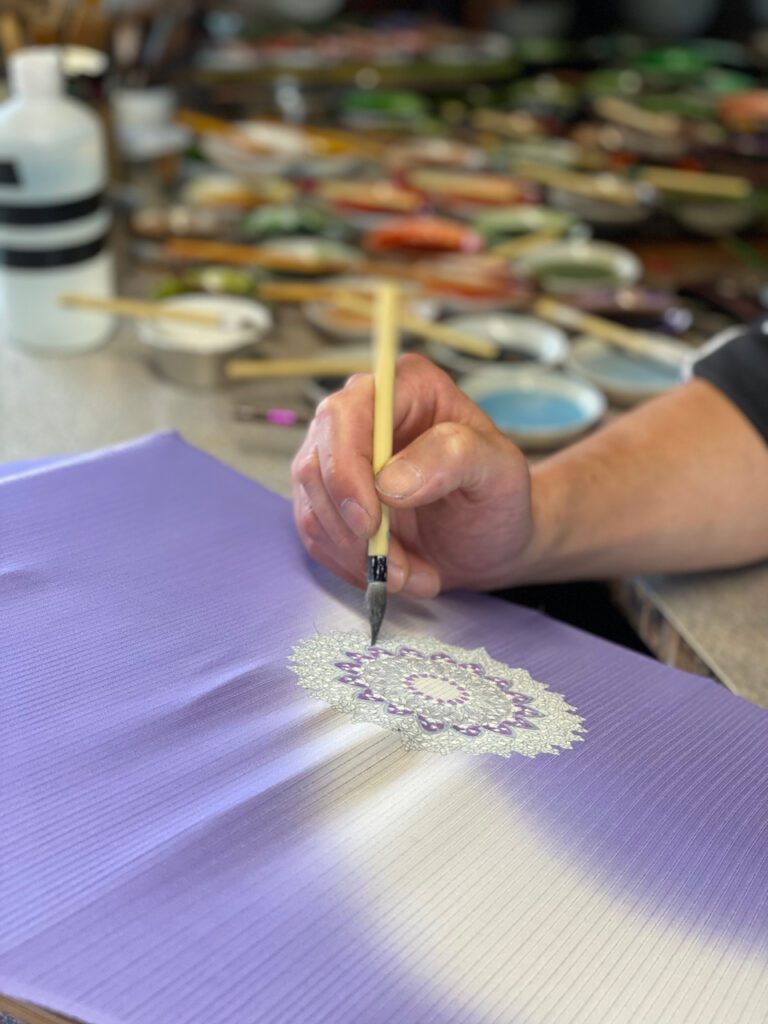
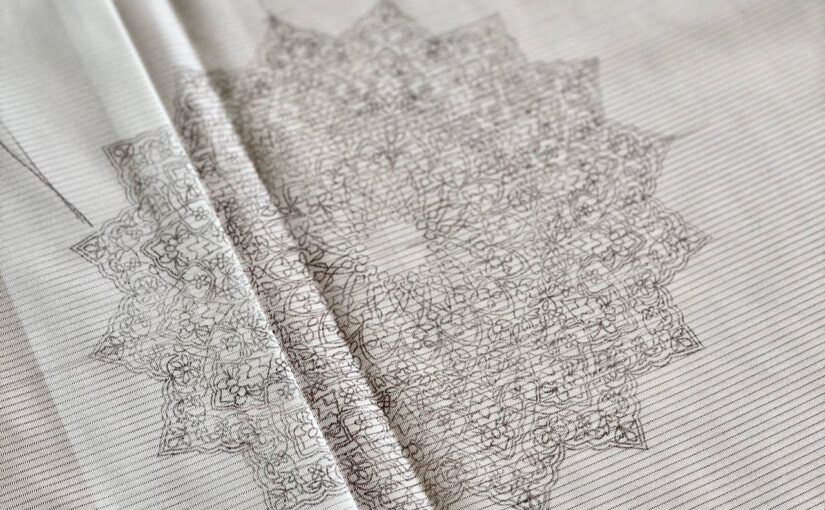
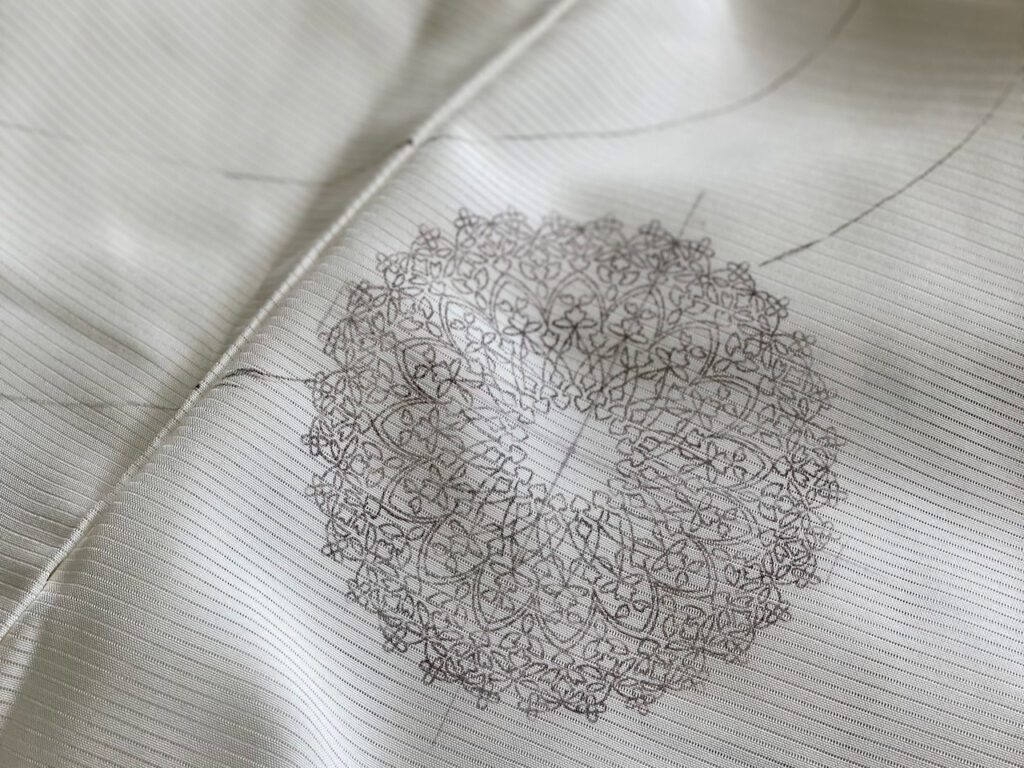
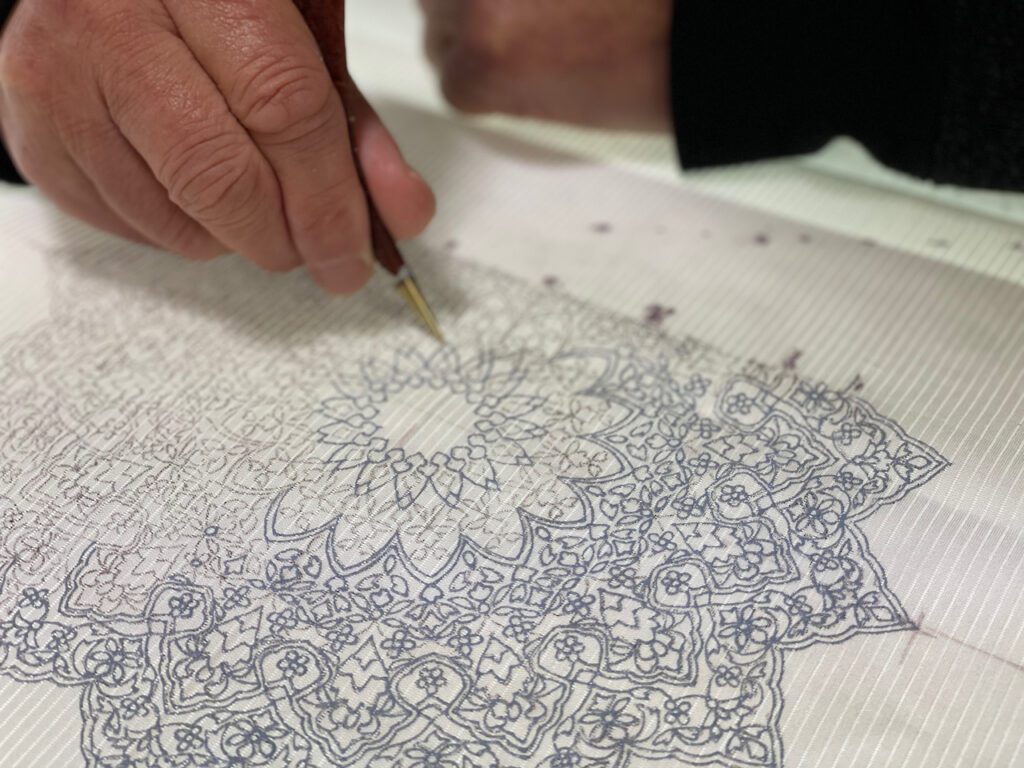
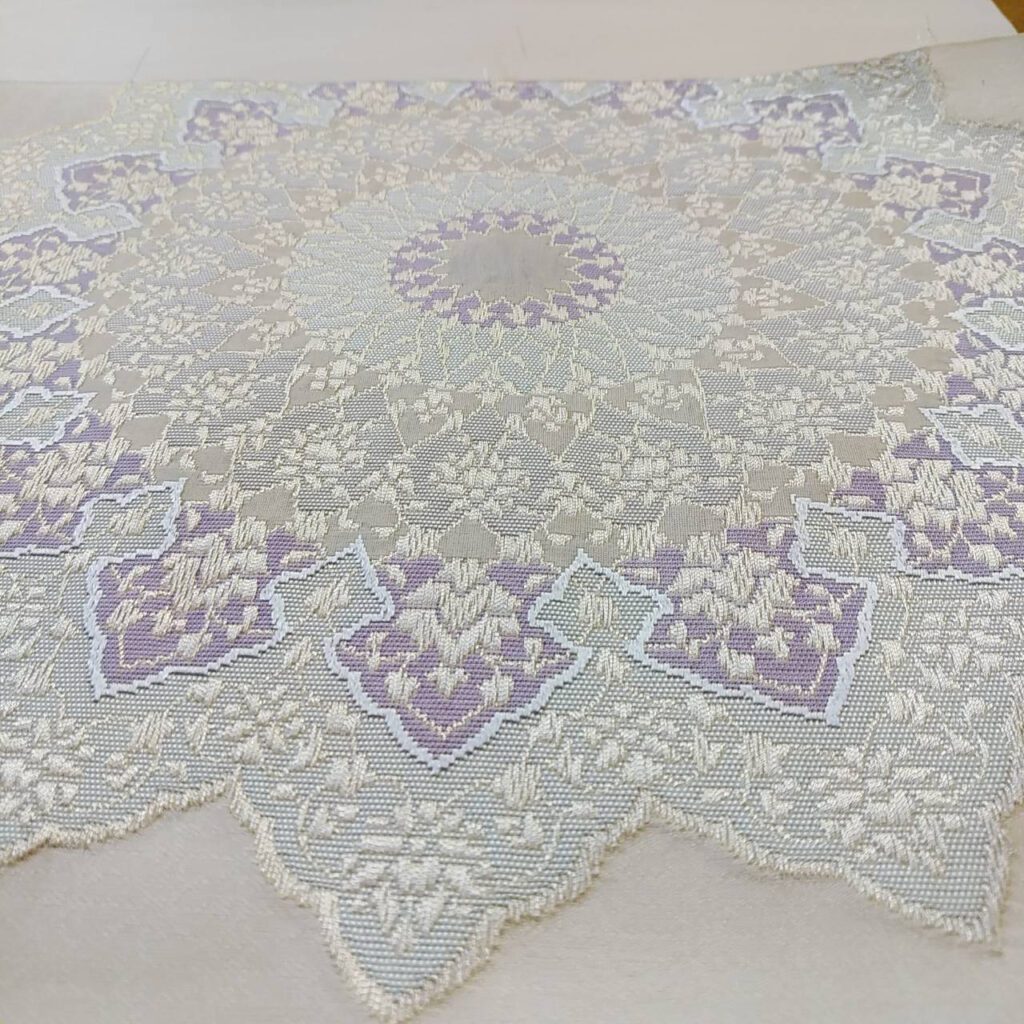
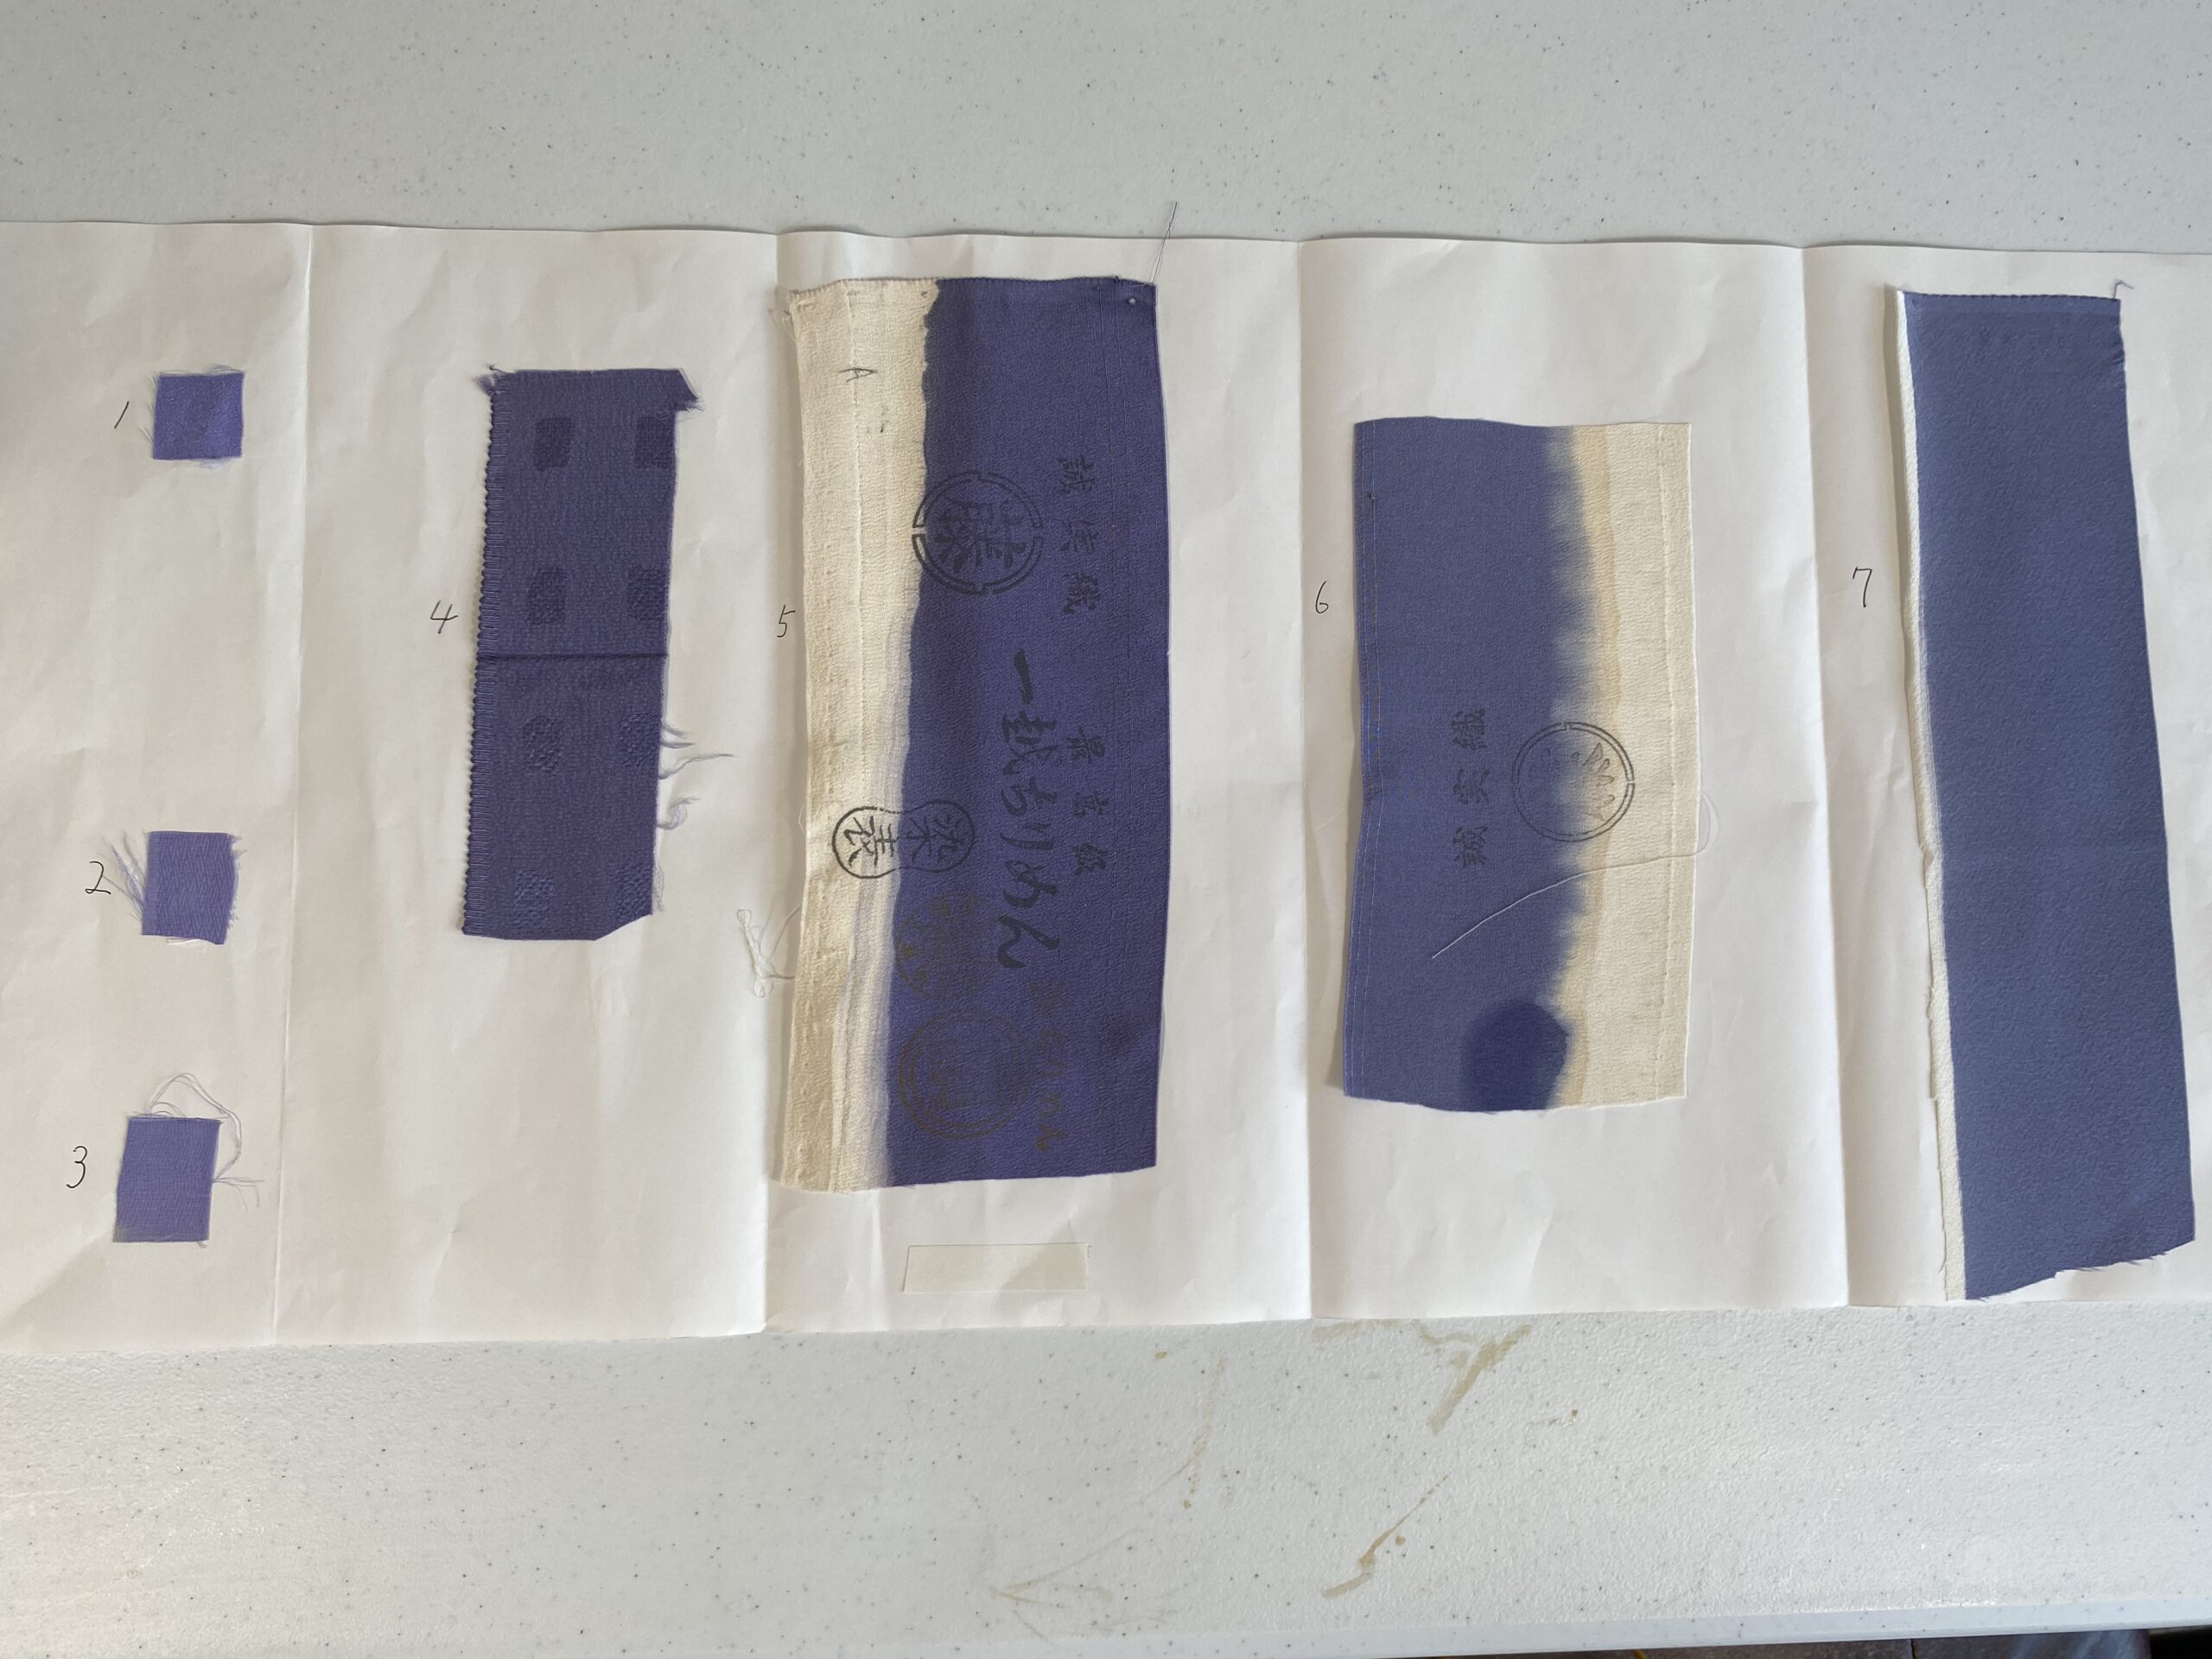
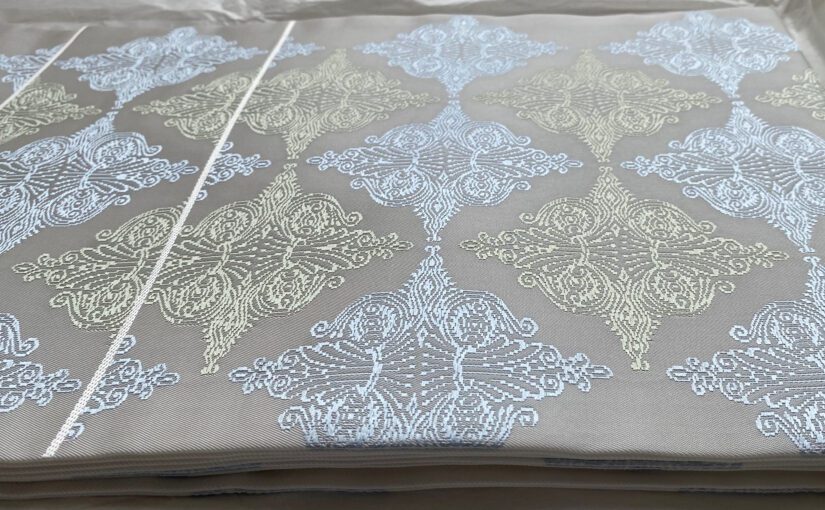
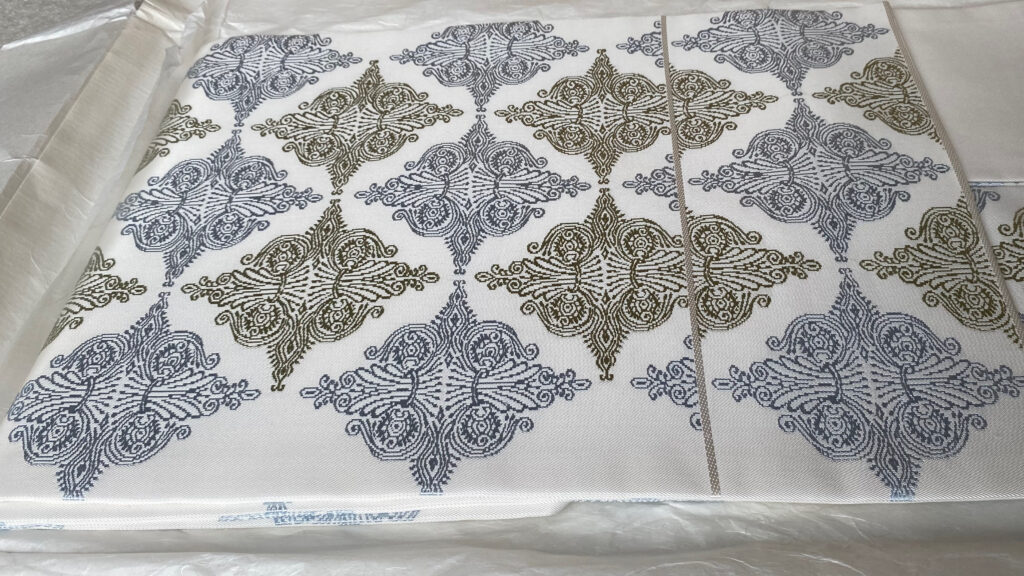
Katsuyama-san’s obi, however, doesn’t use too many colors. The obi in the photos above, for example, is woven with only two different colors of brocade threads on the white base. The intricate colors change depending on the angle from which you look at. The gray turns shiny blue, and what seemed to be brown looks almost green as you change the angle from left to right. Katsuyama-san knows how to make the maximum use of the silk luster to create a graceful as well as luxurious appearance to his obi. His obi is lighter and much more comfortable to wear than my other silk obi. Katsuyama-san is a silk magician.
How Katsuyama-san and Shimura-sen Met
Textile production in Nishijin district, Kyoto, dates back to the 5th century. During the Onin War (1467-1477), this district was used as Nishijin (meaning “Western camp”). When the weavers who had fled the war returned to Kyoto, they settled in Nishijin area and revived textile production. During Muromachi and Edo periods, Nishijin flourished supplying fabrics to the Imperial Court and samurai lords. For centuries, Nishijin was Japan’s center for luxurious textile production.
Katsuyama-san is the 5th-generation silk-textile maker in Nishijin. Katsuyama-san’s family creed is “Never repeat the same thing as the previous generation, try something new.” Following this family creed, Katsuyama-san’s father opened a hand-loom studio in Shuzan, the northern outskirt of Kyoto City, in 1967, when most of the Nishijin makers were switching to machine looms. When Katsuyama-san took over the family business about thirty years ago, he was struggling to find his own style of textile making.
One day Katsuyama-san had an opportunity to see and touch a silk kimono made in the fifteenth century. The thickness of the silk thread was uneven, but the fabric was softer and lighter than any silk he had ever seen. Katsuyama-san was shocked. Where and how can he find this kind of silk? So his pursuit of this legendary fabric began.
When he visited a men’s tailor shop in Milan, Italy, Katsuyama-san encountered the same type of silk fabric, used for handkerchiefs. Quite impressed, he asked the shopkeeper where he could get the fabric. Not in Italy, was the answer. The fabric came from Japan.
Upon returning to Japan, Katsuyama-san did further research and found the person who made the handkerchiefs: Shimura-san (Shimura Akira 志村明).
Shimura-san had devoted his professional life to studying silk making in its entire process. Through his study, he had learned that there was a disconnect between Japan’s traditional silk-making process and the one that is dominant today.
Japan has a long history of silk-making. The oldest domestic silk thread found in Japan dates back to Yayoi Period (300 BCE – 300 CE), and silk-making originated in China must have been introduced to Japan by then. Many feudal domains in the Edo period (1603 – 1868) encouraged sericulture in their territories, and by the end of that period, Japan was producing raw silk from many varieties of silkworm.
When Japan opened its doors to the Western world, the newly established Meiji government positioned raw silk as the country’s most important export item. By the 1890s, raw silk accounted for 40% of Japan’s exports, mainly to the US. During the Industrial Revolution, the US focused on mass-producing silk socks and stockings. The US complained about the uneven quality of Japan’s raw silk as a hindrance to higher production efficiency. In response, Japan strived to “improve” the quality of its raw silk by breeding silkworms and standardizing silkworm species.
By the time Shimura-san began his career in the 1970s, Japan was almost exclusively producing raw silk optimized for mass production, utilizing mechanical production processes from only certain silkworm species that were specifically bred for mass production. The texture of the fabric made from the mass-produced silk threads was nothing like that of old kimono that Shimura-san had studied. He wanted to recreate the “beautiful”, “better” silk fabric that had existed in Japan before the mass-production era. To pursue his goal meant reconstructing traditional methods of silk making, from growing mulberry trees, selecting different silkworm species and incubating them, feeding them, harvesting cocoons, reeling silk threads, processing, dyeing and weaving, all by hand. Shimura-san moved to Ehime, and while working as an instructor at Seiyo City Silk Museum, he was experimenting with his method. The handkerchief Katsuyama saw in Italy was one of such experiments.
Katsuyama-san saw a possible breakthrough in Shimura-san’s approach. To create new types of obi, he also had to start from scratch… Katsuyama-san persuaded Shimura-san to co-found a company, with the single purpose of creating “the most beautiful” silk fabric.
After thorough research, they found an ideal location in Nagano Prefecture. The climate was ideal for growing silkworms, and there were still several sericultural farmers remaining in that village. One farmer became too old to continue sericulture, so he agreed to lend them his mulberry farmland. In 2002 Katsuyama-san and Shimura-san established Silk Textile Research Institute. Shimura-san and his apprentice, Akimoto-san (Akimoto Shigeko 秋本賀子), moved to Iijima-cho. And Katsuyama-san began spending significant time there to kick off the new venture while managing the operation in Nishijin and Shuzan Studio.
Visit to Silk Textile Research Institute
July 25, 2025. I get on a bus that left Shinjuku Bus Terminal at 2:45 pm, bound for Iida, Nagano Prefecture. Ever since I got to know Katsuyama-san in 2016, visiting his silk farm in Nagano had always been my wish. I wanted to see the birthplace of my kimono and obi. Nine years later, my wish finally comes true.
The bus drives through Chuo Freeway. The further the bus goes, the closer the mountains look on both sides of the highway.
I get off the bus at Komagane Interchange, walk toward the exit following the sign, then find a familiar black SUV. The same car I got in when I visited Kyoto last time. Reiko-san is the driver, with her sister Aiko-san on the back seat. On the passenger seat is Katsuyama-san. Rakufulin 洛風林, Reiko-san’s company, has been supporting Katsuyama-san’s endeavor since he began silk making in Nagano, and is the exclusive distributor of Katsuyama-san’s works.
It is a little after 6:00 pm when we check into the hotel. Katsuyama-san suggests we head out to the mulberry farm before sunset. Now the heat is no longer unbearable. Let’s hope there are not too many mosquitoes. Four of us get in the SUV and head out.
The SUV drives through rice paddies on one side and a persimmon orchard on the other side. It stops in front of a small hut that looks like a storage unit. On the left side are rows of mulberry trees with lush green leaves.
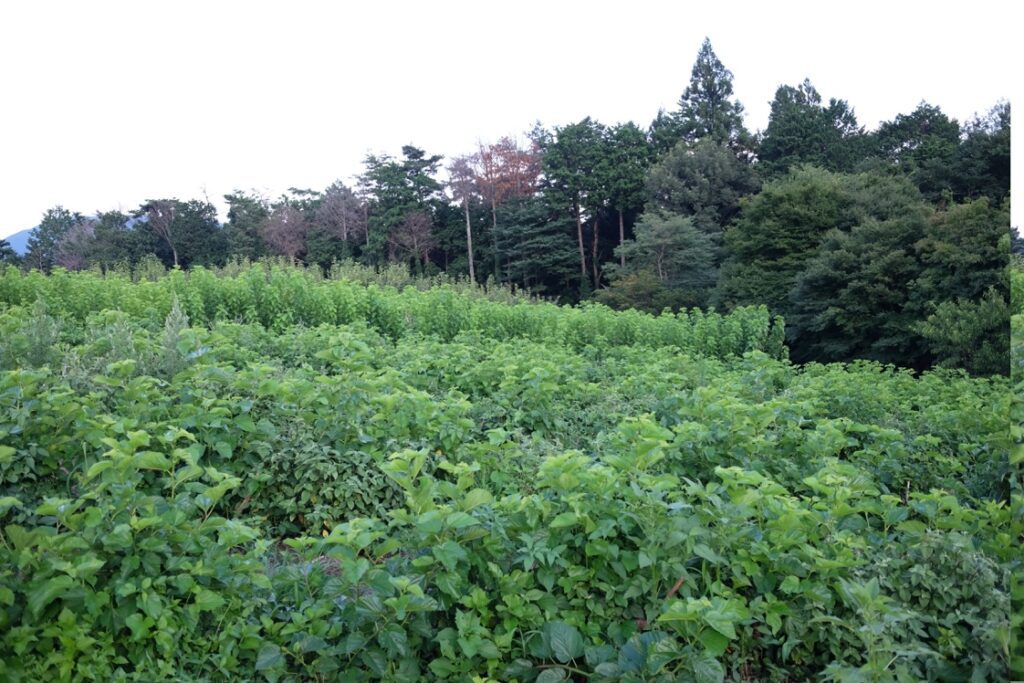
The trees on the left side of the farm are shorter. Ones on the further right side are much taller. “We grow silkworms twice a year. We finished feeding the spring silkworms about a month ago, using the mulberry trees on the left side. That’s why they are shorter. Now the spring silworms have already formed cocoons, and we have harvested them. The taller trees on the further right side are for the fall silkworms. We will begin the process with hatching silkworm eggs in early September,” says Katsuyama-san.
“We don’t feed the top several leaves because they are so bitter that silkworms don’t eat them. We feed the silkworms only down to the twelfth leaves, more tender part, to make sure that the size of the cocoons is consistent.”
“Here on our farm, we plant three different varieties of mulberry trees: Nezumi-kaeshi, Kikuba, and Kenmochi. Depending on the growth stage of the silkworms, we carefully choose which variety of mulberry leaves to feed them.”
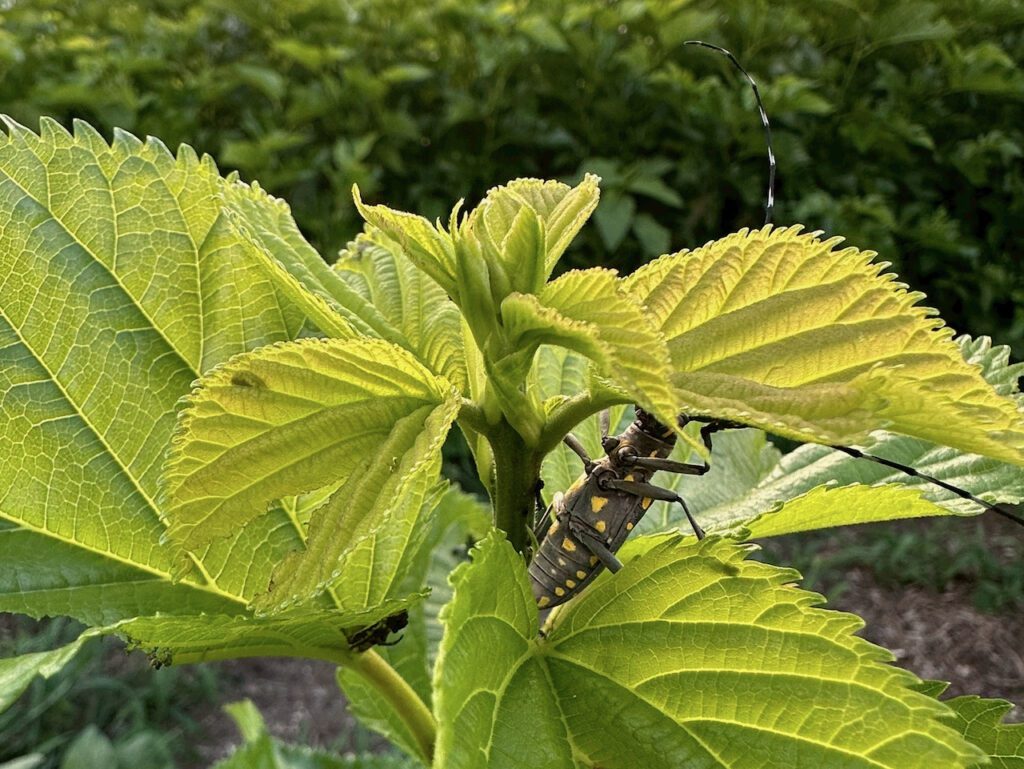
While walking along the rows of mulberry bushes, Katsuyama-san finds a black insect with long whiskers, nesting on the leaves. He picks it up, pinches its head and body with his thumb and index finger, and kills it by snapping its neck. “Longhorn beetles. They are mulberry’s natural enemy. Their larvae bore holes and may even kill the tree. If you find one, please kill it like I did.”
Why not spray pesticides? I answer myself to my silly question. Silkworms are, you know, insects. Any pesticide will weaken the very creature they are growing. I’m reminded that sericulture is by definition pesticide-free. And there is a price to pay.
“Our landlord grows persimmon trees in the orchard right next to us. This year, they spread pesticides later than normal. Our mulberry farm was affected, and we had to cut down the silk production volume by half this spring. We should have communicated with each other better, but they are our landlord, after all. We don’t have much to say…” says Katsuyama-san.
Not only to pesticides, but silkworms are also sensitive to natto bacteria. “You are not supposed to eat natto (a traditional Japanese food made from fermented soybeans) while feeding silkworms. Even if you wash your hands and mouth, the natto bacteria might be left on your clothes and that might hinder the growth of silkworms.”
Jokingly, I tell Katsuyama-san. “For that I’m qualified to work on your farm. I hate natto and I never eat it. You don’t have to worry my bringing natto bacteria here.”
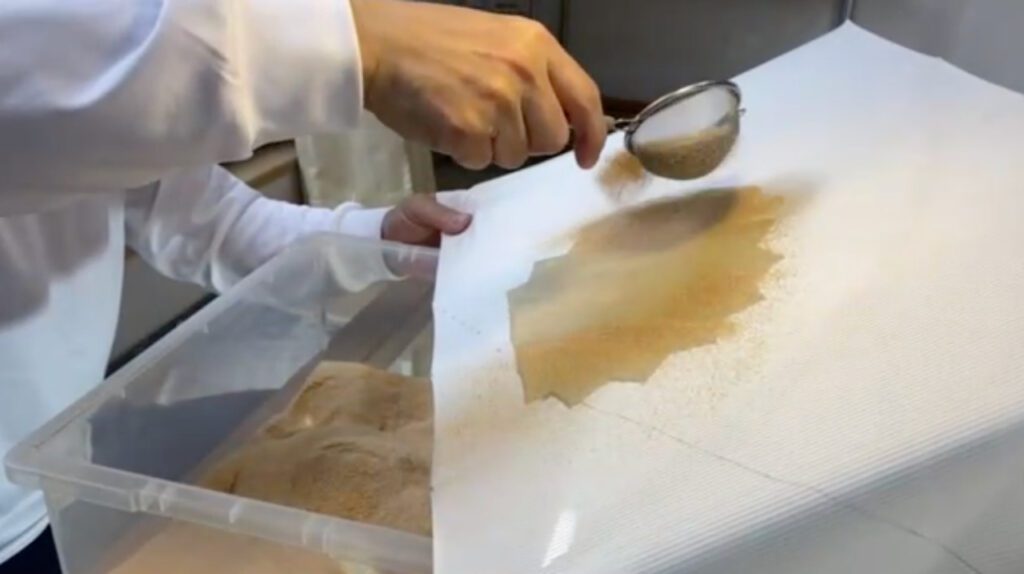
In the winter, Katsuyama-san’s farm prunes the mulberry trees and burns the cut branches and fallen leaves to ashes. The ashes are spread out to enrich the soil. In the first couple of years they used to purchase fertilizer labeled as “organic”. When they used their own ashes as fertilizer, the quality of the silk improved dramatically. Ever since, they have switched to self-sourcing the fertilizer as well. Now the farm is 100% organic.
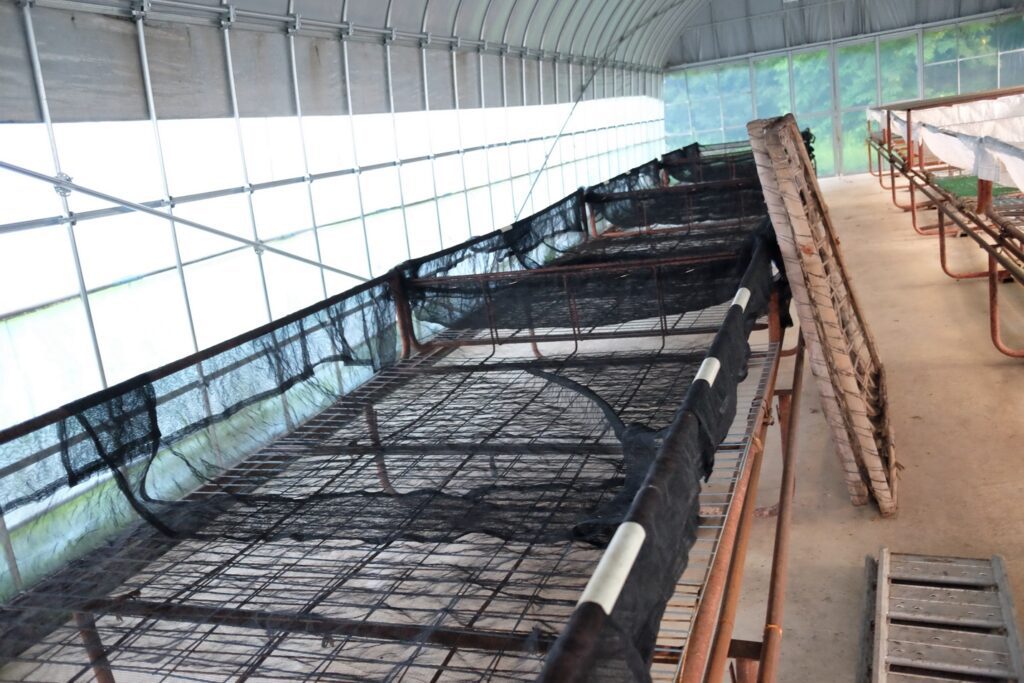
Across the path from the mulberry farm stand two sheds where they grow silkworms. The spring cocoons have already been harvested and stored in a different location. We go inside to see the empty beds, waiting to be used again in the fall. The back of the shed has large doors that can fully open, and behind the shed runs a creek. The temperature is lower on the creek, and the breeze comes in through the back doors. “It is crucial to maintain optimal temperature, humidity, and ventilation for the healthy development of silkworms. By having a creek in the back, natural ventilation occurs inside. The shed has been here before us. Farmers in the past knew it very well.”
The sun will set soon. Time to leave the farm.
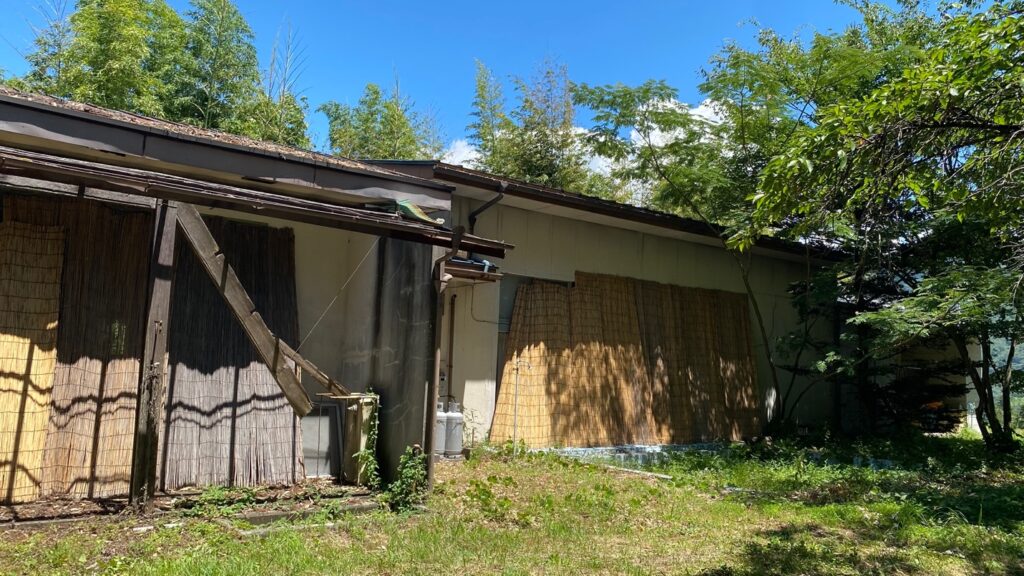
The next morning, we visit the weaving studio near the farm. The building used to be a kindergarten. It was closed years ago (obviously due to the population decrease in the area), and Katsuyama-san is now renting it from the city.
In the space which used to be a classroom, spring cocoons are stored.
Once the silkworms create cocoons, their lives end before they come out of the cocoons. Today’s main method of taking the lives of silkworms is to blow extremely hot air into the cocoons. The hot air eliminates humidity, making it easy to store the cocoons. The silk’s natural texture, however, is somewhat lost.
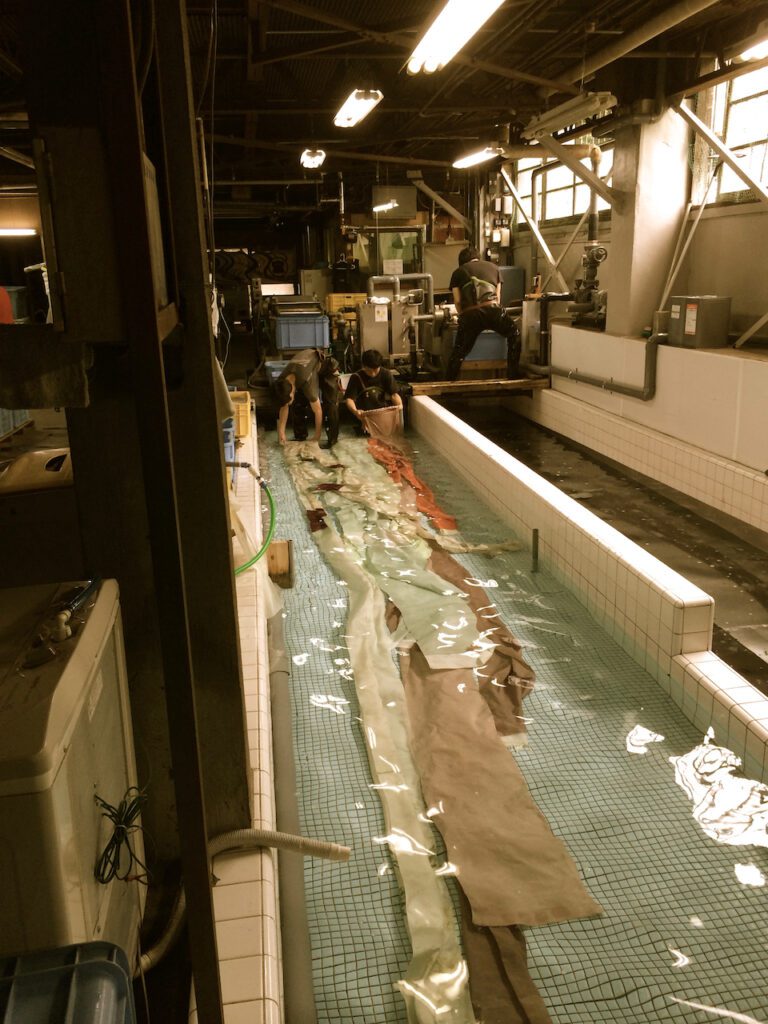
Shimura-san found a more natural and time-tested alternative: to salt the cocoons. At the studio, they place cocoons in a wooden barrel and salt them for two weeks to stifle the worms. They take out the cocoons and dry them naturally while storing them. This way, the silk’s natural texture and strength are maintained.
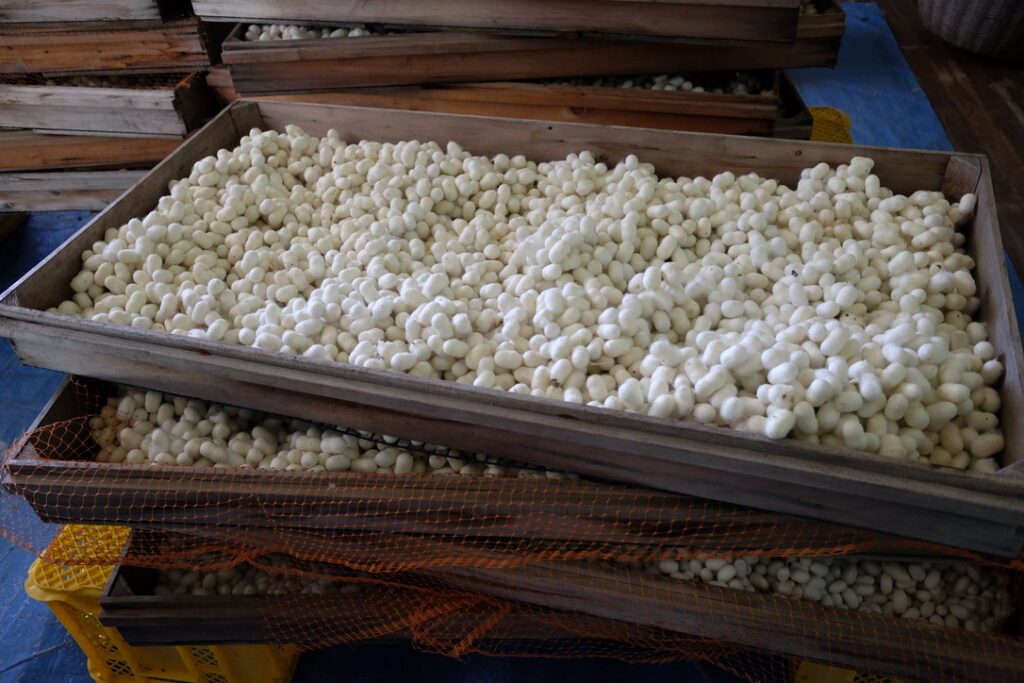
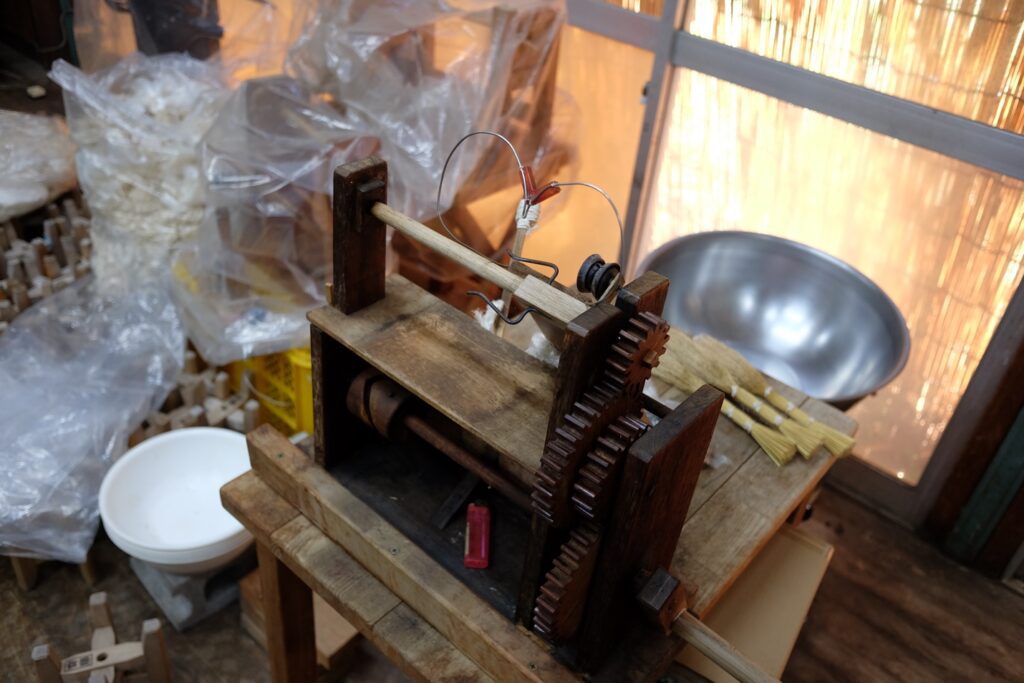
The texture of the silk threads changes depending on how long the cocoons are stored. In order to keep the consistency of the thread texture, they real the threads in a batch. Now the two full-time workers are focused on weaving, the reeling room is empty until weaving the current batch is completed.
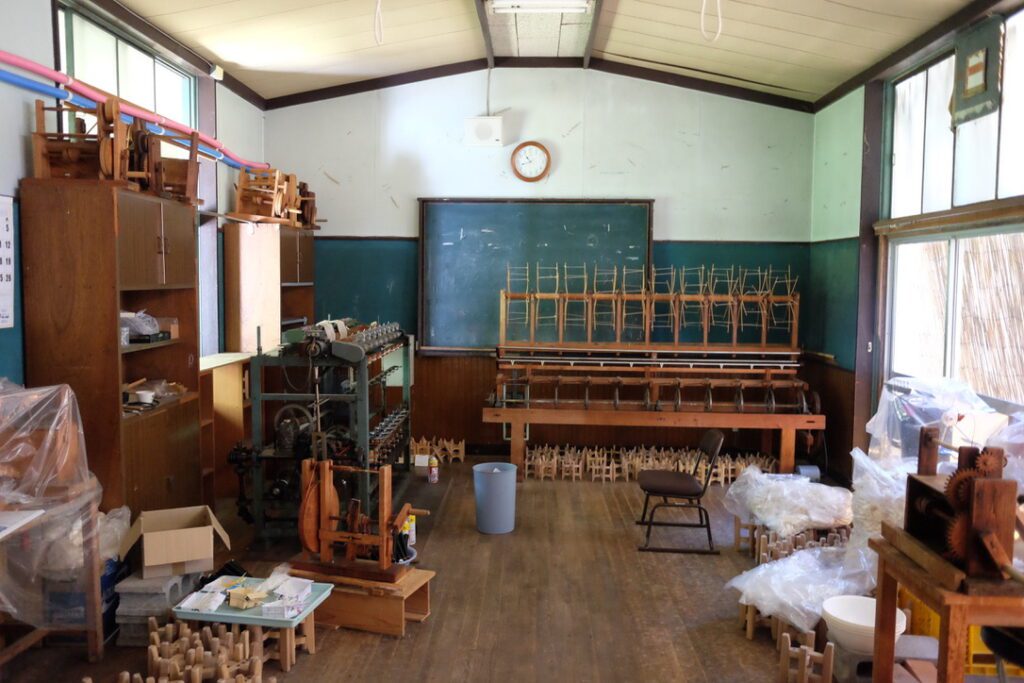
The room that used to be an auditorium is now the weaving room. Unfortunately Shimura-san is not in good health and can’t meet us, but two women working full-time are busy weaving.
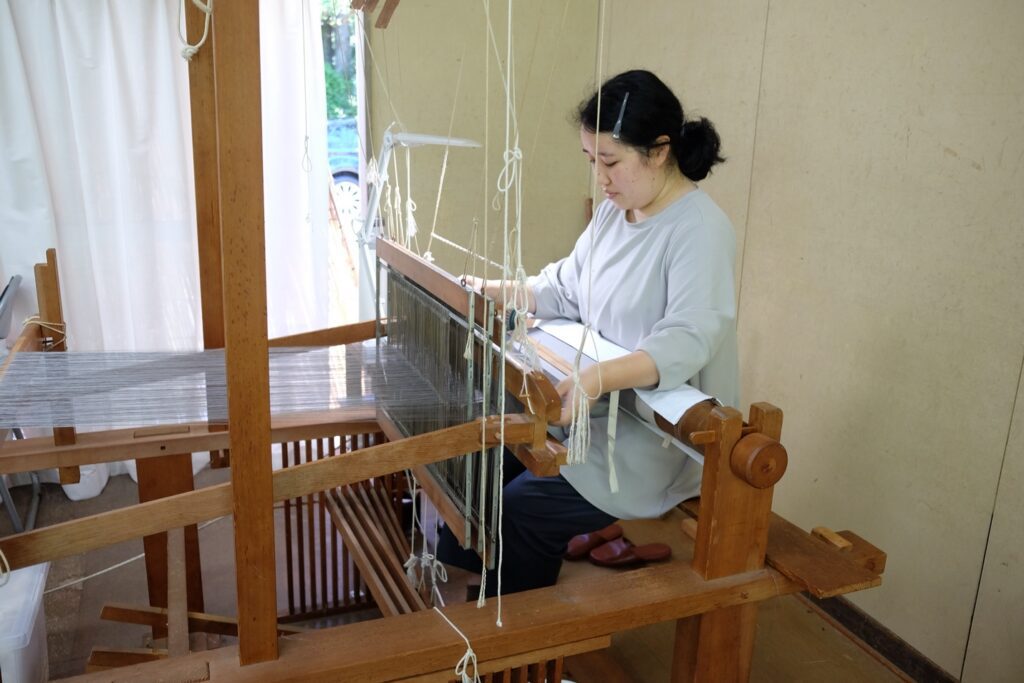
On the smaller loom, Mizune-san is weaving Usuhaginu, Katsuyama-san’s thinnest kimono fabric. Both warp and weft threads were reeled here, then dyed with Japanese green adler called yasha. With a rhythmic motion, Mizune-san moves the shuttle. How many warp threads are there?, 1750. How long does it take to finish one bolt of kimono fabric? About a month.
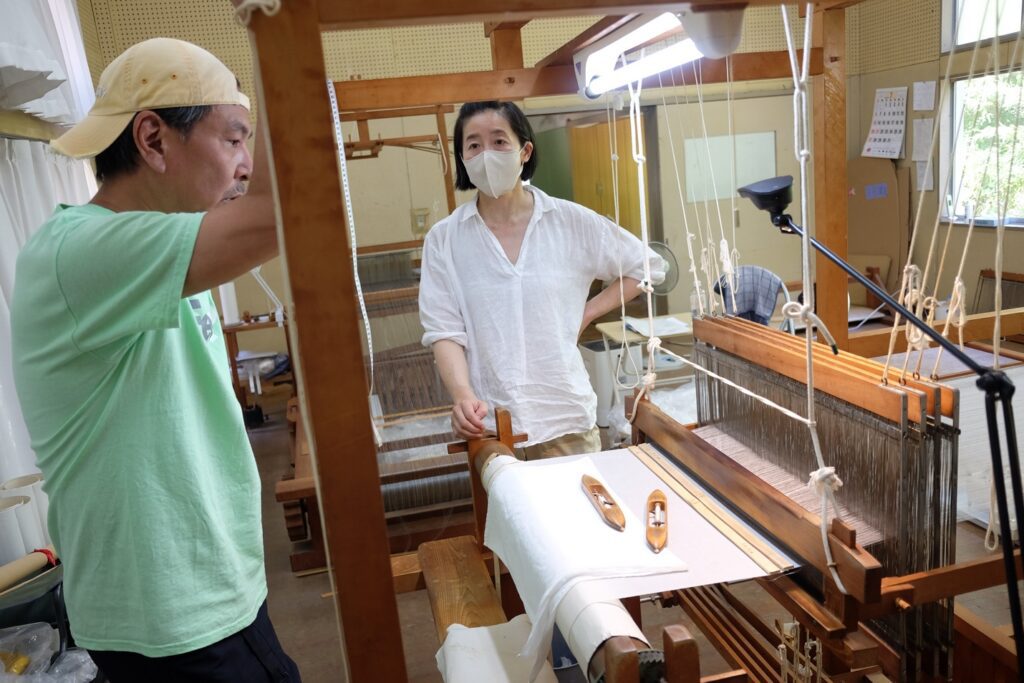
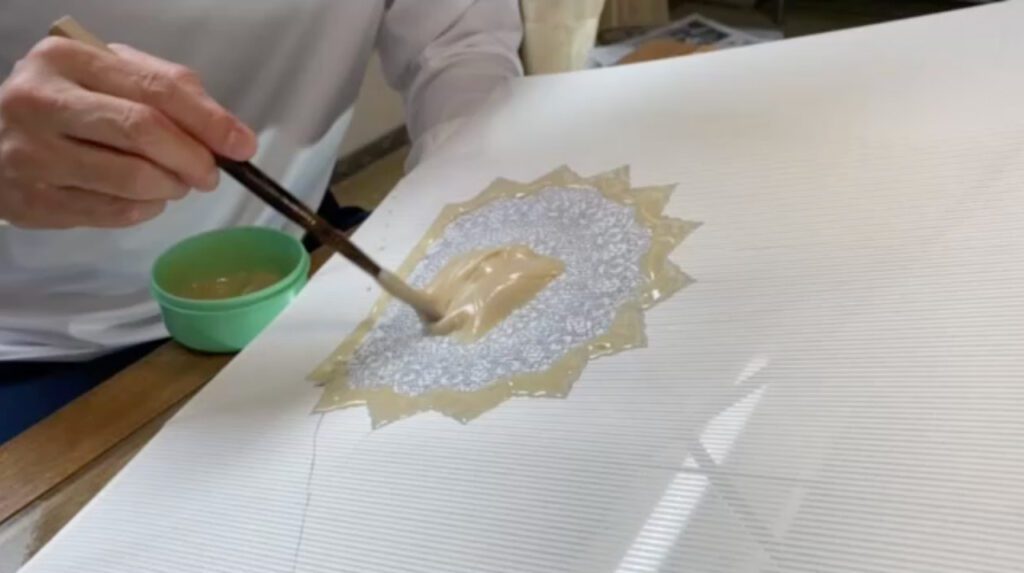
On the larger loom, Akimoto-san, Shimura-san’s apprentice, is weaving even thinner fabric, which is to be used as repair material to restore one of Japan’s national treasures. In 2021, Shimura-san was recognized as a holder of a selected preservation technique for “traditional silk production” by Japan’s Agency for Cultural Affairs. Akiyama-san now works with conservators of the national museum, determines how thin or light the repair fabric should be, reels the threads according to the needs, and weaves the material. One of such preservation projects is Korin Kimono owned by the Tokyo National Museum. The silk fabric woven by Akimoto-san was dyed in dark orange and used as the lining of this national treasure originally designed by Ogata Korin 300 years ago.
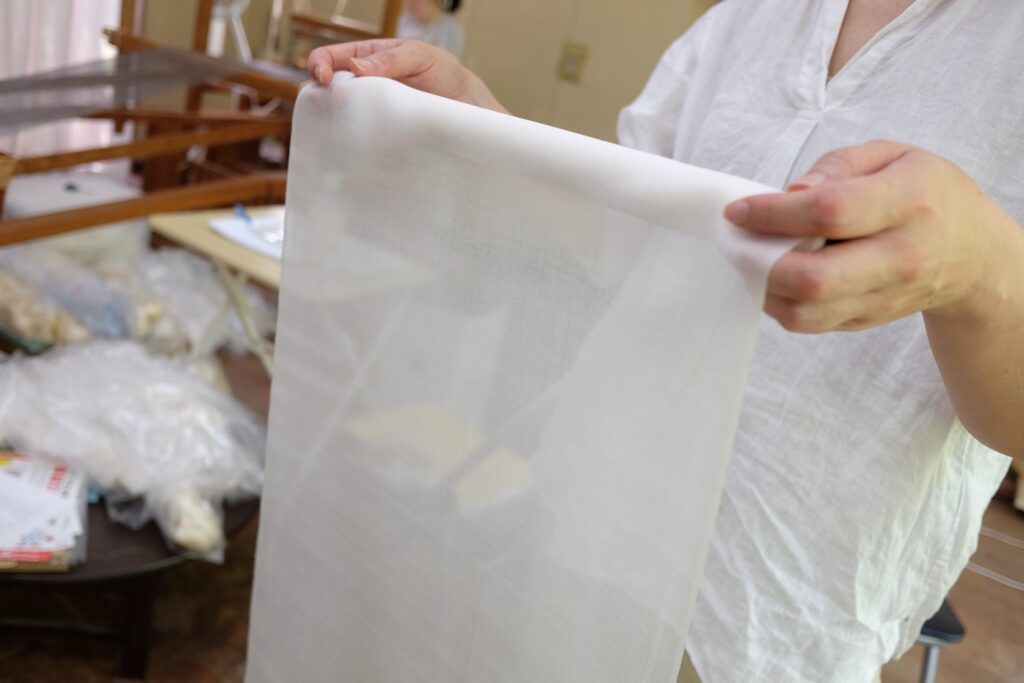
Akimoto-san shows me the fabric she has just finished. It’s so thin that I can see her hand through it. As she moves her hand, the fabric also moves as if it were swimming in the air. She lets me touch the fabric. I almost feel no weight. Tennyo no hagoromo天女の羽衣 “Heavenly Maiden’s Feather Robe” must look and feel exactly like this.
What makes Akimoto-san’s fabric so thin and light? The secret also lies in the reeling process, she explains. “In a modern method, to maintain uniform thickness, you pass the thread through a small cylinder. The cross-section of the thread becomes a perfect circle, but the thread is somewhat squeezed. Our traditional method, on the other hand, simply passes the thread through the V-shape point. No squeezing. The cross-section of the thread is irregular, and the width is not uniform. It is almost impossible for a machine to weave with such irregular threads; that’s why we have to use a hand loom. But this irregularity gives you extra lightness to the fabric.”

No more disturbing Akimoto-san’s and Mizune-san’s work. Mizune-san’s father runs a soba-noodle restaurant nearby, which is super popular. Mizune-san asked her father to save some for our lunch. Let’s go before it’s too late. The four of us thank them and leave the studio.
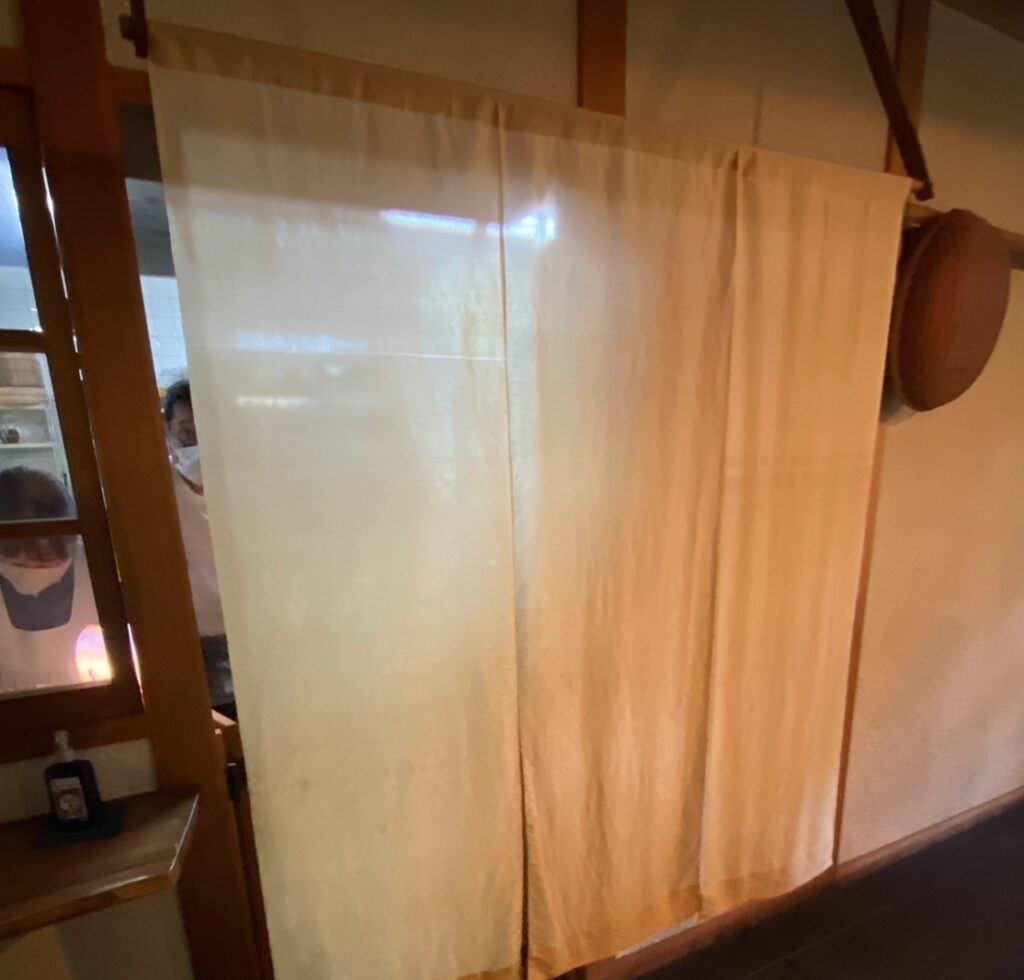
The soba is wonderful. But what impressed me most is the noren that is hanging between the kitchen and the eating area. This is Mizune-san’s very first work as a trainee. After being used for several years, the middle part is now even softer. Each time somebody goes through the noren, it swims in the air with a graceful motion.
Reiko-san gives me a ride back to Kyoto. In the car, I contemplate.
Now I understand why my obi that Katsuyama-san made is lighter than any of my other silk obi. The irregular cross-section and width of the silk threads cause the diffuse reflection of light, hence the magical shine and change of colors when looking from different angles.
Conventionally, heavy, densely woven obi that feature multiple colors, including gold and silver, and intricate patterns, are considered luxurious. The collaboration of Katsuyama-san and Shimura-san is challenging this “conventional wisdom” not by presenting a new approach but by bringing back the centuries-old traditional method of silk making that was once lost during the Industrial Revolution in the last 150 years or so.
What we think as “conventional wisdom” today may be an outlier. In the name of “technological advancement” and in pursuit of convenience and efficiency, we might have deviated from the laws of sustainable nature for a while. Katsuyama-san and Shimura-san’s challenge might be signaling us that it’s about time for us to correct our trajectory and return to the true “conventional wisdom.”
Is it possible that Juni Hitoe 十二単, the twelve-layered kimono worn by aristocratic women during the Heian period, was much lighter than modern people imagine? Is it possible that a woman could move around gracefully as described in The Tale of Genji because Juni Hitoe was not heavy at all? I’m dying to know…