Kinsai 金彩 and Embroidery 刺繍: Yuzen’s Last Process

We Love Kimono Project 10

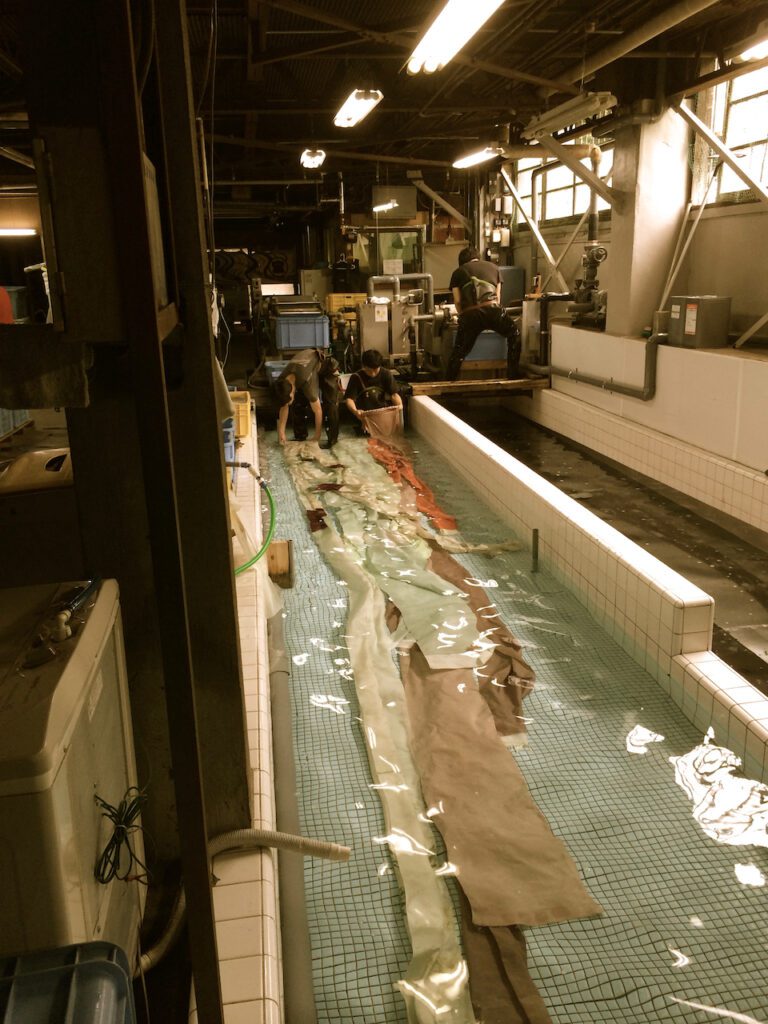
The dyeing process is over, but the Yuzen 友禅process is not complete yet, said Mamiya-san, my kimono retailer.  What else is there, you may wonder.  So did I.

According to Kosaka-san, the kimono maker, there are two more processes.  One is Kinsai 金彩, and the other is Shishu 刺繍.

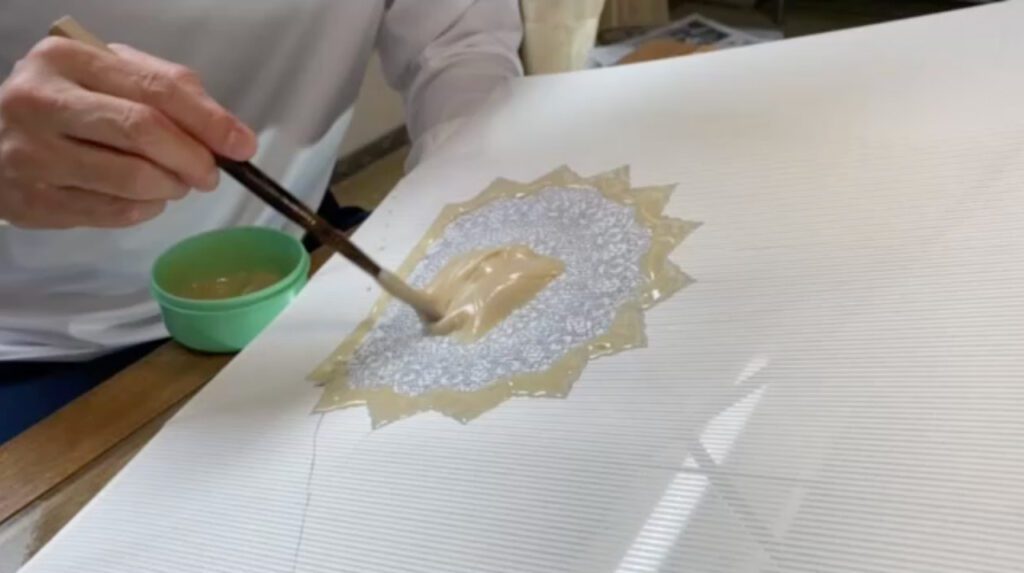
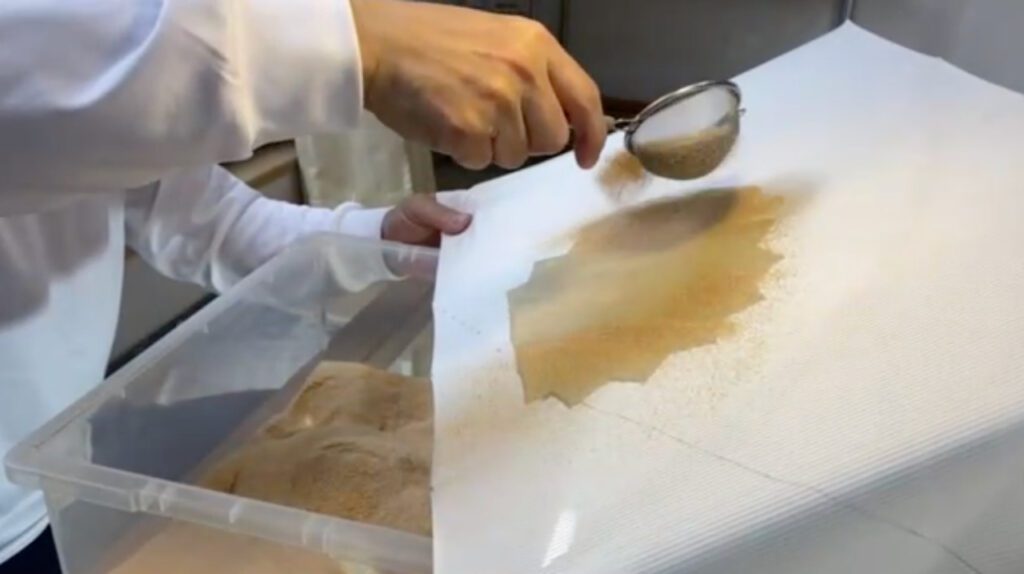
Kinsai 金彩 literally means decoration with gold.  On top of the design colored with Yuzen resist dyeing, a craftsman applies ultra-thin gold film or paste mixed with fine gold powder.  Nowadays, not only gold but silver, platinum, and other metalic colors are added.

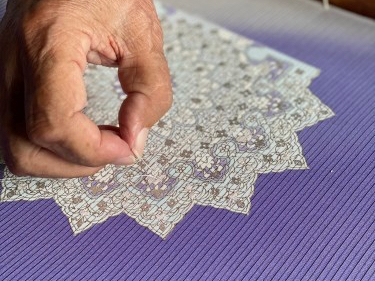
Shishu 刺繍 is a Japanese word for embroidery.

Both Kinsai and Shishu add three-dementional aspect to the colorful but flat design of Yuzen dyeing.  If you fill with too much Kinsai and shishu, however, the design will lose its original elegance and turn to a flamboyant but ungraceful pattern. 

Where to apply Kinsai and Shishu, how much, and how, so that the design achieves the ultimate depth without losing its elegance… every Yuzen kimono maker strives for the perfect combination.

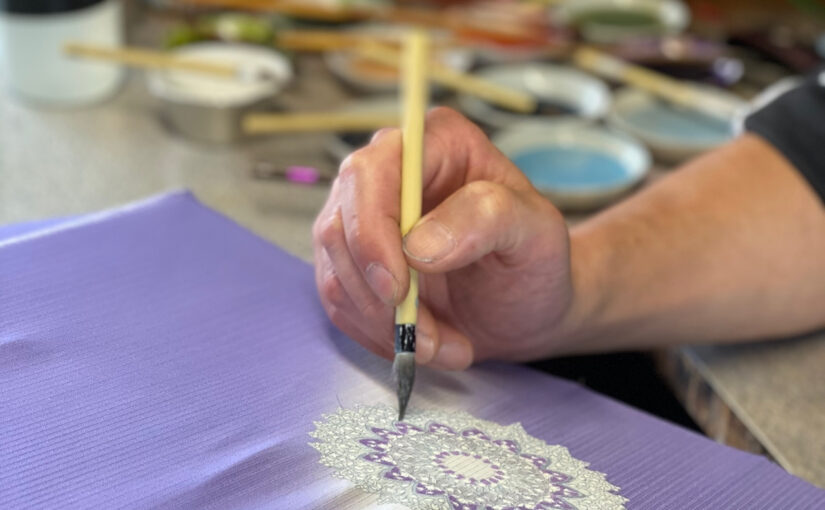
Kosaka-san’s choice was to add some silver paste and embroidery with silver thread on top of the Islamic design.  Culculating how the light reflects on the kimono design when worn, he knows exactly which part should be decorated with such shiny objects. 

There is no manual, textbook, or algorithm for this work.  I doubt if Artificial Intelligence can ever perfect this work.

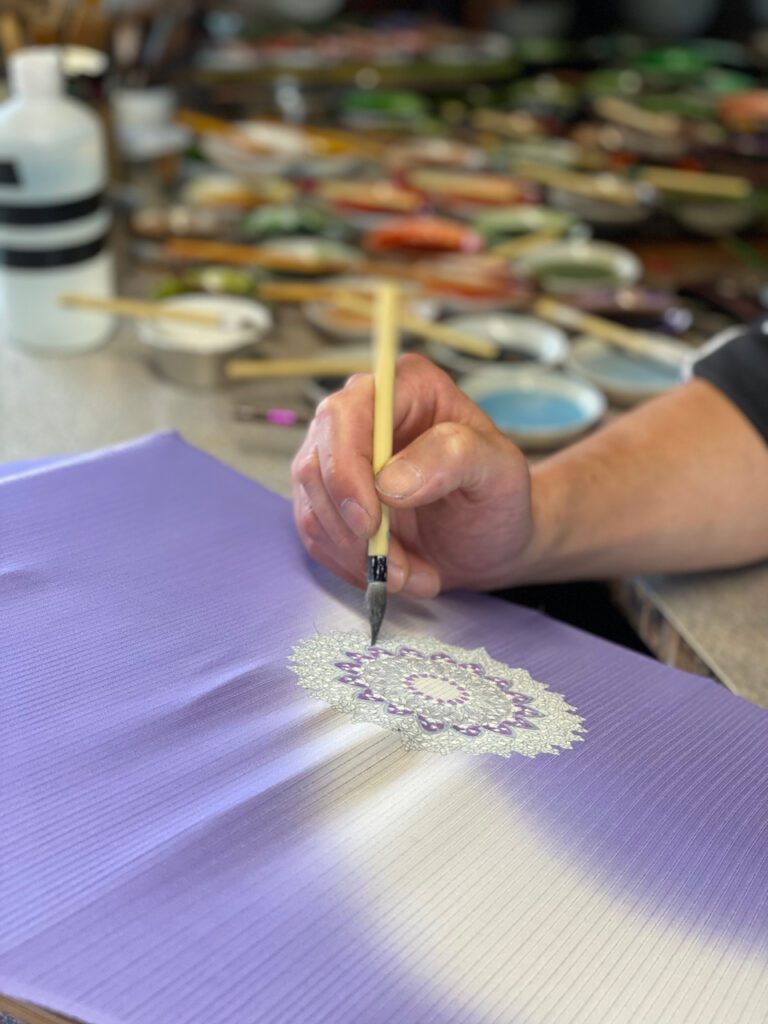
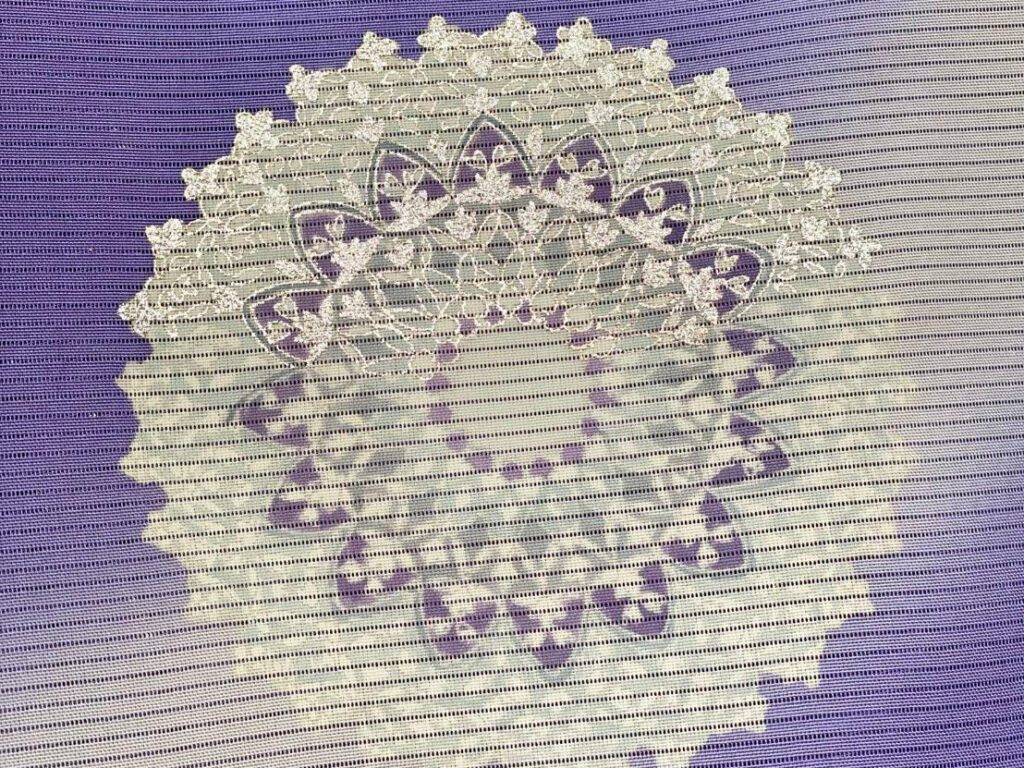
Mamiya-san told me that this design on the photo is not the actual design that will be on my kimono.  When Kosaka-san dyed the kimono fabric, he drew the same design on the edge of the kimono fabric, which usually has some buffer in length. 

Knowing this edge will be cut off and not used when the kimono is finally sewn, Kosaka-san is using this pattern as a place where he can experiment. The final design shown on the kimono may be slightly different from this, said Mamiya-san.

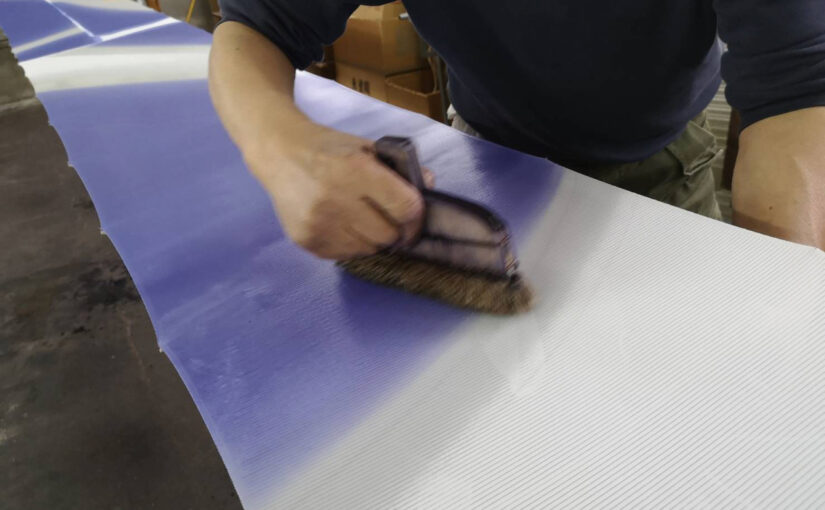
By the way, did you notice that the kimono fabric has fine stripes across it?  This fabric type is called ro絽.  After every odd number of weft, like 3, 5, or 7, two warp threads are crossed over, creating small gaps between the weft.

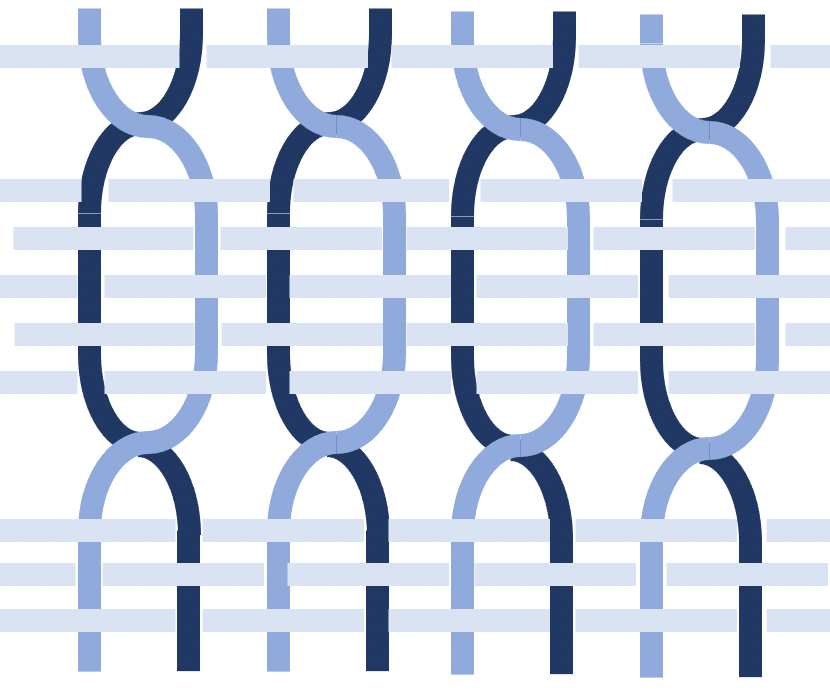
The summer in Japan is hot and humid.  You want the fabric to be as airy as possible.  Ro is one of the solutions for keeping you cooler. 

Irosashi 色挿し – Freehand Dyeing

We Love Kimono Project 9

Jizome 地染, the process of dyeing the kimono fabric with the base color, is complete.  The Fuse-nori 伏糊, the paste applied onto the designs to resist the base color to penetrate the fabric, has been washed away.  The Itome 糸目, the finely drawn design, is still intact on the fabric.  At this stage, the craftsman moves on to the next step: Irosashi色挿し.


Irosashi 色挿し

Iro 色means colors.  Sashi 挿しmeans to apply.  In this process, the craftsman directly applies different colors of dye onto the fabric using small brushes.  Bordered by Itome, one color is not mixed with the neighboring color.  Like freehand painting, the number of colors to be used is almost limitless.  That’s the distinct characteristics of Tegaki Yuzen 手描き友禅.


With the medashi of my obi right next to the Itome design of the kimono fabric, the Yuzen craftsman decides which color to apply where.

Depending upon the size of the area, s/he uses different sizes and shapes of the brush.  For creating gradation, s/he uses a flat-tip brush.  Since this Islamic Flower design is so fine, the craftsman mainly uses brushes with pointed tips.  


Once the irosashi 色挿し is complete, the fabric is again steamed and then rinsed with water.  This time Itome is washed away along with the excess dye.  The lines created with Itome are now shown in white. 

I placed the photo of the medashi of my obi (left) and the one of the Yuzen pattern of my kimono (right) next to each other.  The shape of the design and the color gradation are almost identical, but the outer circle is more prominent on the kimono fabric.  This subtle difference gives the illusion that the two designs are somewhat different whereas harmony is still maintained. Very cool, Kosaka-san.  I like the way it turned out.

Fuse Nori 伏糊 and Jizome 地染…Techniques of Dyeing Kimono Fabric

We Love Kimono Project 8

Fuse-nori 伏糊: Covering with paste

Once the Itome-oki 糸目置 is complete, the craftsman moves on to the process called fuse-nori 伏糊. 

Fuse-nori is a mixture of sticky rice, rice bran, salt, and water.  Its texture is thick like a paste.  The craftsman applies the fuse-nori evenly to cover the whole area where the Itome-oki, the paste-dyeing, is done.   

S/he then sprinkles sawdust on the fuse-nori.  The covered area with fuse-nori and the sawdust is left intact when the rest of the fabric is dyed with the basic color.


Jizome地染: Dyeing the basic color

The next step is to dye the fabric with the base color.  This is called 地染jizome.    

The standard length of a kimono fabric is about 12 – 13 meters, or forty feet.  The craftsman first clamps both ends of the fabric and hangs it across.  A very long room is needed for this process. 

S/he places bamboo sticks in an arch shape across the short side of the fabric, so that the tension of the sticks keeps the fabric straight.  About two hundred sticks are used.  Once the fabric is hung long with its surface stretched flat, it’s ready to spread the dye.

Using a flat brush, the craftsman swiftly spreads the dye so that the color is spread evenly all through the fabric.  Mamiya-san’s design has this river-like flow.  The craftsman implements a special technique called bokashi暈し to shade off the wisteria color at the border. 

Both spreading the dye evenly across the long fabric and shading off the color naturally require a high level of skills, acquired only with experience. 

The craftsman spreads the dye on both the front and the back side of the fabric.  On the back side, you can see the bamboo sticks spreading the fabric with the tension.


Mushi 蒸し:Steaming

Once the basic color is applied, the fabric is left to dry.  Then the fabric is folded loosely and put into a small enclosure where it is steamed at a high temperature for twenty to fifty minutes.  The darker the color, the longer it takes to steam.  This way the color of the dye seeps into the yarns of the fabric thoroughly. 

Mizumoto 水元 : Rinsing off with water

Once the fabric is steamed, it’s time to wash away the excessive dye and fuse-nori. 

In the old days, one would see kimono craftspeople washing their kimono in the Kamo River and other rivers around Kyoto.

Contamination of the river water, however, became a major concern.  In 1971 washing out the kimono fabric on the river water was completely banned. Yuzen makers had to create an alternative method. 

The photo above shows how the washing-out process is carried out today.  Kyoto has abundant underground water.  Now the water is pumped through the well into an indoor pool.  The water used to wash the kimono fabric is treated before it flows back into the wastewater system.