“What can I contribute,” not “What’s in it for me”
After living for more than 60 years, I’m finally beginning to prefer asking myself “what can I do to contribute?” rather than “what’s in it for me?”
I was requested to conduct an ikebana demonstration for a group of 25 or so people.
The duration of the demonstration is an hour. It takes at least an hour and a half each way to drive. In order to make 3-4 ikebana arrangements for the demonstration, I need at least several hours of preparation a day before. I need to go get some materials also.
What I get in return is an honorarium that may or may not cover the gas and the material cost, and the words of gratitude from the audience.
If I seek an answer to the question “what’s in it for me?” or “what would I get?”, it’s hard to convince myself to say yes to this request.
But if I ask instead, “What can I contribute?”, the answer is quite different.
People who gathered are all interested in learning ikebana. Some are total beginners. By seeing my demonstration, such beginners might be inspired and decide to learn ikebana regularly. Some practice different schools of Ikebana. Such people might find it eye-opening to learn different techniques. Those who have been studying Sogetsu ikebana, the same school as me, might refresh their memory by watching basic techniques taught by a different person.
Even in a minute way, I may contribute to making a change in the lives of someone out of those who watch my demonstration.
The possibility of the answer to “what can I contribute?”, is enormous. Way more satisfactory than the answer I get by asking “what’s in it for me”.
The trick of making myself satisfied or even happy lies not in the answer, but in the question. For too long I guess I had been asking myself a wrong question. Hopefully it’s not too late. Why don’t I keep asking myself, “what can I contribute?”
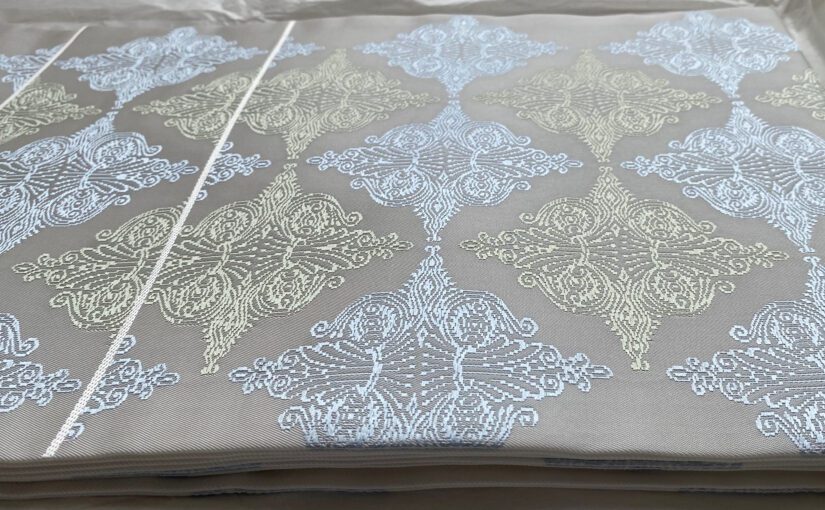
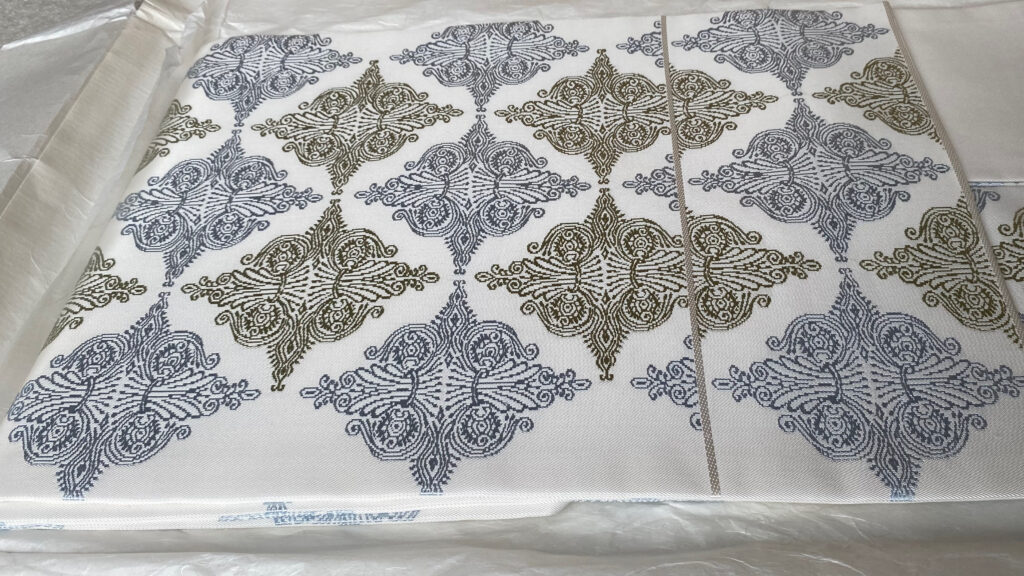
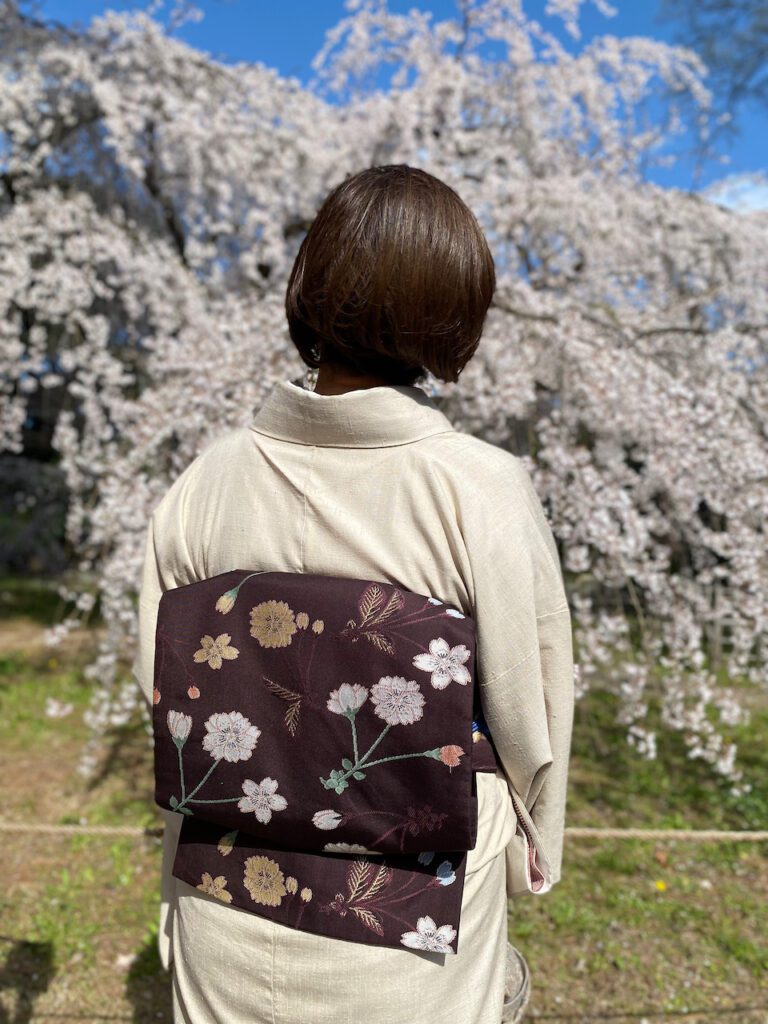
Obi made by Katsuyama-san. The same obi looks totally different from different angles.
Katsuyama-san: The Silk Magician
The obi fabric that Katsuyama-san (Katsuyama Takeshi 勝山健史) makes is nothing like I’ve ever seen.
Obi is a sash worn with kimono, traditional Japanese clothing. Its original function was to simply keep the kimono closed, since kimino doesn’t have buttons or fasteners. As kimono became more decorative over time, obi became wider and also more decorative as an aesthetic companion of kimono.
Formal obi are made of silk with brocade weaves. Obi with more colors of the decorative threads are considered more luxurious. Some obi are woven with gold and silver threads to add a gorgeous look. More decorative threads also add more weight, making it heavier to wear.
Katsuyama-san’s obi, however, doesn’t use too many colors. The obi in the photos above, for example, is woven with only two different colors of brocade threads on the white base. The intricate colors change depending on the angle from which you look at. The gray turns shiny blue, and what seemed to be brown looks almost green as you change the angle from left to right. Katsuyama-san knows how to make the maximum use of the silk luster to create a graceful as well as luxurious appearance to his obi. His obi is lighter and much more comfortable to wear than my other silk obi. Katsuyama-san is a silk magician.
How Katsuyama-san and Shimura-sen Met
Textile production in Nishijin district, Kyoto, dates back to the 5th century. During the Onin War (1467-1477), this district was used as Nishijin (meaning “Western camp”). When the weavers who had fled the war returned to Kyoto, they settled in Nishijin area and revived textile production. During Muromachi and Edo periods, Nishijin flourished supplying fabrics to the Imperial Court and samurai lords. For centuries, Nishijin was Japan’s center for luxurious textile production.
Katsuyama-san is the 5th-generation silk-textile maker in Nishijin. Katsuyama-san’s family creed is “Never repeat the same thing as the previous generation, try something new.” Following this family creed, Katsuyama-san’s father opened a hand-loom studio in Shuzan, the northern outskirt of Kyoto City, in 1967, when most of the Nishijin makers were switching to machine looms. When Katsuyama-san took over the family business about thirty years ago, he was struggling to find his own style of textile making.
One day Katsuyama-san had an opportunity to see and touch a silk kimono made in the fifteenth century. The thickness of the silk thread was uneven, but the fabric was softer and lighter than any silk he had ever seen. Katsuyama-san was shocked. Where and how can he find this kind of silk? So his pursuit of this legendary fabric began.
When he visited a men’s tailor shop in Milan, Italy, Katsuyama-san encountered the same type of silk fabric, used for handkerchiefs. Quite impressed, he asked the shopkeeper where he could get the fabric. Not in Italy, was the answer. The fabric came from Japan.
Upon returning to Japan, Katsuyama-san did further research and found the person who made the handkerchiefs: Shimura-san (Shimura Akira 志村明).
Shimura-san had devoted his professional life to studying silk making in its entire process. Through his study, he had learned that there was a disconnect between Japan’s traditional silk-making process and the one that is dominant today.
Japan has a long history of silk-making. The oldest domestic silk thread found in Japan dates back to Yayoi Period (300 BCE – 300 CE), and silk-making originated in China must have been introduced to Japan by then. Many feudal domains in the Edo period (1603 – 1868) encouraged sericulture in their territories, and by the end of that period, Japan was producing raw silk from many varieties of silkworm.
When Japan opened its doors to the Western world, the newly established Meiji government positioned raw silk as the country’s most important export item. By the 1890s, raw silk accounted for 40% of Japan’s exports, mainly to the US. During the Industrial Revolution, the US focused on mass-producing silk socks and stockings. The US complained about the uneven quality of Japan’s raw silk as a hindrance to higher production efficiency. In response, Japan strived to “improve” the quality of its raw silk by breeding silkworms and standardizing silkworm species.
By the time Shimura-san began his career in the 1970s, Japan was almost exclusively producing raw silk optimized for mass production, utilizing mechanical production processes from only certain silkworm species that were specifically bred for mass production. The texture of the fabric made from the mass-produced silk threads was nothing like that of old kimono that Shimura-san had studied. He wanted to recreate the “beautiful”, “better” silk fabric that had existed in Japan before the mass-production era. To pursue his goal meant reconstructing traditional methods of silk making, from growing mulberry trees, selecting different silkworm species and incubating them, feeding them, harvesting cocoons, reeling silk threads, processing, dyeing and weaving, all by hand. Shimura-san moved to Ehime, and while working as an instructor at Seiyo City Silk Museum, he was experimenting with his method. The handkerchief Katsuyama saw in Italy was one of such experiments.
Katsuyama-san saw a possible breakthrough in Shimura-san’s approach. To create new types of obi, he also had to start from scratch… Katsuyama-san persuaded Shimura-san to co-found a company, with the single purpose of creating “the most beautiful” silk fabric.
After thorough research, they found an ideal location in Nagano Prefecture. The climate was ideal for growing silkworms, and there were still several sericultural farmers remaining in that village. One farmer became too old to continue sericulture, so he agreed to lend them his mulberry farmland. In 2002 Katsuyama-san and Shimura-san established Silk Textile Research Institute. Shimura-san and his apprentice, Akimoto-san (Akimoto Shigeko 秋本賀子), moved to Iijima-cho. And Katsuyama-san began spending significant time there to kick off the new venture while managing the operation in Nishijin and Shuzan Studio.
Visit to Silk Textile Research Institute
July 25, 2025. I get on a bus that left Shinjuku Bus Terminal at 2:45 pm, bound for Iida, Nagano Prefecture. Ever since I got to know Katsuyama-san in 2016, visiting his silk farm in Nagano had always been my wish. I wanted to see the birthplace of my kimono and obi. Nine years later, my wish finally comes true.
The bus drives through Chuo Freeway. The further the bus goes, the closer the mountains look on both sides of the highway.
I get off the bus at Komagane Interchange, walk toward the exit following the sign, then find a familiar black SUV. The same car I got in when I visited Kyoto last time. Reiko-san is the driver, with her sister Aiko-san on the back seat. On the passenger seat is Katsuyama-san. Rakufulin 洛風林, Reiko-san’s company, has been supporting Katsuyama-san’s endeavor since he began silk making in Nagano, and is the exclusive distributor of Katsuyama-san’s works.
It is a little after 6:00 pm when we check into the hotel. Katsuyama-san suggests we head out to the mulberry farm before sunset. Now the heat is no longer unbearable. Let’s hope there are not too many mosquitoes. Four of us get in the SUV and head out.
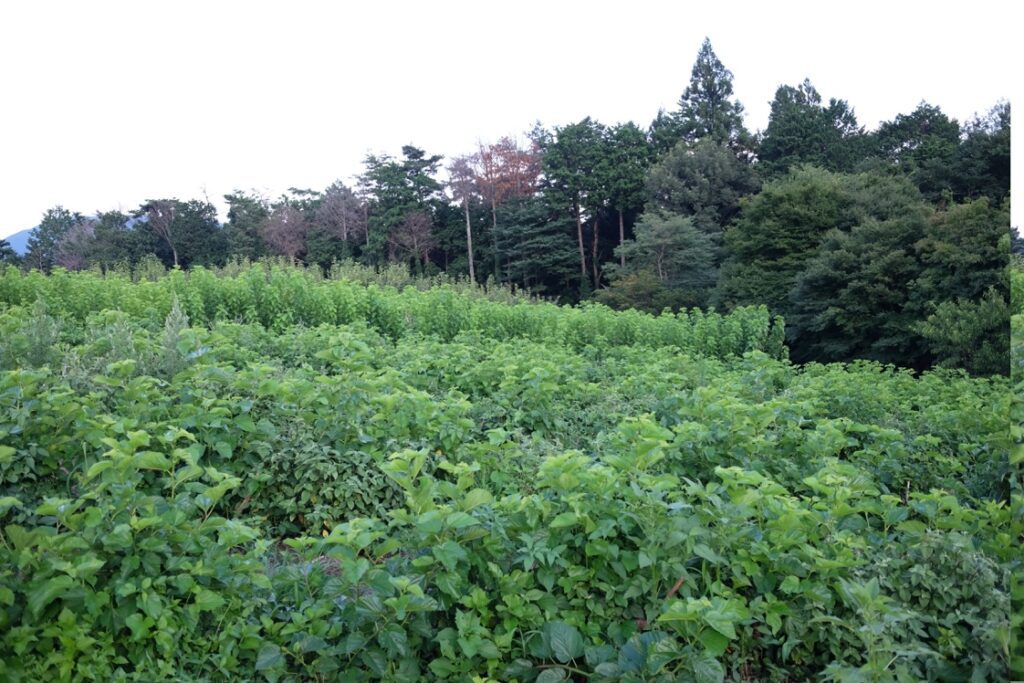
The SUV drives through rice paddies on one side and a persimmon orchard on the other side. It stops in front of a small hut that looks like a storage unit. On the left side are rows of mulberry trees with lush green leaves.
Mulberry Farm
The trees on the left side of the farm are shorter. Ones on the further right side are much taller. “We grow silkworms twice a year. We finished feeding the spring silkworms about a month ago, using the mulberry trees on the left side. That’s why they are shorter. Now the spring silworms have already formed cocoons, and we have harvested them. The taller trees on the further right side are for the fall silkworms. We will begin the process with hatching silkworm eggs in early September,” says Katsuyama-san.
“We don’t feed the top several leaves because they are so bitter that silkworms don’t eat them. We feed the silkworms only down to the twelfth leaves, more tender part, to make sure that the size of the cocoons is consistent.”
“Here on our farm, we plant three different varieties of mulberry trees: Nezumi-kaeshi, Kikuba, and Kenmochi. Depending on the growth stage of the silkworms, we carefully choose which variety of mulberry leaves to feed them.”
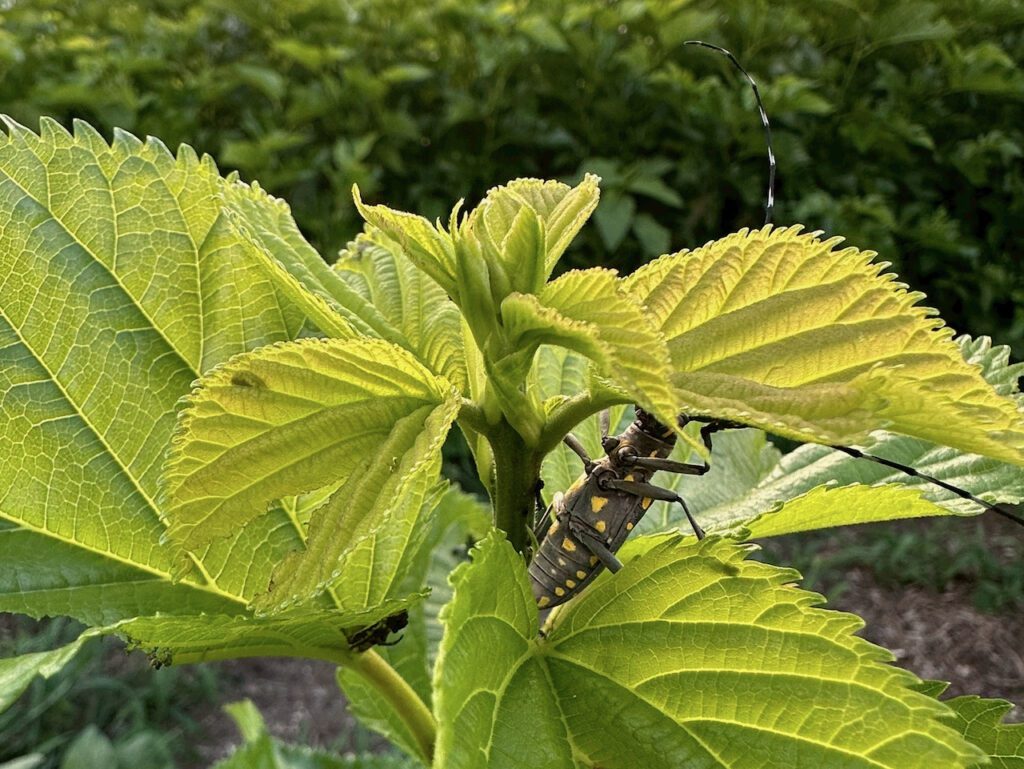
Longhorn beetle, natural enemy of mulberry trees
While walking along the rows of mulberry bushes, Katsuyama-san finds a black insect with long whiskers, nesting on the leaves. He picks it up, pinches its head and body with his thumb and index finger, and kills it by snapping its neck. “Longhorn beetles. They are mulberry’s natural enemy. Their larvae bore holes and may even kill the tree. If you find one, please kill it like I did.”
Why not spray pesticides? I answer myself to my silly question. Silkworms are, you know, insects. Any pesticide will weaken the very creature they are growing. I’m reminded that sericulture is by definition pesticide-free. And there is a price to pay.
“Our landlord grows persimmon trees in the orchard right next to us. This year, they spread pesticides later than normal. Our mulberry farm was affected, and we had to cut down the silk production volume by half this spring. We should have communicated with each other better, but they are our landlord, after all. We don’t have much to say…” says Katsuyama-san.
Not only to pesticides, but silkworms are also sensitive to natto bacteria. “You are not supposed to eat natto (a traditional Japanese food made from fermented soybeans) while feeding silkworms. Even if you wash your hands and mouth, the natto bacteria might be left on your clothes and that might hinder the growth of silkworms.”
Jokingly, I tell Katsuyama-san. “For that I’m qualified to work on your farm. I hate natto and I never eat it. You don’t have to worry my bringing natto bacteria here.”
In the winter, Katsuyama-san’s farm prunes the mulberry trees and burns the cut branches and fallen leaves to ashes. The ashes are spread out to enrich the soil. In the first couple of years they used to purchase fertilizer labeled as “organic”. When they used their own ashes as fertilizer, the quality of the silk improved dramatically. Ever since, they have switched to self-sourcing the fertilizer as well. Now the farm is 100% organic.
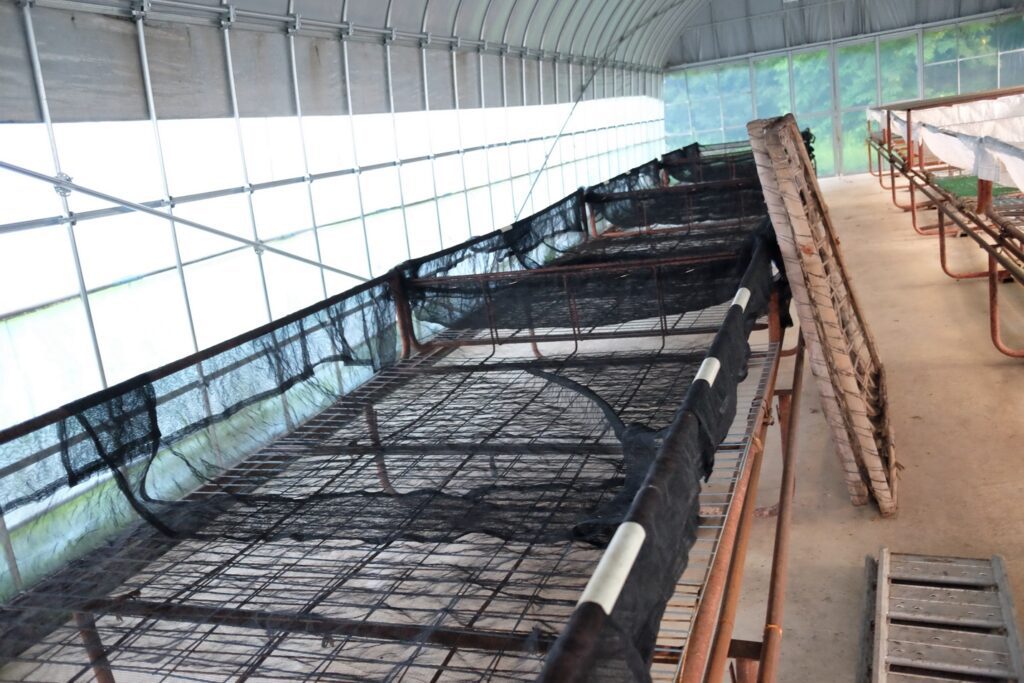
Silkworms’ bed
Across the path from the mulberry farm stand two sheds where they grow silkworms. The spring cocoons have already been harvested and stored in a different location. We go inside to see the empty beds, waiting to be used again in the fall. The back of the shed has large doors that can fully open, and behind the shed runs a creek. The temperature is lower on the creek, and the breeze comes in through the back doors. “It is crucial to maintain optimal temperature, humidity, and ventilation for the healthy development of silkworms. By having a creek in the back, natural ventilation occurs inside. The shed has been here before us. Farmers in the past knew it very well.”
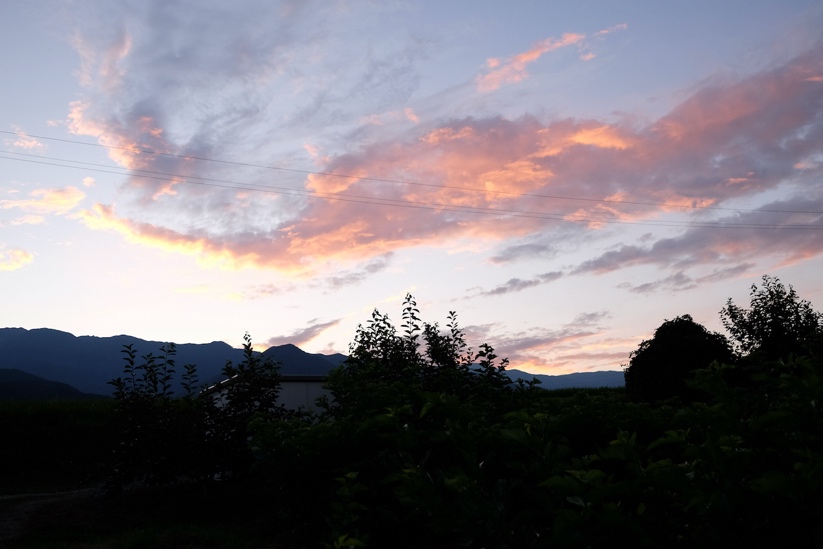
The sun will set soon. Time to leave the farm.
Sunset at the mulberry farm
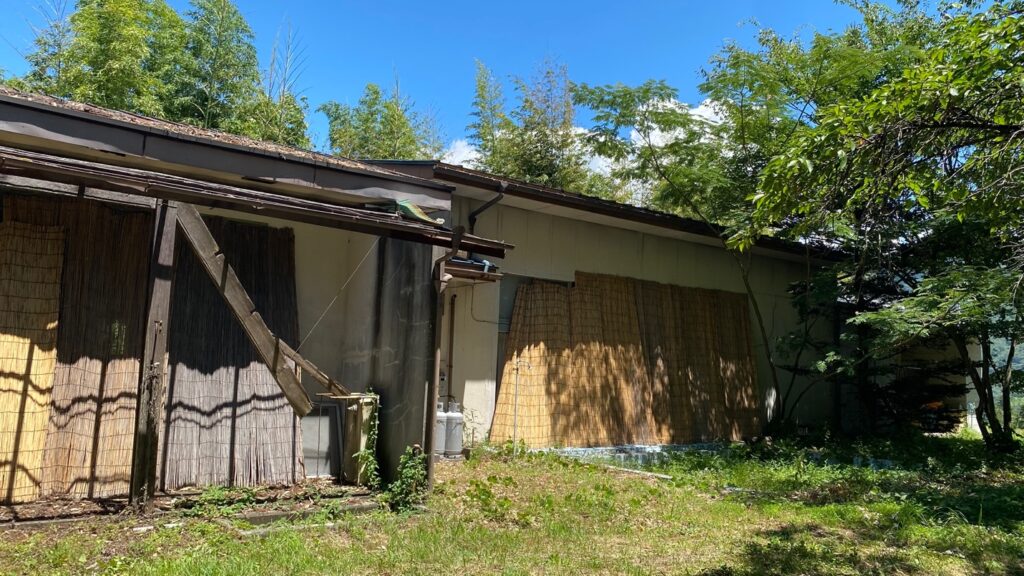
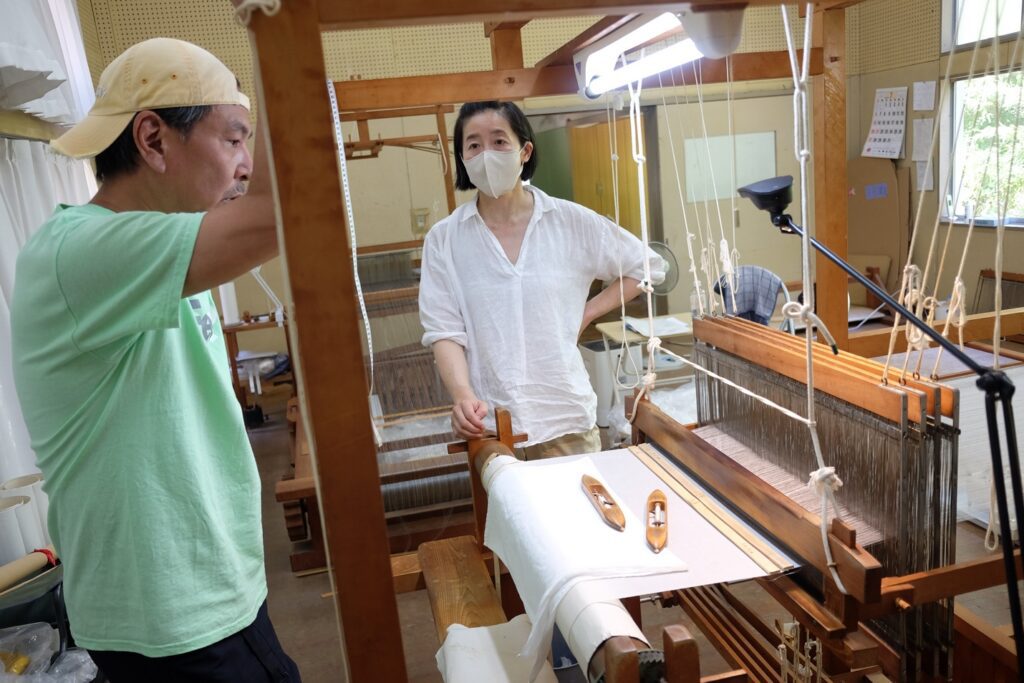
The next morning, we visit the weaving studio near the farm. The building used to be a kindergarten. It was closed years ago (obviously due to the population decrease in the area), and Katsuyama-san is now renting it from the city.
The studio used to be a kindergarten
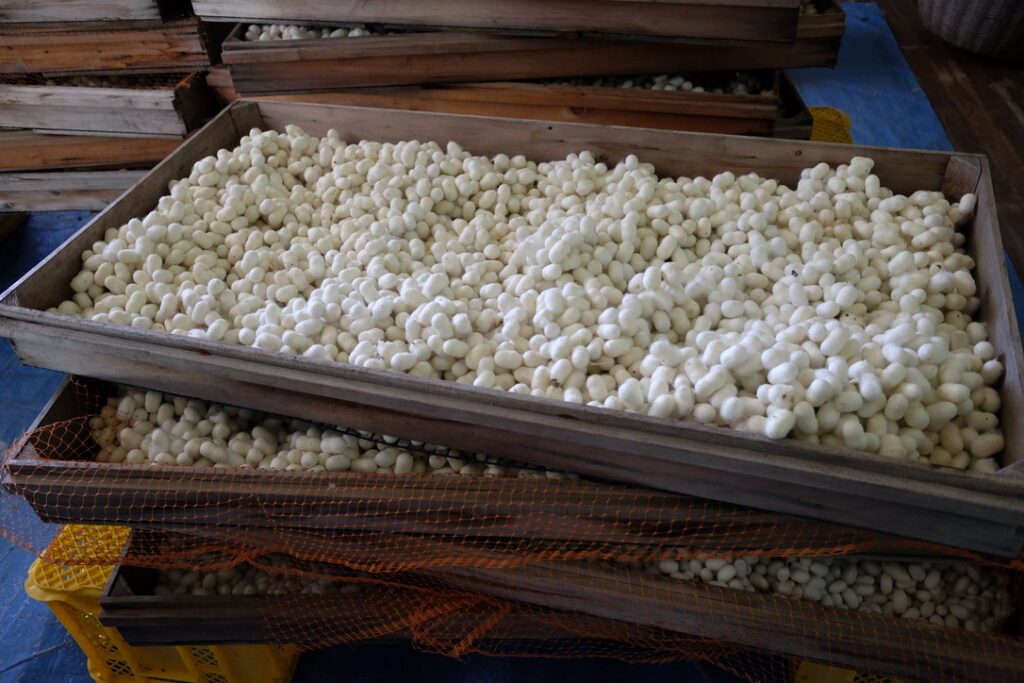
In the space which used to be a classroom, spring cocoons are stored.
Once the silkworms create cocoons, their lives end before they come out of the cocoons. Today’s main method of taking the lives of silkworms is to blow extremely hot air into the cocoons. The hot air eliminates humidity, making it easy to store the cocoons. The silk’s natural texture, however, is somewhat lost.
Shimura-san found a more natural and time-tested alternative: to salt the cocoons. At the studio, they place cocoons in a wooden barrel and salt them for two weeks to stifle the worms. They take out the cocoons and dry them naturally while storing them. This way, the silk’s natural texture and strength are maintained.
The spring cocoons are stored in the room, waiting to be reeled by hand
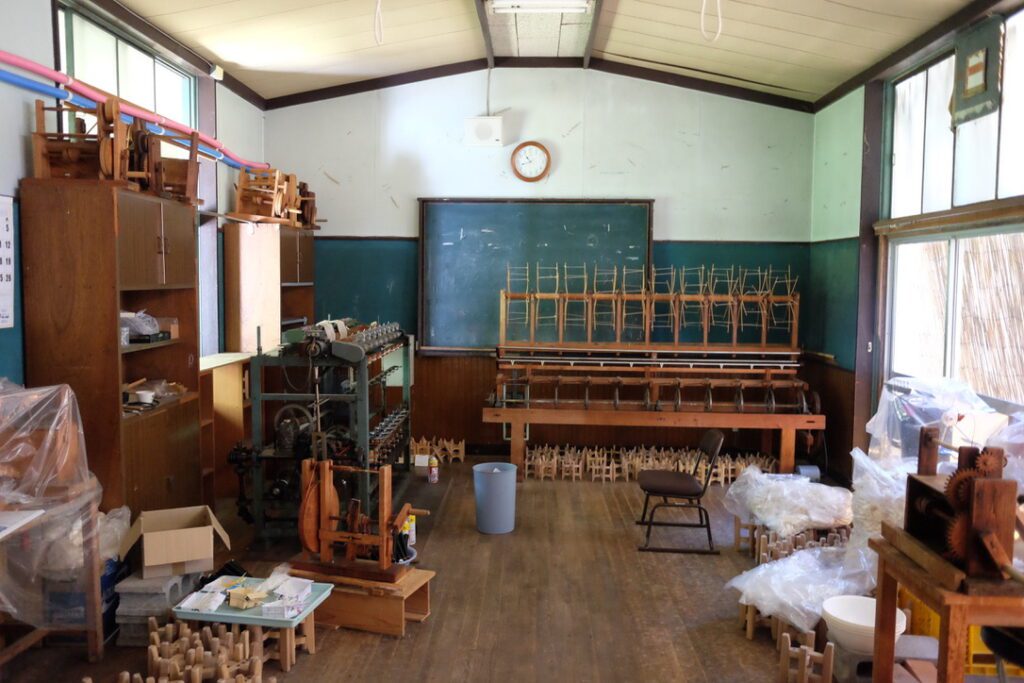
The texture of the silk threads changes depending on how long the cocoons are stored. In order to keep the consistency of the thread texture, they real the threads in a batch. Now the two full-time workers are focused on weaving, the reeling room is empty until weaving the current batch is completed.
Reeling the silk threads from the cocoons is done all by hand in this room.
The room that used to be an auditorium is now the weaving room. Unfortunately Shimura-san is not in good health and can’t meet us, but two women working full-time are busy weaving.
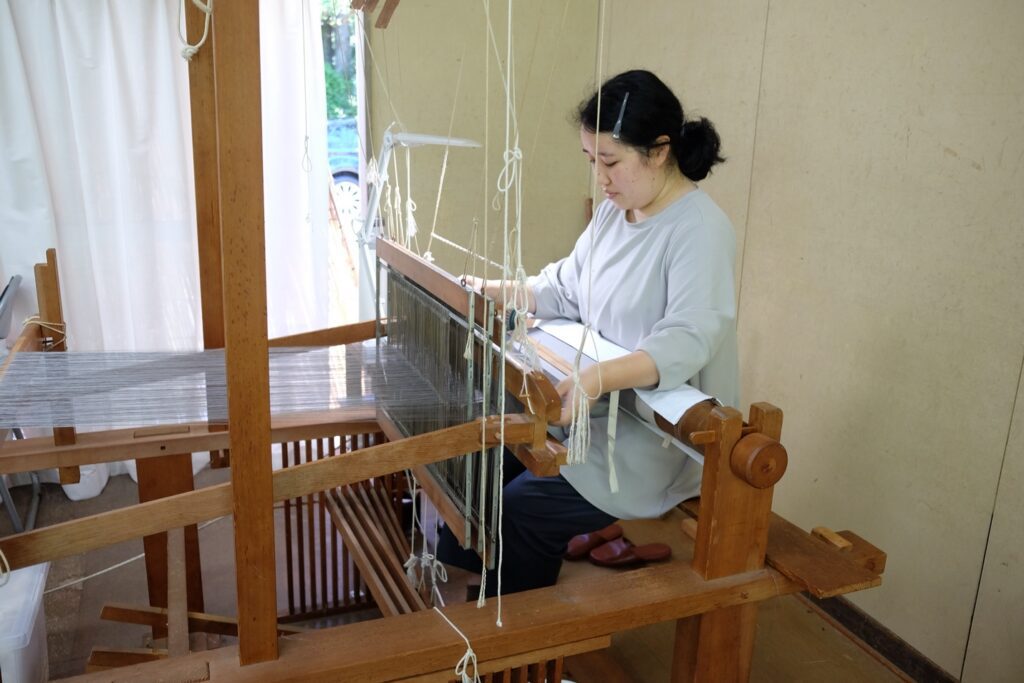
Mizune-san weaving Usuhaginu
On the smaller loom, Mizune-san is weaving Usuhaginu, Katsuyama-san’s thinnest kimono fabric. Both warp and weft threads were reeled here, then dyed with Japanese green adler called yasha. With a rhythmic motion, Mizune-san moves the shuttle. How many warp threads are there?, 1750. How long does it take to finish one bolt of kimono fabric? About a month.
Akimoto-san and Katsuyama-san
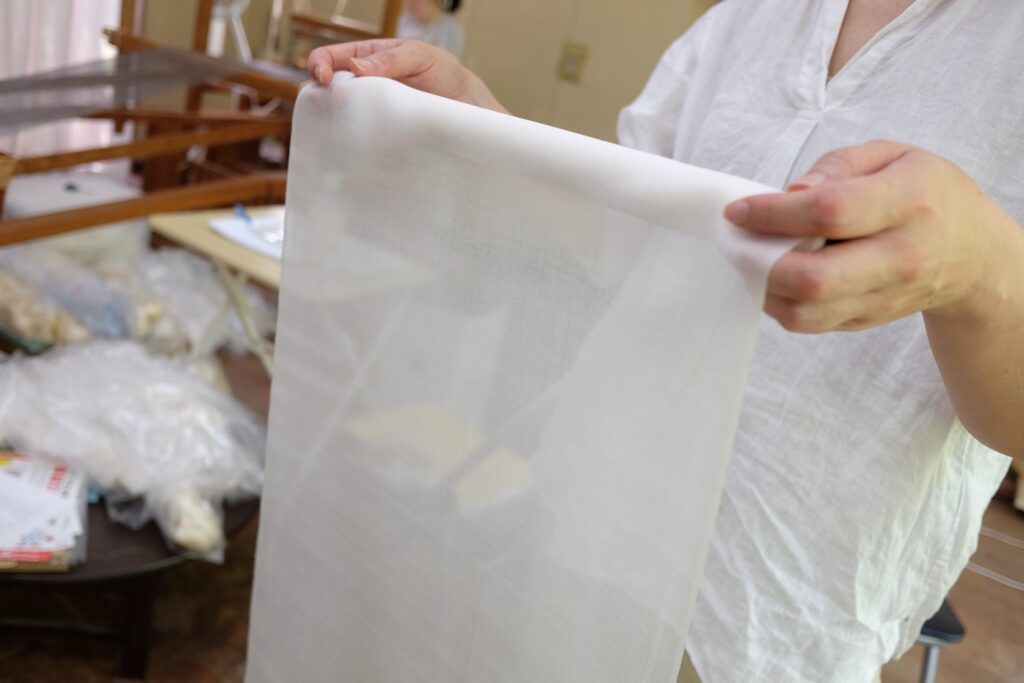
On the larger loom, Akimoto-san, Shimura-san’s apprentice, is weaving even thinner fabric, which is to be used as repair material to restore one of Japan’s national treasures. In 2021, Shimura-san was recognized as a holder of a selected preservation technique for “traditional silk production” by Japan’s Agency for Cultural Affairs. Akiyama-san now works with conservators of the national museum, determines how thin or light the repair fabric should be, reels the threads according to the needs, and weaves the material. One of such preservation projects is Korin Kimono owned by the Tokyo National Museum. The silk fabric woven by Akimoto-san was dyed in dark orange and used as the lining of this national treasure originally designed by Ogata Korin 300 years ago.
Akimoto-san’s fabric is so thin and light
Akimoto-san shows me the fabric she has just finished. It’s so thin that I can see her hand through it. As she moves her hand, the fabric also moves as if it were swimming in the air. She lets me touch the fabric. I almost feel no weight. Tennyo no hagoromo天女の羽衣 “Heavenly Maiden’s Feather Robe” must look and feel exactly like this.
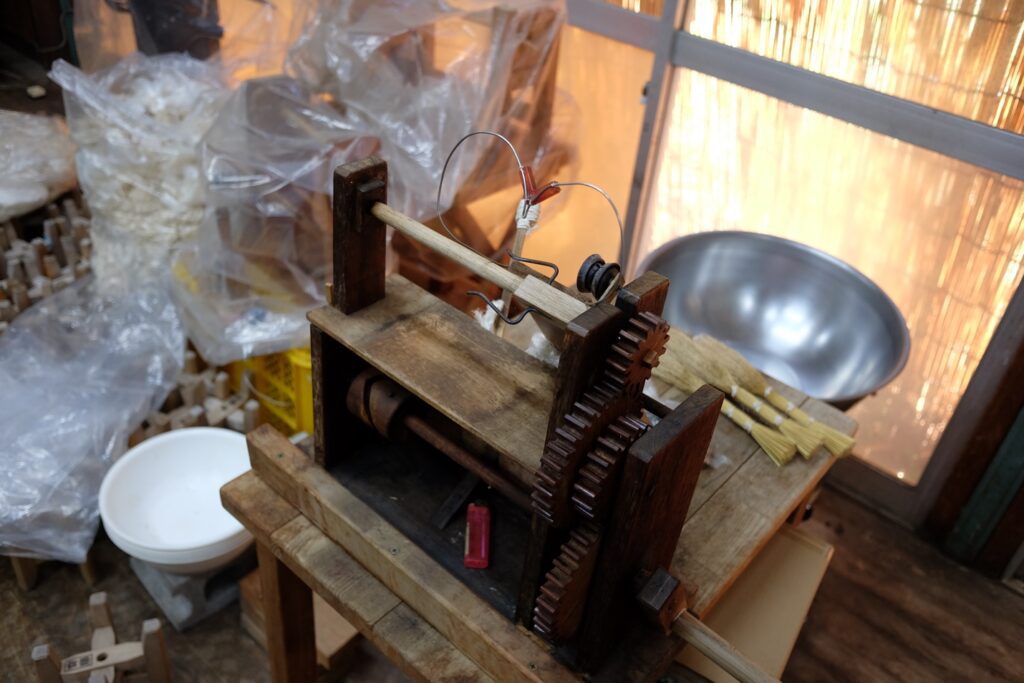
What makes Akimoto-san’s fabric so thin and light? The secret also lies in the reeling process, she explains. “In a modern method, to maintain uniform thickness, you pass the thread through a small cylinder. The cross-section of the thread becomes a perfect circle, but the thread is somewhat squeezed. Our traditional method, on the other hand, simply passes the thread through the V-shape point. No squeezing. The cross-section of the thread is irregular, and the width is not uniform. It is almost impossible for a machine to weave with such irregular threads; that’s why we have to use a hand loom. But this irregularity gives you extra lightness to the fabric.”
Hand-reeling equipment, with the V-shape pointLeft: machine-reeled yarn. Right: hand-reeled yarn. The same cocoons, the same length, and the same weight.
No more disturbing Akimoto-san’s and Mizune-san’s work. Mizune-san’s father runs a soba-noodle restaurant nearby, which is super popular. Mizune-san asked her father to save some for our lunch. Let’s go before it’s too late. The four of us thank them and leave the studio.
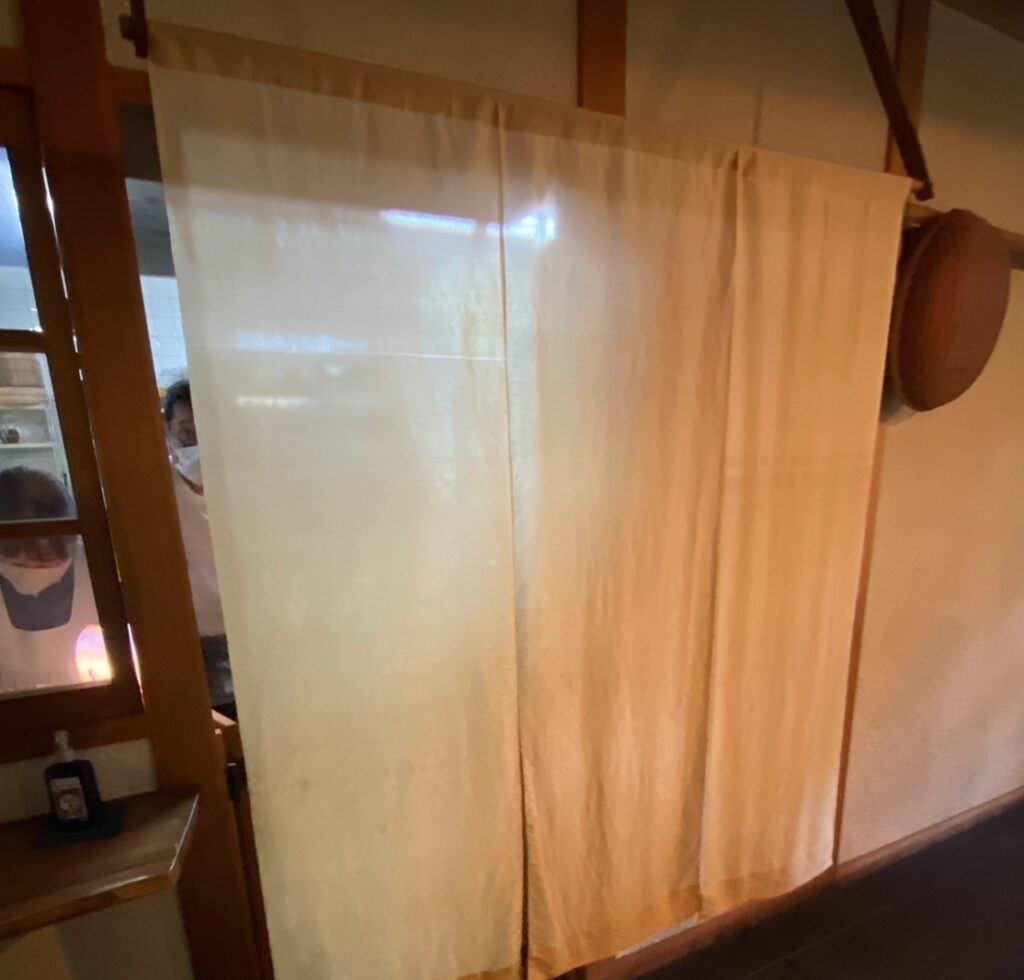
The noren that Mizune-san wove
The soba is wonderful. But what impressed me most is the noren that is hanging between the kitchen and the eating area. This is Mizune-san’s very first work as a trainee. After being used for several years, the middle part is now even softer. Each time somebody goes through the noren, it swims in the air with a graceful motion.
Reiko-san gives me a ride back to Kyoto. In the car, I contemplate.
Now I understand why my obi that Katsuyama-san made is lighter than any of my other silk obi. The irregular cross-section and width of the silk threads cause the diffuse reflection of light, hence the magical shine and change of colors when looking from different angles.
Conventionally, heavy, densely woven obi that feature multiple colors, including gold and silver, and intricate patterns, are considered luxurious. The collaboration of Katsuyama-san and Shimura-san is challenging this “conventional wisdom” not by presenting a new approach but by bringing back the centuries-old traditional method of silk making that was once lost during the Industrial Revolution in the last 150 years or so.
What we think as “conventional wisdom” today may be an outlier. In the name of “technological advancement” and in pursuit of convenience and efficiency, we might have deviated from the laws of sustainable nature for a while. Katsuyama-san and Shimura-san’s challenge might be signaling us that it’s about time for us to correct our trajectory and return to the true “conventional wisdom.”
Is it possible that Juni Hitoe 十二単, the twelve-layered kimono worn by aristocratic women during the Heian period, was much lighter than modern people imagine? Is it possible that a woman could move around gracefully as described in The Tale of Genji because Juni Hitoe was not heavy at all? I’m dying to know…
“Peacefulness through a bowl of tea” will always be with us
I was shocked by the news that came from Japan late last night. It said that Sen Genshitsu, the 15th-generation grand master of Urasenke School of Japanese Tea Ceremony, had passed away. News earlier this year was reporting that he was still visiting overseas at age 102… Apparently, he had been in poor health for the past few days.
Coincidentally, it was one day before the 80th anniversary of the end of World War II. I wonder how Grand Master felt on this day every year.
For me, a student of Urasenke School, it’s more natural to call him “Daisosho 大宗匠.”
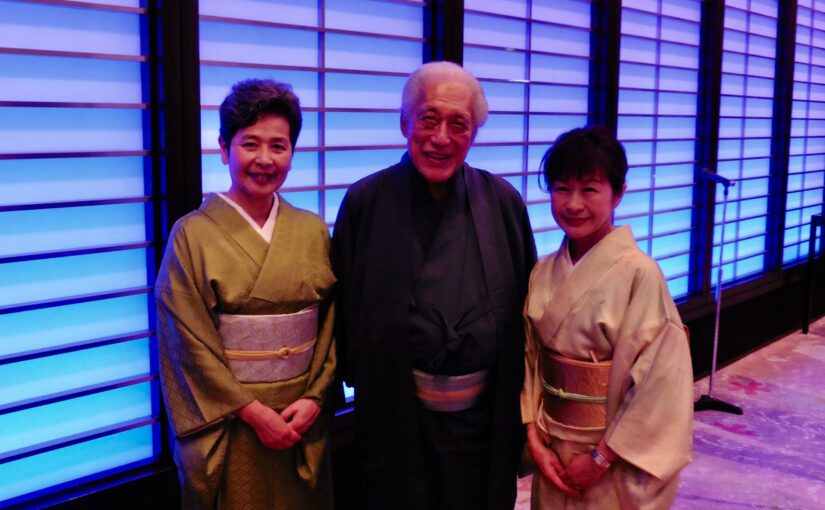
In November 2016, we Urasenke Tankokai Seattle Chapter members participated in the Sotanki memorial tea gathering in Kyoto. Since such an opportunity occurs only once in every ten years, I felt quite lucky to be one of such members to visit Kyoto after studying tea ceremony for only two years or so.
At the welcome dinner, Daisosho welcomed us who came from abroad with a warm smile. He was supposed to attend the dinner only at the beginning and leave soon after his opening remarks that night, because he was to leave for Tokyo very early the next morning. But he ended up staying until the very end, greeting each one of us. When we were sitting hesitantly at the table, he urged us to get in line at the buffet, saying, “The food’s getting cold. Go get the food. Don’t be shy.”
Together with my tea friend, I mustered up the courage to ask if we could take a photo together with him. No problem! He immediately posed for a photo.
Time passed. I kept on practicing tea ceremony. And we Seattle Tankokai members are honored to visit Kyoto again next March. I was looking forward to seeing Daisosho again…
It’s no longer possible. The photo above is the only one I took with Daisosho.
Although Daisosho is no longer with us, his legacy is with us. The spirit of “peacefulness through a bowl of tea” will always be with us.
Thank you so much, Daisosho. Please rest in peace…
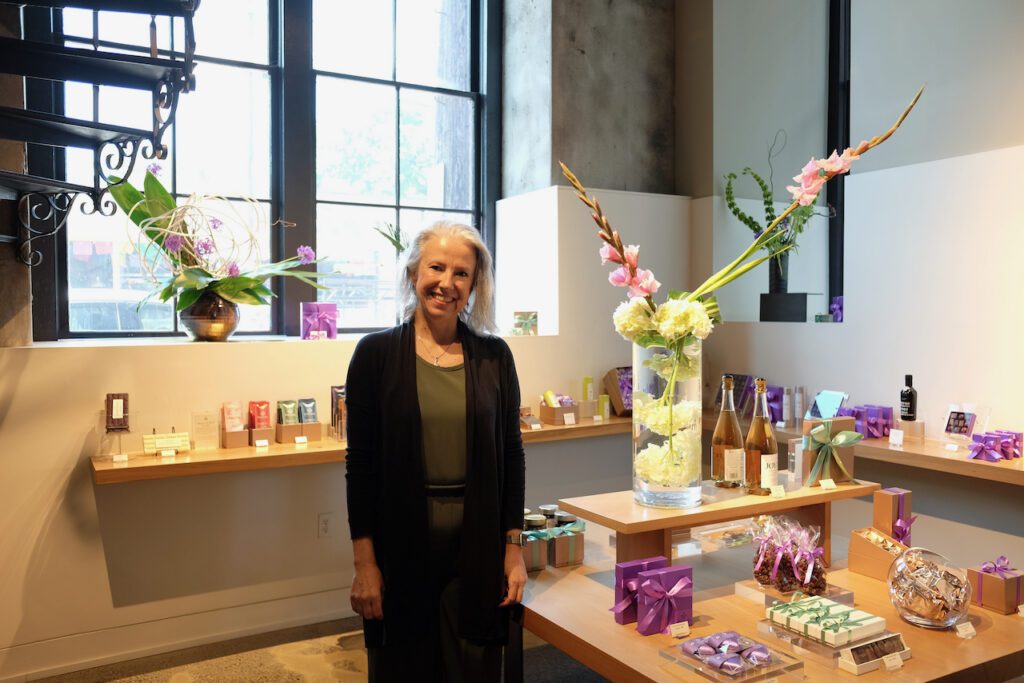
I began teaching Ikebana at Fran’s Chocolates 8 years ago. My first class was filled with my dear friends. They were interested in Ikebana, wanted to test the water, but they took my class mainly to show their support for me. I’m so grateful for their generosity.
When I started teaching, I had no idea how this endeavor would turn out. I had no set of goals like “I will have xx students and generate $xx in revenue in three years.” The max size of the class was 12 students, due to the size of the large table at Fran’s. I would hold one class on a Thursday afternoon and two classes on a Saturday a month. At first, my classes were rarely filled. More than once I had a class that only one person signed up. I didn’t cancel any classes because of the low turnout. I kept on teaching.
I had my website iloveikebana.com, and posted photos of the arrangements that the students made. Fran’s Chocolates created signage of my classes and placed it at all four retail stores. I did no other advertising.
Gradually my classes began to be filled occasionally. Some people purchased a textbook, came back to the class regularly.
Then the pandemic hit. The store was closed. Out of desperation or boredom, I created several Ikebana tutorial videos at home and posted them on YouTube. Encouraged by my continuing students, I started to teach online. Whenever a new student joined, I asked him/her which neighborhood s/he lived. When one of my online students replied, “I’m taking your class from California,” I realized there was a silver lining to the pandemic.
In eight years, 586 people took my Ikebana at least once. Most of them never came back, which is understandable. They simply wanted to test the water or cross out Ikebana from their bucket list.
Eight years later, 7 people have finished all five Sogetsu textbooks. Twenty lessons on Book 1, 2, 3, and 4, and plus 30 lessons on Book 5. Finishing all five textbooks means that they took at least 110 of my Ikebana lessons. That’s a huge commitment and accomplishment!
Then what’s next?
Well, just as I did, my students go back to study Book 1 Lesson 1. By the time we are used to making freestyle arrangements in Book 3, 4, and 5, we pretty much forget the basics that we learned in Book 1 and 2. As if we were a beginner, we try basic lessons again. The second time around, we may notice things we never did the first time. Like many other traditional Japanese forms of art that are called “the ways of …,” there is no end to “the way of Ikebana.” Not the goal, but the process of pursuing this “way of Ikebana” gives you the profound joy.
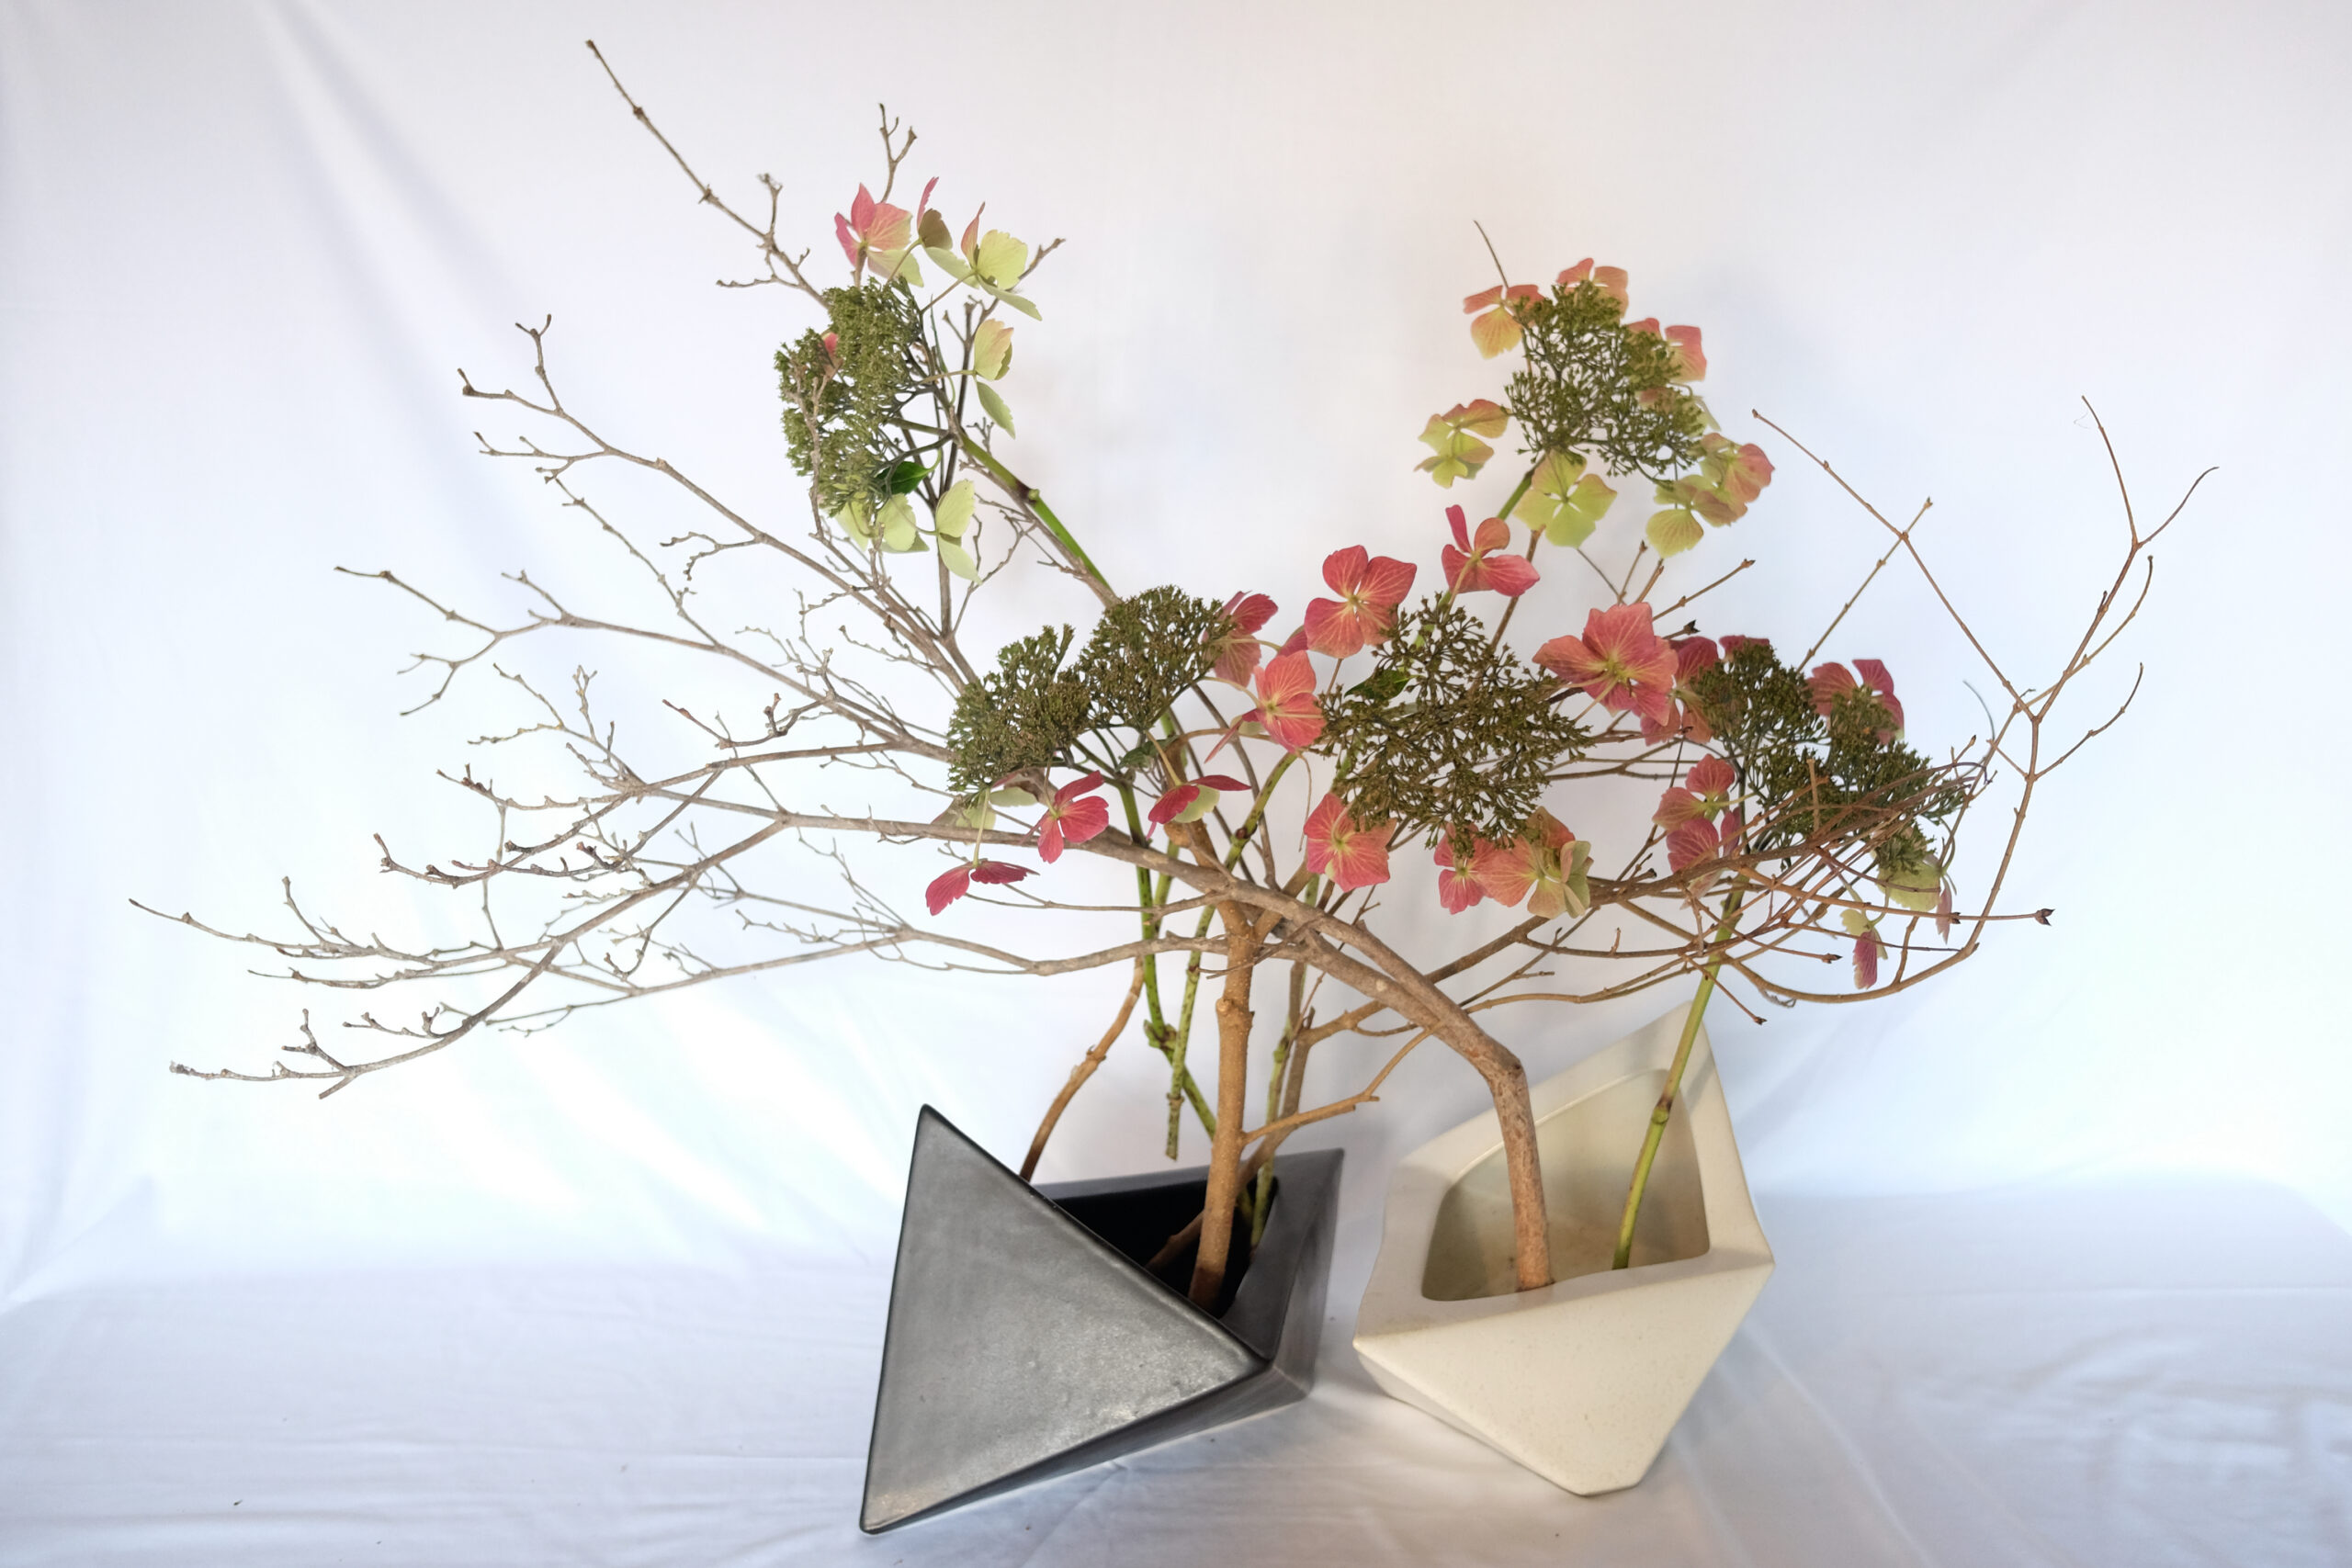
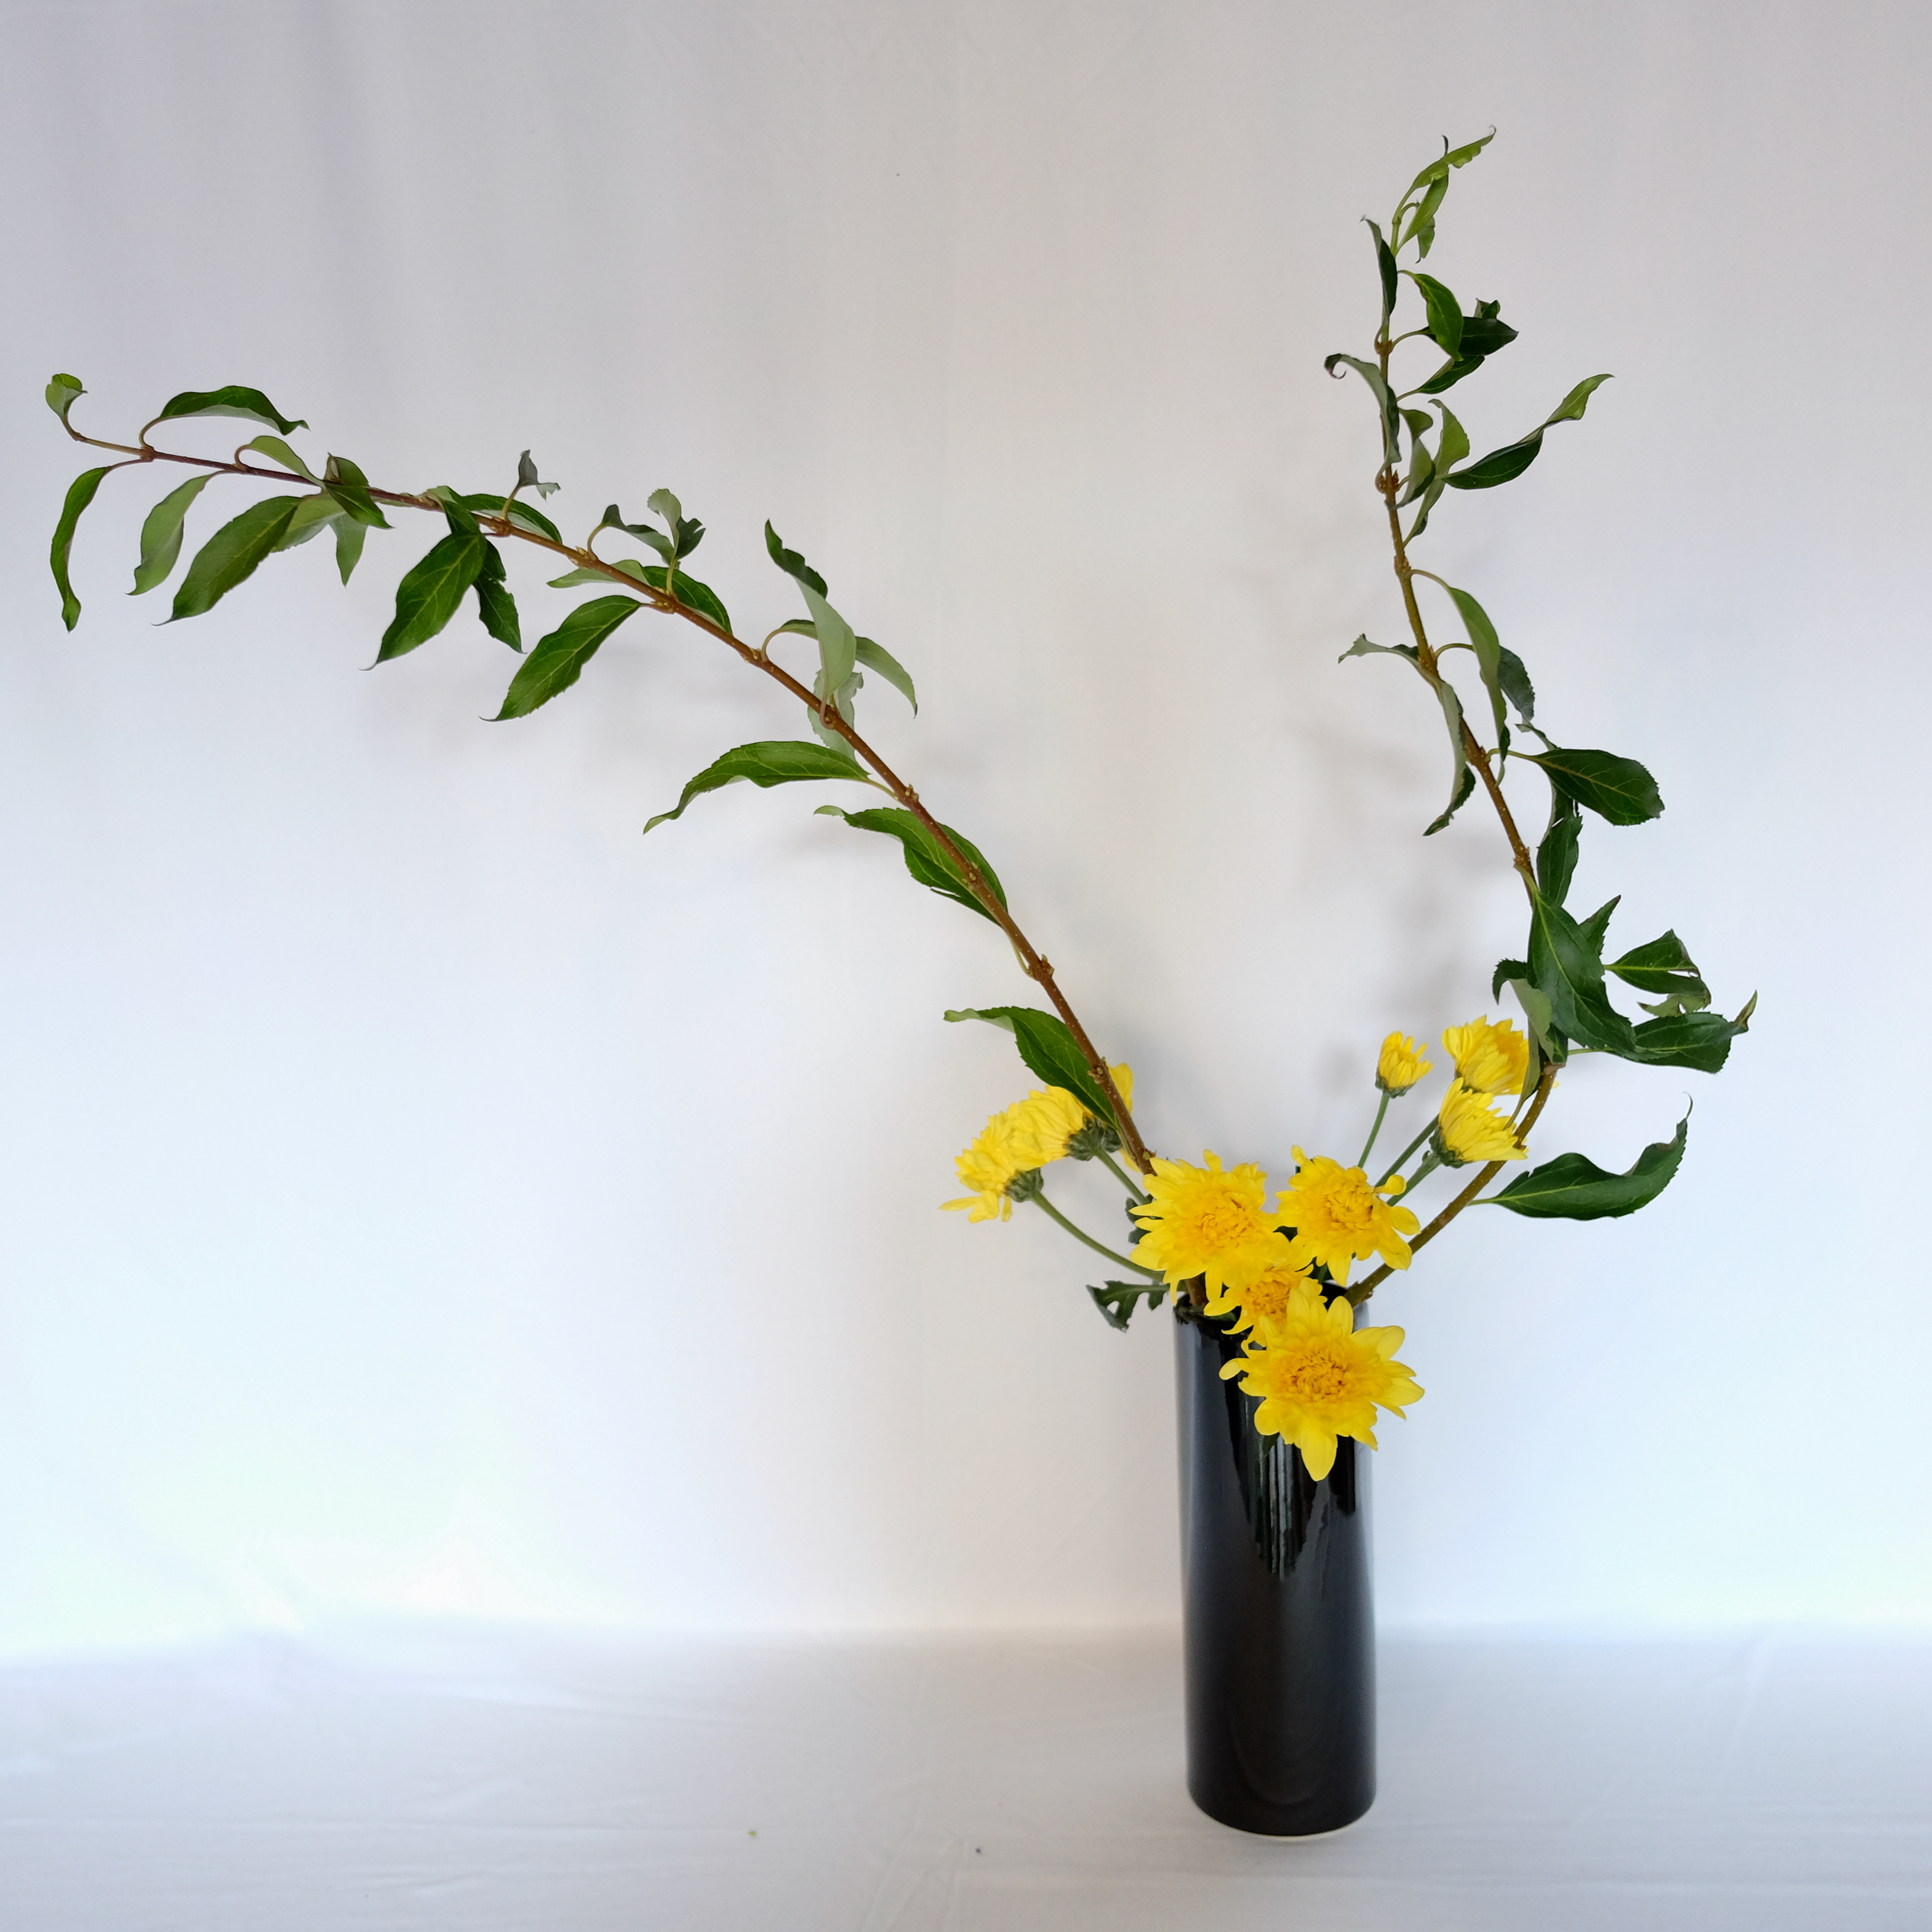
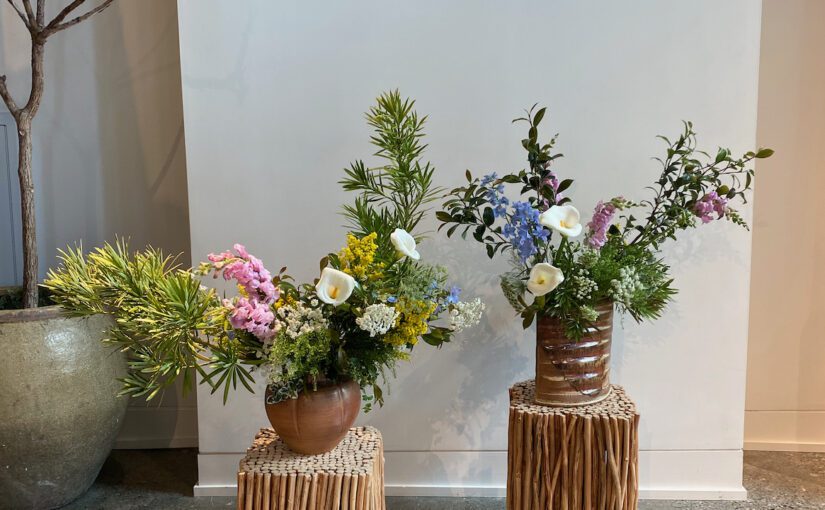
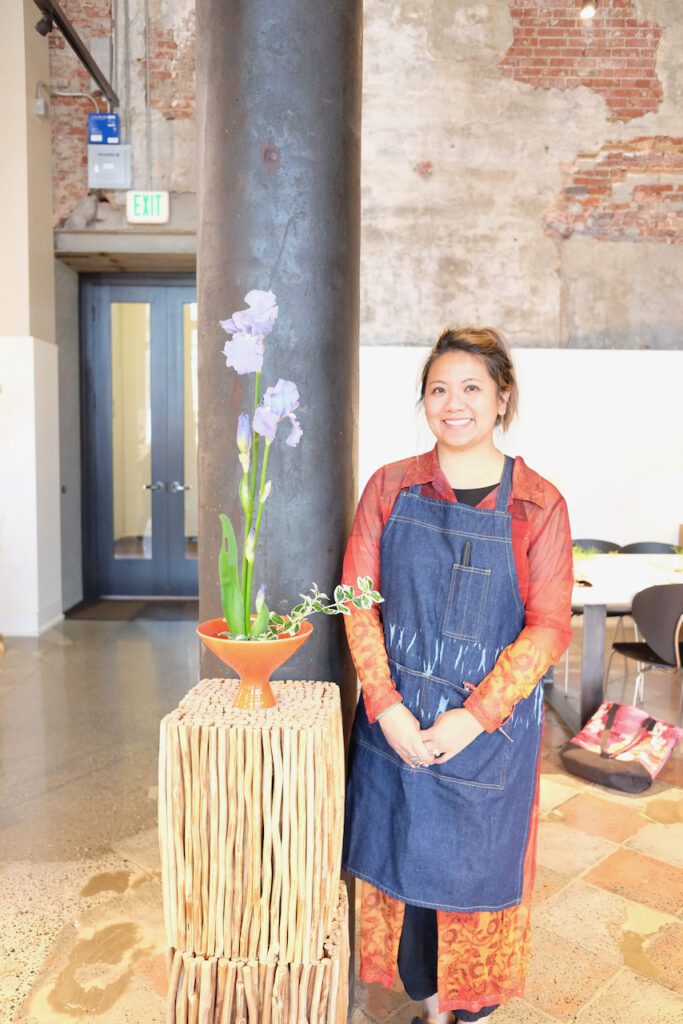
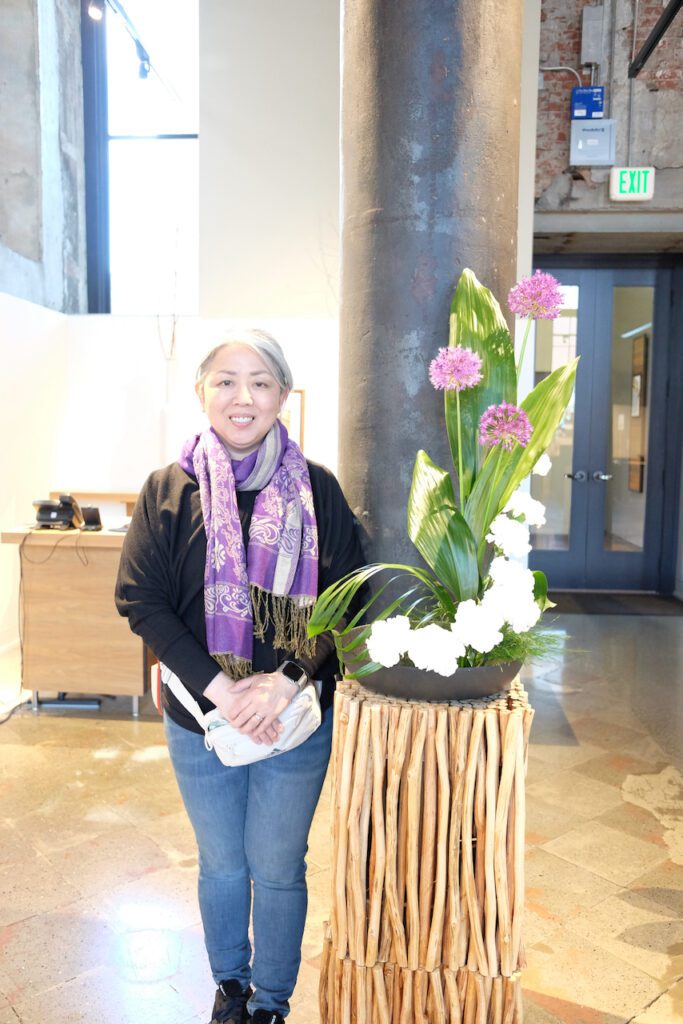
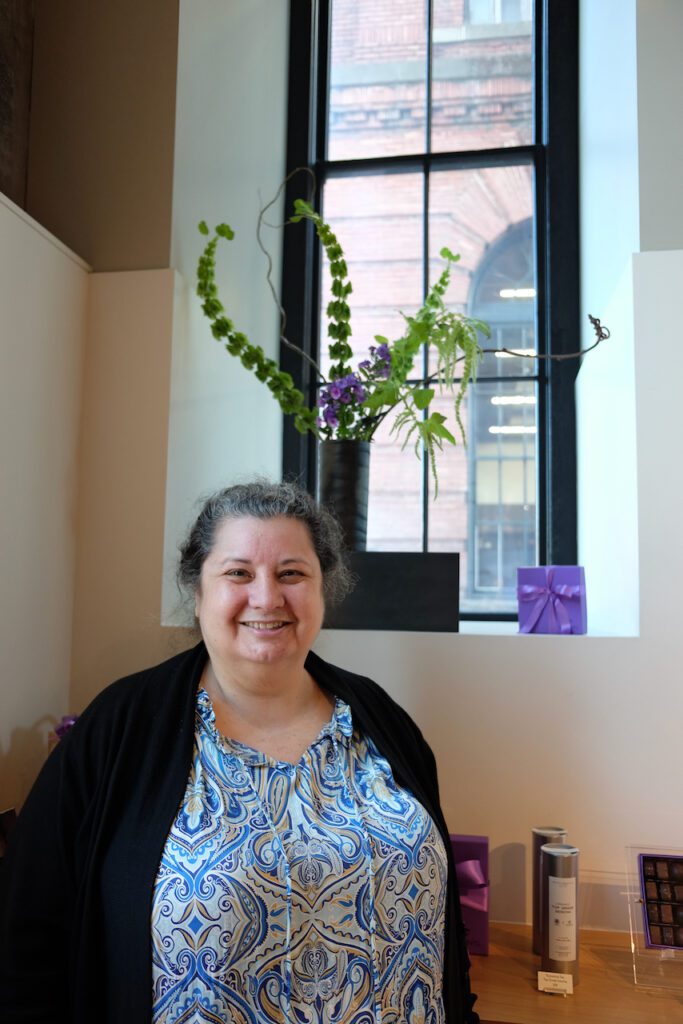
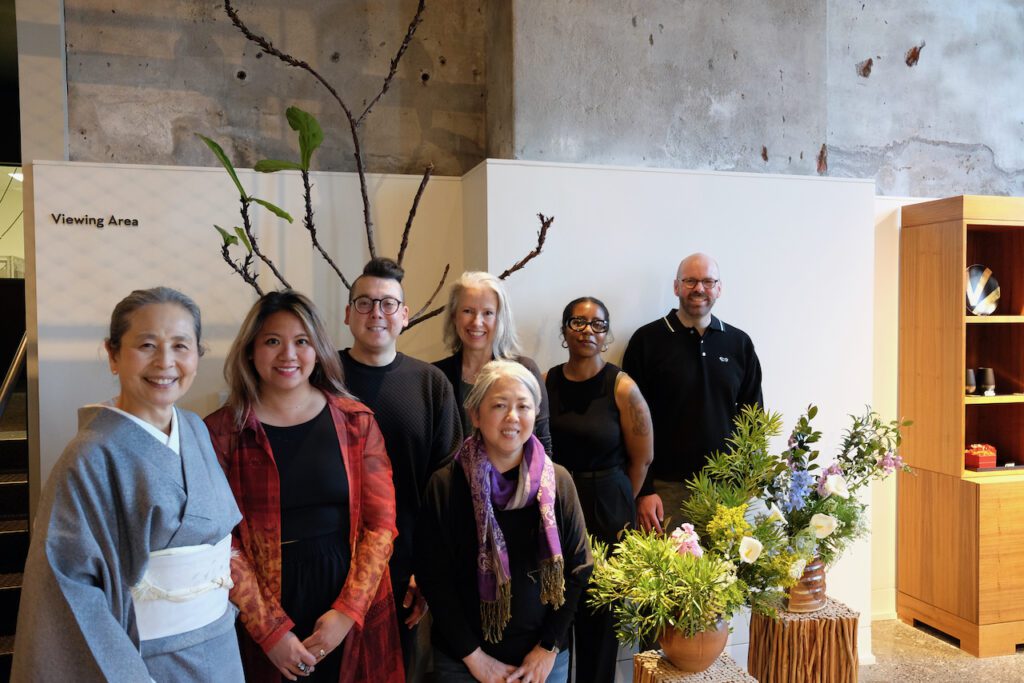
In late May, my students participated in our spring Ikebana exhibition. Here are their individual and group arrangements. I hope you enjoy them. Kudos to all of the talented Ikebana arrangers!
Although I don’t remember exactly when, it must be on a spring or early summer night in 1979. I was a junior in high school, got accepted to spend a whole year in the US as an exchange student through an organization called AFS, then called American Field Service. Before I left for the US in July, my father took us to a fugu (blowfish) restaurant for a family dinner.
My father, being the owner of a small electricity-construction company, was working hard and seldom at home for dinner time. Even on the weekend, he would usually be gone visiting worksites. So, going out for dinner with the family itself was a special event for me. My father must have realized that not seeing his only daughter for the whole year was not a trivial matter.
And considering that his daughter would be away from Japan for a whole year, my father must have thought it through to decide which restaurant to take us.
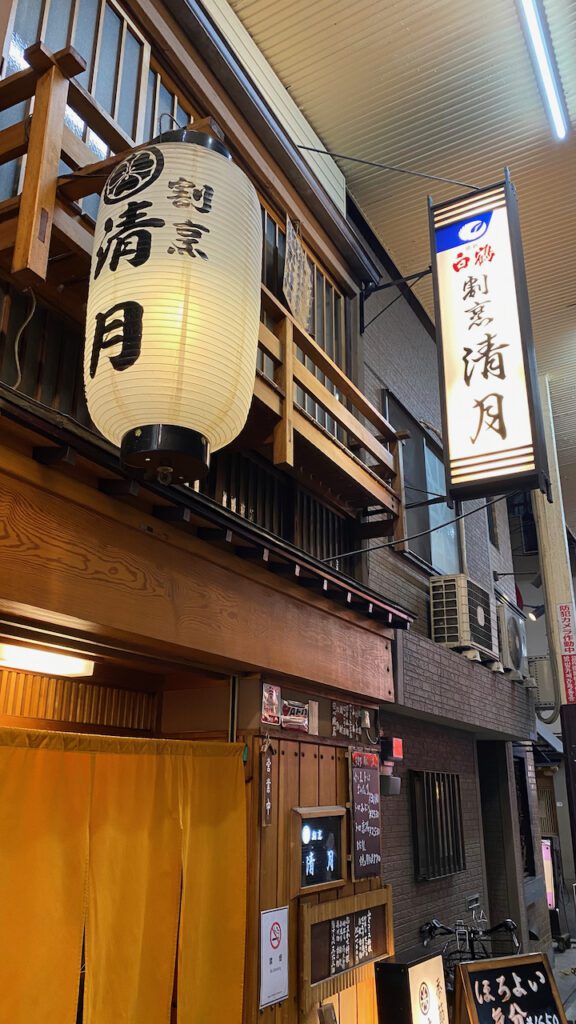
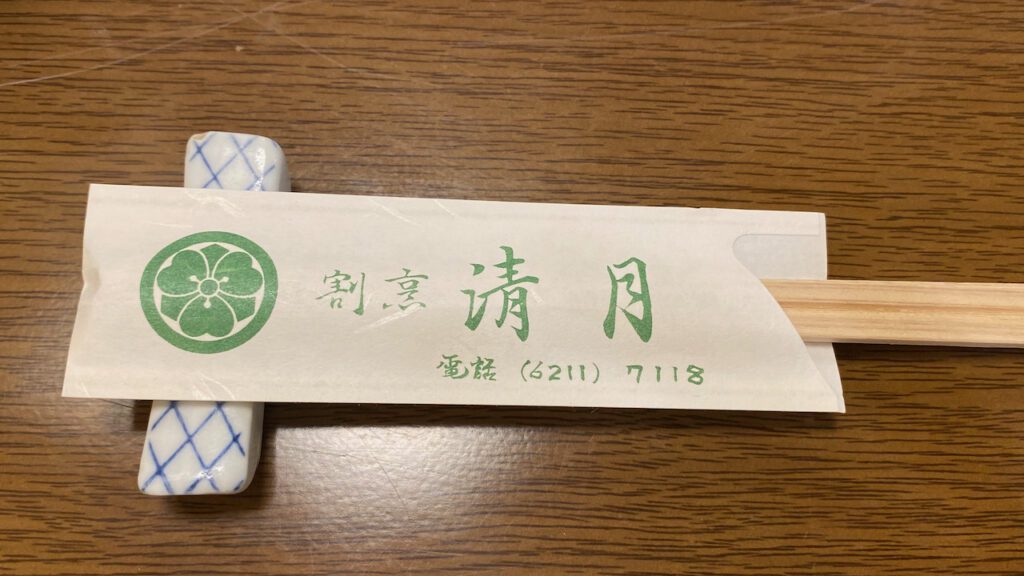
The restaurant was called Seigetsu 清月. Our family was taken to a tatami-mat room upstairs. We were the only customers in a rather large room.
From the way my father and the okami, or proprietress of the restaurant, were talking to each other, I sensed that they had known each other for a long time. I assumed my father must have often used this place to entertain his clients.
As the first dish, Tessa, or fugu (blowfish) sashimi, was served. Very thin slices of fugu meat were spread neatly like flower petals on a large, flat, round porcelain plate. The firm texture of the thin slice was a surprise for me. It must have been my first time to eat fugu, and I loved it!
The main dish was “Tetchiri” or fugu hot pot. The fugu meat was cooked with various kinds of vegetables and tofu. The broth was brilliantly light both in color and the taste. The delicate fugu meat was delicious with the ponzu, the mixture of soy sauce and citrus juice.
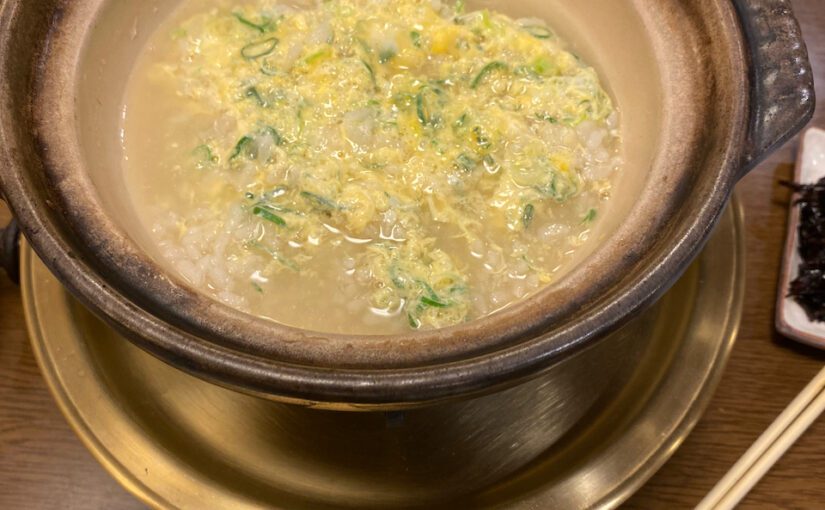
After we ate Tetchiri, the okami brought white rice. She cleared away most of the leftover vegetables and flakes of fugu meat carefully with a mesh ladle. Into the transparent broth left in the pot, she put rice and kept on cooking for a while. Then she poured beaten eggs on the rice. “Once you pour eggs, you turn off the heat and close the lid. You cook the eggs with the residual heat of the rice and the broth. That’s the secret of making the most delicious Ojiya,” said the okami.
It didn’t take long. Maybe only three or four minutes. The thick pot made of clay kept the rice and broth warm. When the okami opened the lid, the rice, broth, and the eggs were harmonized to make the perfect Ojiya. After she served the Ojiya to four individual bowls, she instructed us to pour a little bit of ponzu and sprinkle crushed nori (dried seaweed) on top of it. The Ojiya was heavenly.
Time has passed. After I returned from the US, our family did go out for dinner, maybe several more times, but never back to Seigetsu.
I moved to the US to live. My father passed away in 2004.
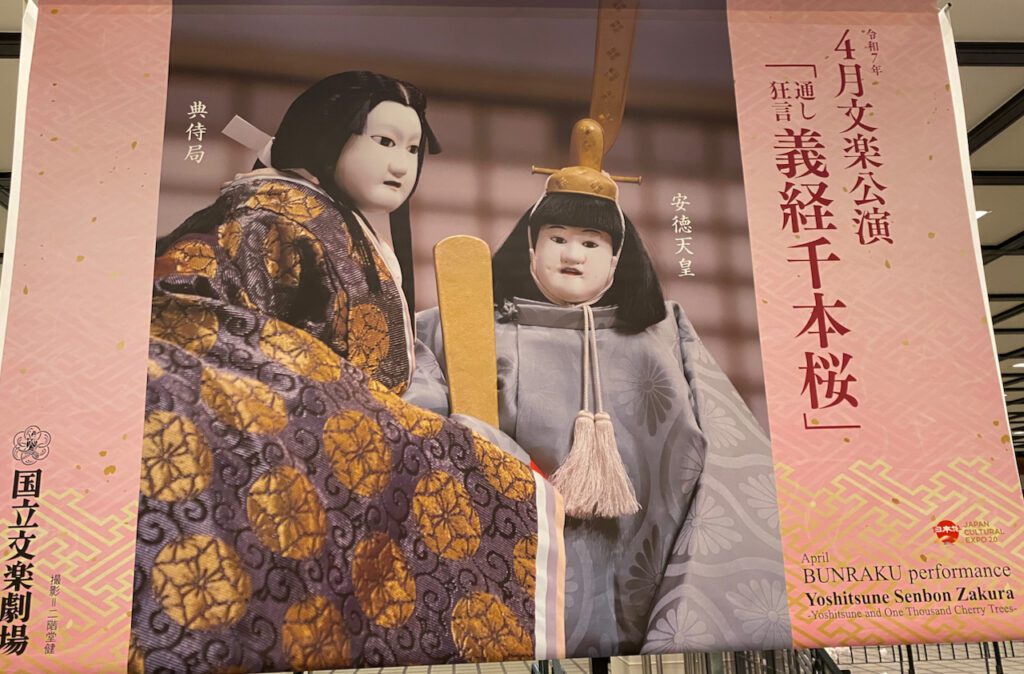
On a sunny day in April, 2025. After we went to see Yoshitsune Senbonzakura at the National Bunraku Theatre, my mother and I were hungry. Along the way, walking back to the subway station from the theatre, I happened to turn my head on the right, and noticed the character on the sign of an old Japanese-style restaurant. I could only see the second character and it was “月.”
I couldn’t help but approach toward the sign to see what the first character. It was “清.”
Does the restaurant serve fugu? The tagline of the restaurant said only ‘Kappo,” a more generic term of a type of Japanese cuisine. Closely looking at the list of items shown on the menu by the door, I found the word “fugu.”
This must be the one. After 47 years, I finally found the restaurant that I hadn’t even been particularly looking for or seriously thought of.
My mother and I went inside. The woman in an apron welcomed us. She looked not much older than me. We were seated on a small tatami section on the opposite side of the counter. Beyond the counter was a chef working alone. He looked around in his seventies.
“How long has this restaurant been here?” I asked. The chef responded, “My parents started this restaurant shortly after the war was over. My mother, in her late 90’s, still comes here to work once or twice a week. I want to retire someday, but not as long as my mother is still alive.”
My mother and I ordered a hot pot. When it came to adding rice to the broth to make Ojiya, I asked the woman in an apron. “As soon as you pour eggs, you close the lid, and turn off the heat, right?” The woman said, “I don’t know about any other restaurants, but that’s the way our restaurant has always been doing.”
The meal was more than delicious. My mother and I would definitely come back here again, hopefully soon. Hopefully when the okami is working here. To ask her if she by any chance remembers my father…
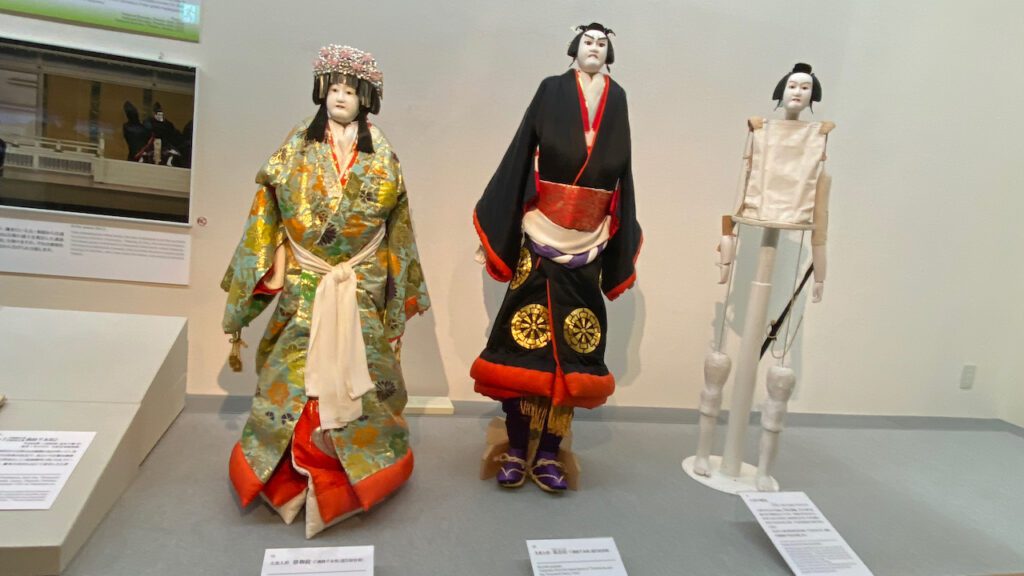
It’s called Ningyo Joruri人形浄瑠 or Bunraku 文楽. According to UNESCO’s website, it has a longer name as Ningyo Joruri Bunraku Puppet Theatre. On UNESCO’s Intangible Heritage website, it is described as “Ranking with Nô and Kabuki as one of Japan’s foremost stage arts, the Ningyo Johruri Bunraku puppet theatre is a blend of sung narrative, instrumental accompaniment and puppet drama.”
Let me call it Bunraku for short.
As the UNESCO site describes, it’s one of Japan’s stage arts, like Nô (or Noh) and Kabuki. There are many academic distinctions among the three arts. For example, Noh is different from the other two because Shamisen, a three-string musical instrument, is NOT used in Noh. Kabuki is different from Bunraku because real people act on the stage rather than puppets. During the Edo period (1603 – 1868), Noh was patronized by the ruling samurai clan. Kabuki and Bunraku, on the other hand, evolved among ordinary people, including merchants, craftspeople, and farmers.
For my mother, the distinction among the three arts is more subjective and absolute. She grew up with Bunraku, not with Noh or Kabuki.
There used to be small Bunraku stages in a small village in Tokushima Prefecture in Shikoku Island, where my mother grew up. In those days, people living in rural villages in Japan must have had very little entertainment, and Bunraku must have been a precious one. Still today my mother recalls how excited she used to be whenever she heard the powerful, low sound of Futozao (thick neck) Shamisen playing on the Bunraku stage. I don’t think my mother has ever watched Noh play. For her, Noh is as foreign as Shakespeare or Western plays. But Bunraku is in her blood.
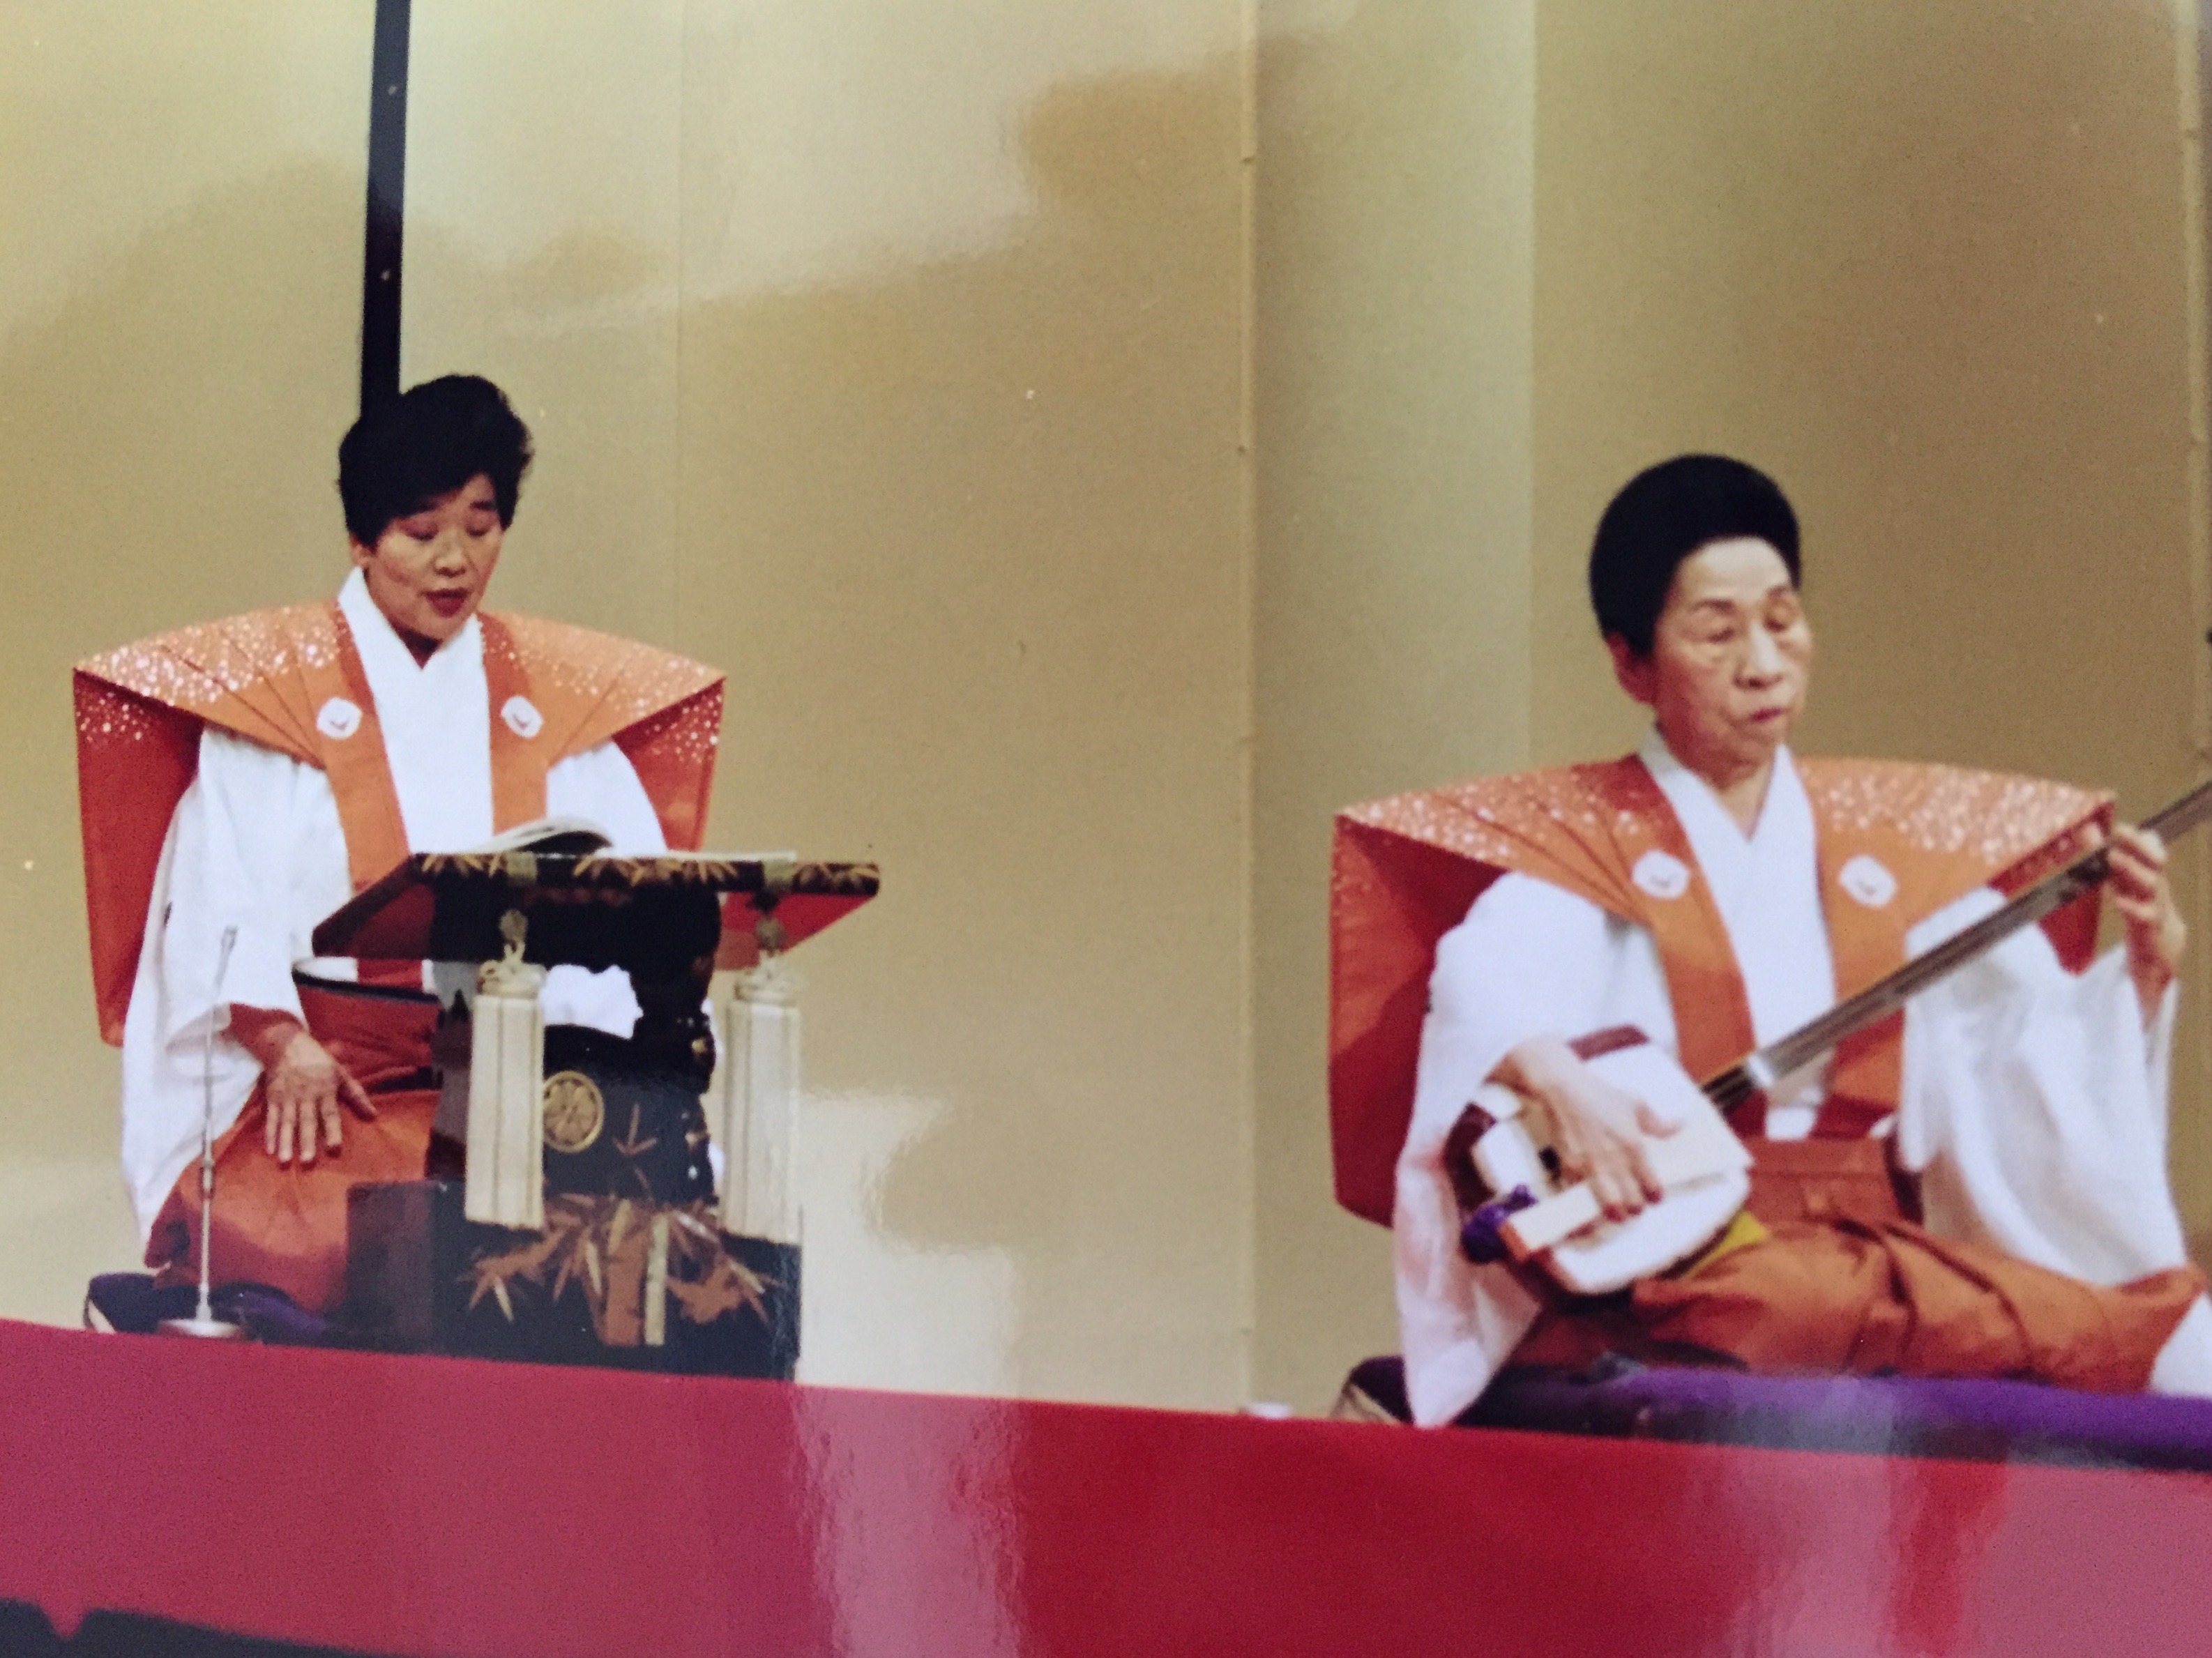
One of her life’s highlights is the days that she took lessons of Gidayu, the reciting part of Bunraku. In Osaka, the then-living national treasure Takemoto Sumidayu 竹本住太夫 used to teach Gidayu at Asahi Culture Center. My mother must have been in her forties or early fifties. She happened to see the advertisement for the class. With no hesitation, she signed up for it.
“There were 7 or 8 people in the class. Each student had a chance to recite the part we learned from the previous lesson in front of Master Sumidayu, no more than 5 minutes. But when it came to my turn, I started reciting, and the 5-minute limit passed, but the master ignored the time limit, and let me recite the whole part. I must have been that good or at least I must have been reciting from the bottom of my heart, and the master knew how much I love Gidayu.” My mother was so proud of that moment and would often tell me the same story.
Time has passed. Master Sumidayu passed in 2018. Now my mother has complete dentures, and with the fear that her dentures would fly out from her mouth while reciting, she has quit Gidayu.
But her love for Bunraku has not waned. She often takes a train to the National Bunraku Theature in the center of Osaka and enjoys watching it.
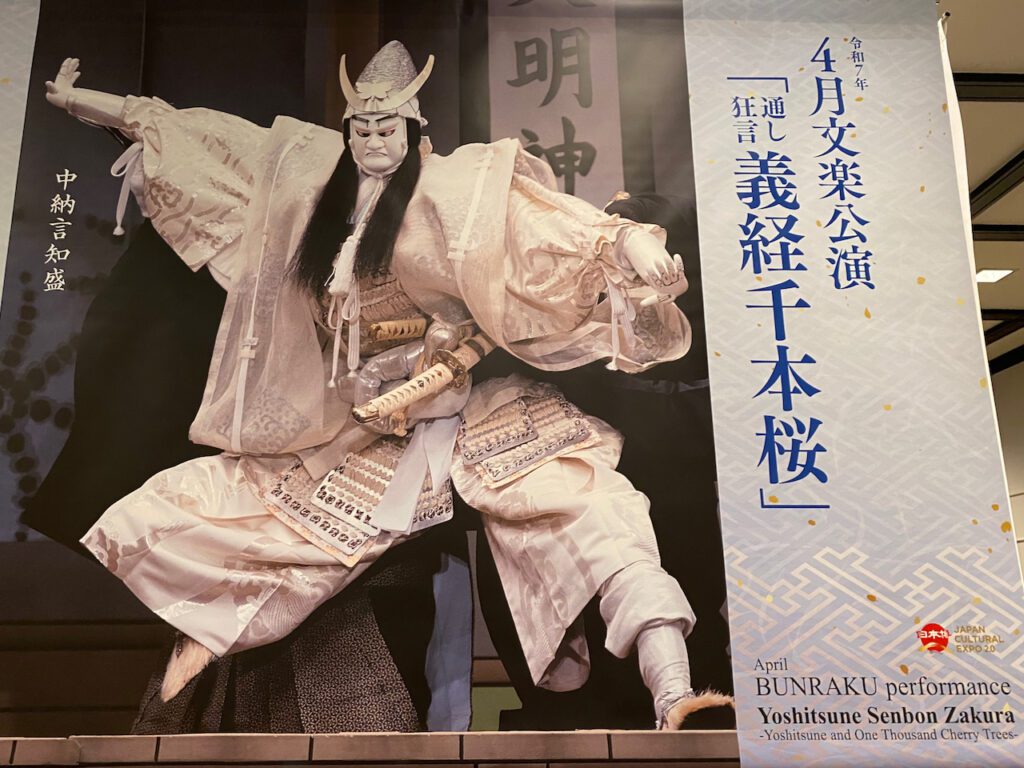
When I visited my mother this April, Yoshitsune Senbonzakura 義経千本桜 was playing at the National Bunraku Theatre. My mother and I went to see the mid-afternoon part. The theater was a little over half full. To my surprise, I saw quite a few foreign tourists. With the help of the audio guide they rented, I wondered how much of the reciting they understood. Without that equipment, maybe I understood less than those tourists, because the reciting was in old Japanese that I was not familiar with.
The reciting, however, is only half of the whole appreciation of the Bunraku play. The movement of the puppets! When the puppets express human feelings, like laughter, anger, sorrow, with exaggerated action of crying, laughing, screaming, dancing, pounding something, holding each other tightly, looking at each other intensely, eyes to eyes, by crying so hard that the head is shaking constantly… You no longer think that you are looking at the puppets but as if you were watching real humans acting. The exaggerated narration of Gidayu helps you become immersed in feeling of the character. It’s all magic.
Now I understand why my mother loves Bunraku so much. While watching, I heard my mother murmuring the Gidayu part together with the performer. She must have learned the scene from Master Sumidayu.
Several years ago my mother asked me to digitize the old cassette tapes that she had recorded during her lessons with Master Sumidayu. For a long time, I forgot all about it. It’s still on my computer! Next time I visit my mother, I will play it for her. It’s my present for her next birthday. I hope she will like it.
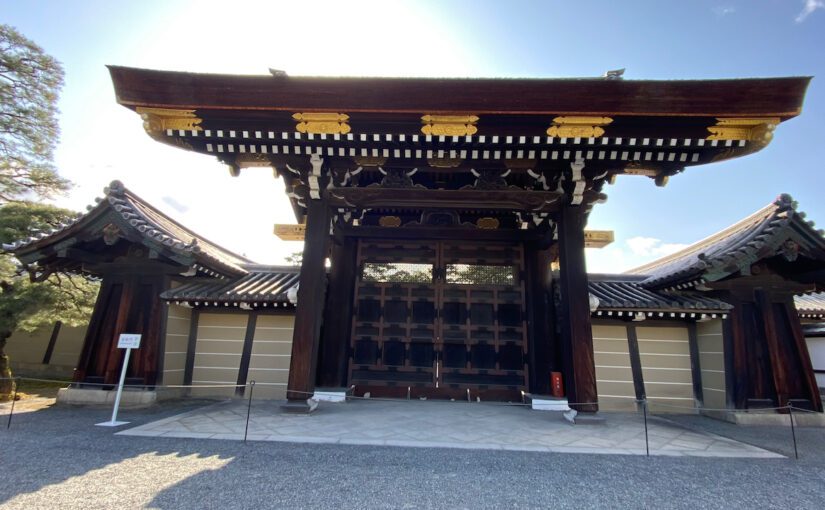
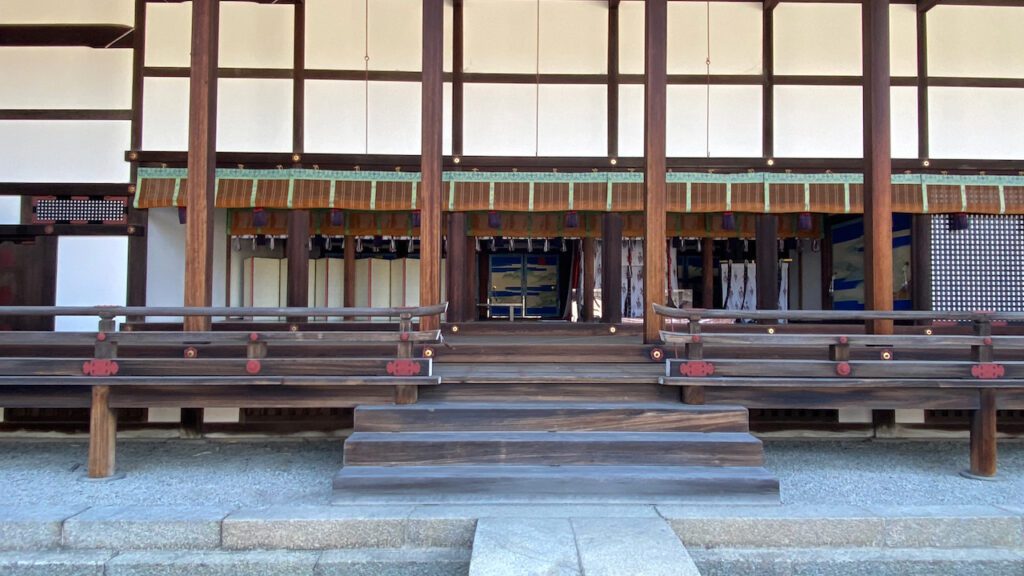
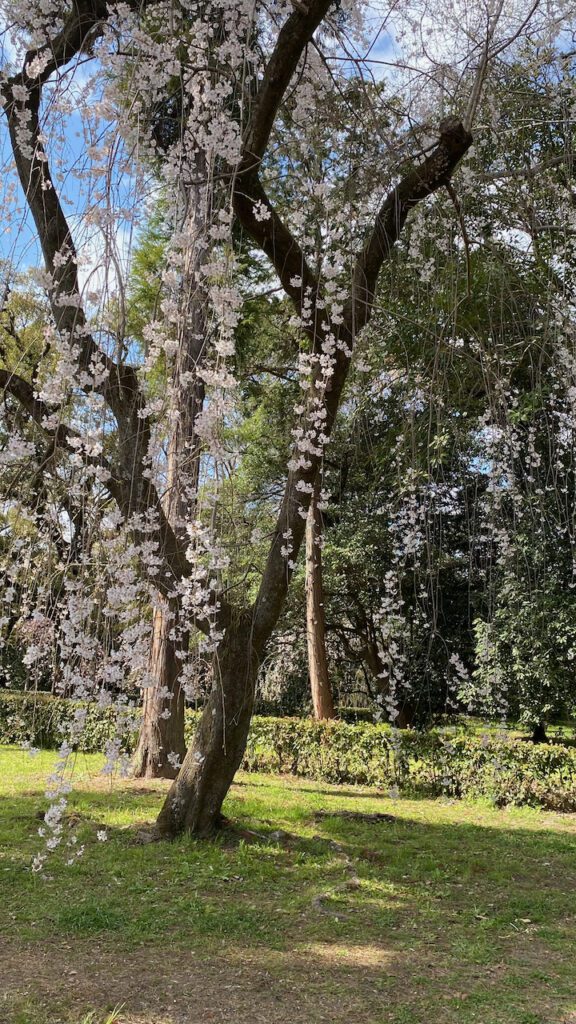
The main building is called Shishinden 紫宸殿, where formal rituals were held. When we visited, the cherry tree on the right side of the building was in full bloom. The tree is called “Sakon no Sakura 左近の桜 (the cherry on the left side).” Why left? Because the tree is on his left when the emperor looks out from inside the building.
The tour doesn’t allow us to go into the building, but you can look inside from the pathway.
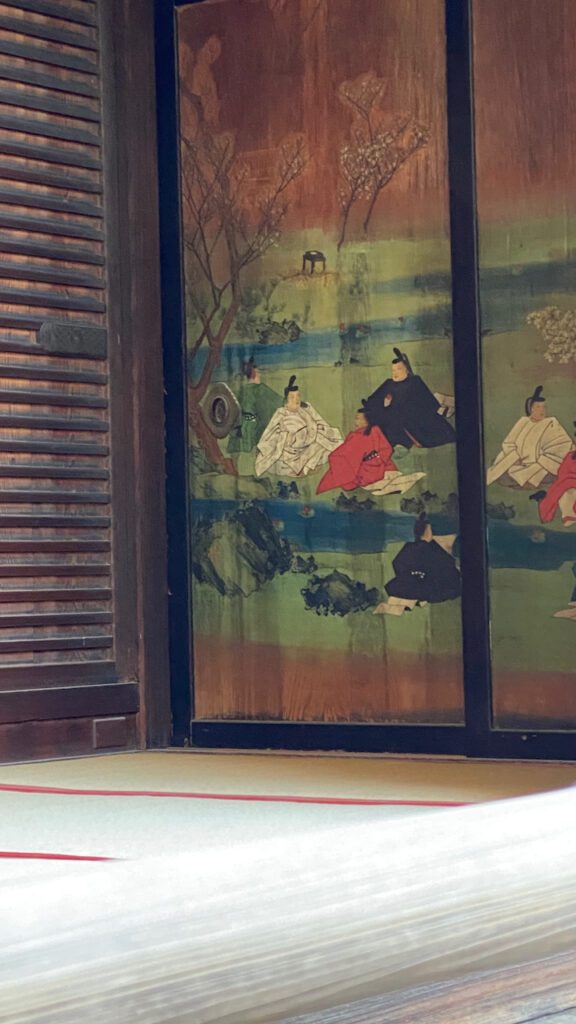
Compared with the flamboyant palaces in European countries like Versailles, the interior of this palace is quite simple. Pictures are painted on the sliding doors here and there.
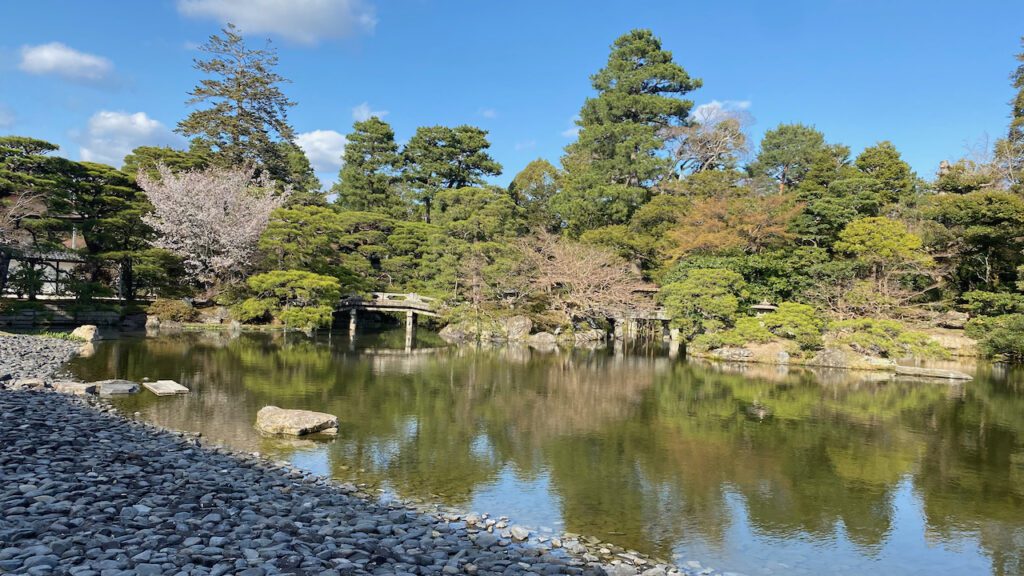
You can walk through the private garden where past emperors used to spend time. The serene scenery that changes colors according to the seasons must have offered the emperors an opportunity to be reflective from time to time.
Kyoto became Japan’s capital when the emperor Kammu (737 – 806) moved there in 794, and it remained so for over 1000 years until 1869.
The emperor used to be the ruler of the country in the early days. The ruling power moved to the samurai clans in the 12th century. Minamoto Clan (12th – 14th C), Hojo (14th – 15th C), Ashikaga (15th – 16th C), and Tokugawa Clan (17th – 19th C)… While the rulers changed hands, Japan’s emperors remained as the ritual figurehead and kept their residency in Kyoto.
When Tokugawa Ieyasu unified the country after a century of civil wars, he built his own castle in Edo and began to rule Japan from there. Ieyasu, however, never dethroned the emperor nor moved the emperor from Kyoto. The lineage of emperors continued to reside in the palace in Kyoto.
Then the Meiji Government took over in 1868. By then, Edo was practically the center of Japan economically and politically. The newly formed government changed the name of the city from Edo to Tokyo 東京, which literally means the eastern capital, and also moved the emperor from Kyoto to Tokyo. As the new residence of the emperor, people regarded Tokyo as Japan’s new capital.
Many people in Kyoto, however, think that the emperor is away from Kyoto only temporarily. The imperial palace in Kyoto is maintained as a place for special rituals. Not only that, many people believe that the facilities are waiting for the master to return eventually.
Will the emperor ever return to Kyoto permanently? Who knows. After having hosted the emperor for over 1000 years, many people in Kyoto think that 150 years is too short to justify Tokyo as the new capital.
In the last several years, I have visited the two sisters whenever I go back to Kyoto. Rakufulin sisters, as I call them, produce beautiful obis. Each of their works of art has a story behind its design. As I got to know them better, I became more and more intrigued in their stories.
Each time we met, our phrase of saying good-by was always “let’s go out together in kimono nest time.” After repeating it so many times, we started to wonder if we were using this phrase in vain. But this spring, we finally made it a true statement!
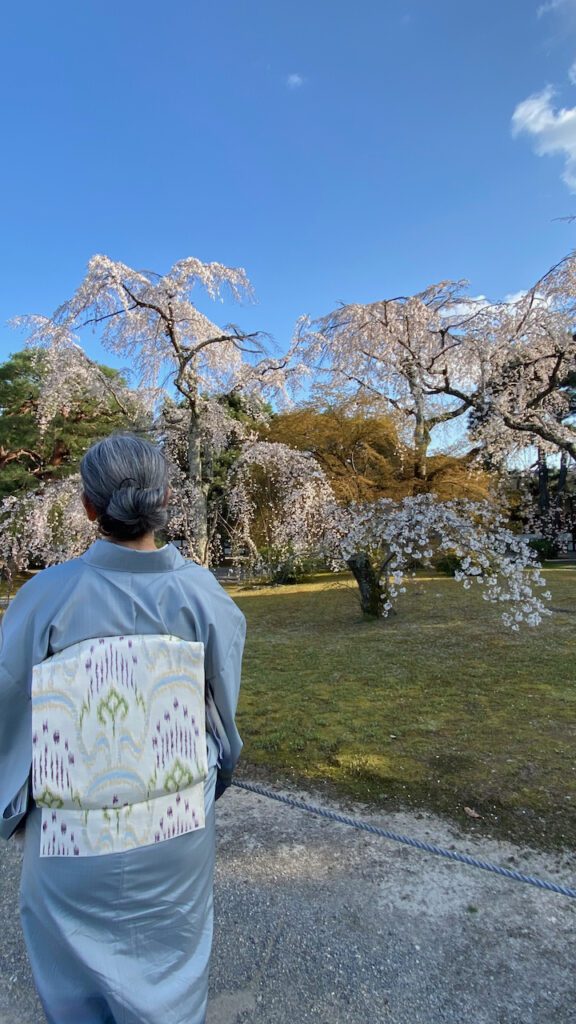
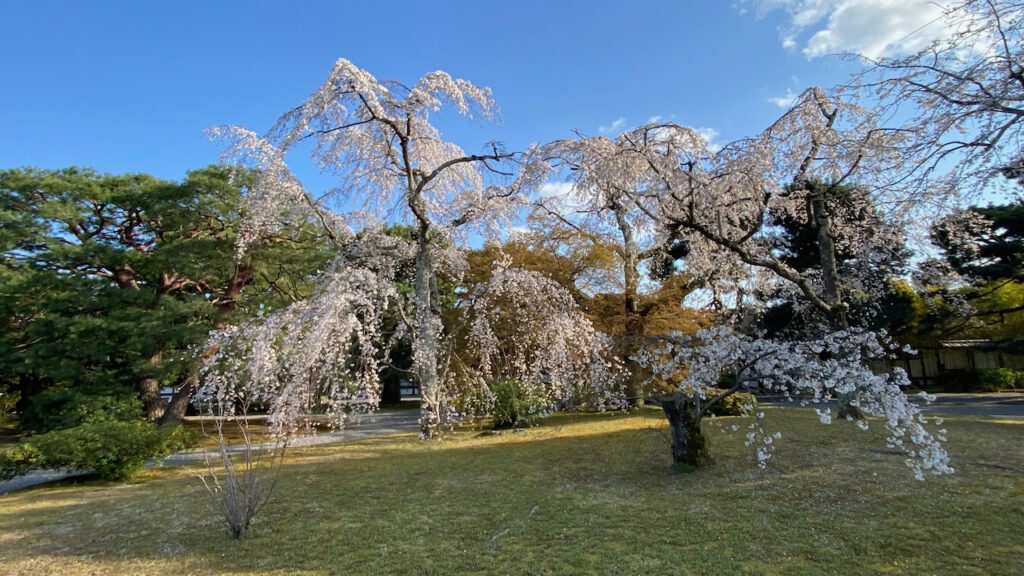
The weather was perfect. Not too cold, not too hot. Above all, it was not raining. And the timing was perfect! According to the cherry blossom forecast, the cherry trees in Kyoto Imperial Palace were 70 – 80% in full bloom. We can’t afford to miss this opportunity! The night before my visit, I texted Reiko-san, the older sister, that I’m coming in kimono. So will she and Aiko-san, the younger sister, was her reply.
The next morning, I put on my new obi with my mother’s Oshima Tsumugi kimono and took a bus from Osaka to Kyoto. The bus was not crowded, so I lounged in the seat comfortably for about 80 minutes.
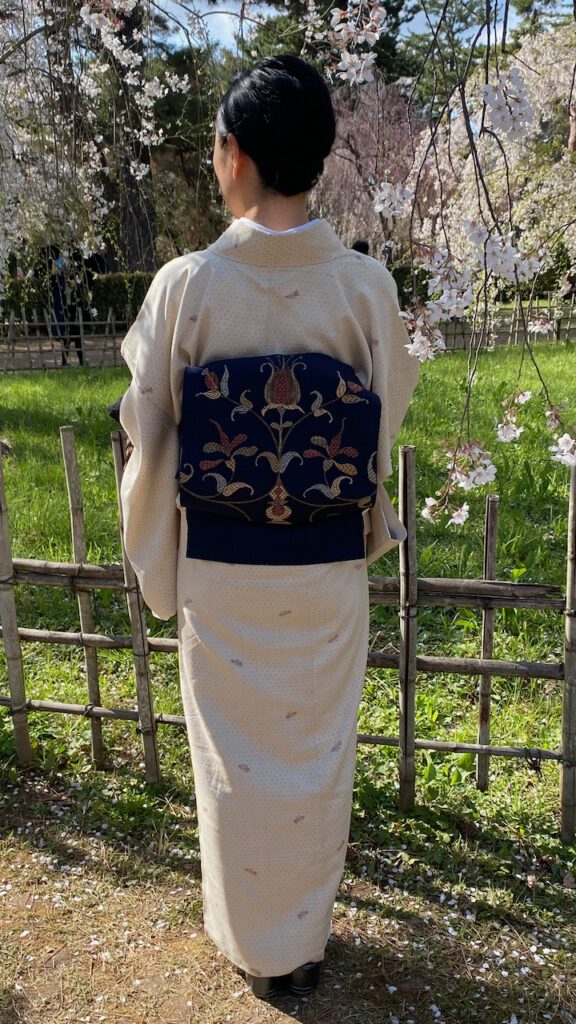
When I arrived at their office, both Reiko-san and Aiko-san welcomed me in their kimono. Reiko-san was wearing her mother’s old obi with a cherry blossoms design, and Aiko-san was wearing one designed by her grandfather, the founder of Rakufulin. After enjoying the seasonal bento box lunch, we walked to the north side of the Kyoto Imperial Palace together.
The design of Reiko-san’s obi has different kinds of cherry blossoms. Some are the kind that bloom early in the spring. Also Somei Yoshino, which blooms in mid-spring. Then blossoms of Yaezakura, which bloom later. The design gives Reiko-san an opportunity to wear this obi throughout the spring.
My new obi is designed by Reiko-san. She got an inspiration from the original pattern, called Taishi Kanto, of an ancient fabric housed in Horyuji Temple in Nara. The fabric is believed to have been used by Shotoku Taishi (574 – 622). With her choice of colors and the rhythm of the line, Reiko-san has resurrected the 1400-year-old design pattern to suit the obi of the 21st century.
Aiko-san’s obi is one of Rakufulin’s signature designs. Her grandfather traveled all around the world and collected textiles. Inspired by exotic patterns, he created one-of-a-kind designs fitted to obi.
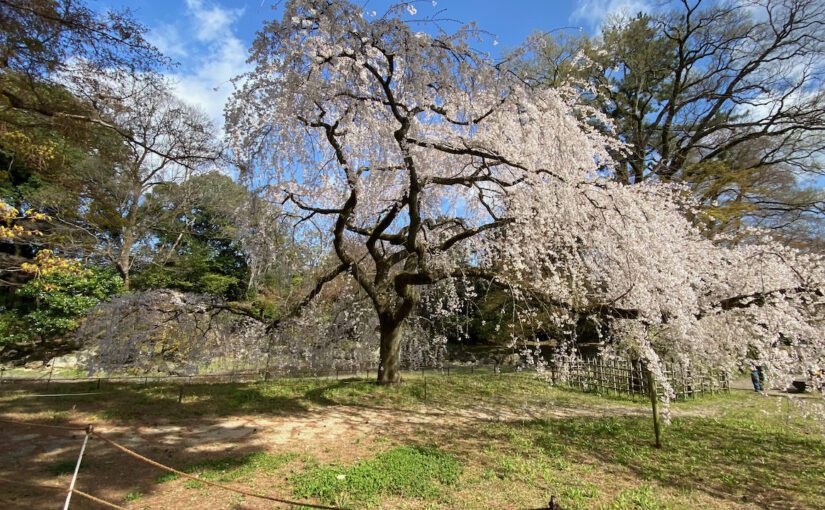
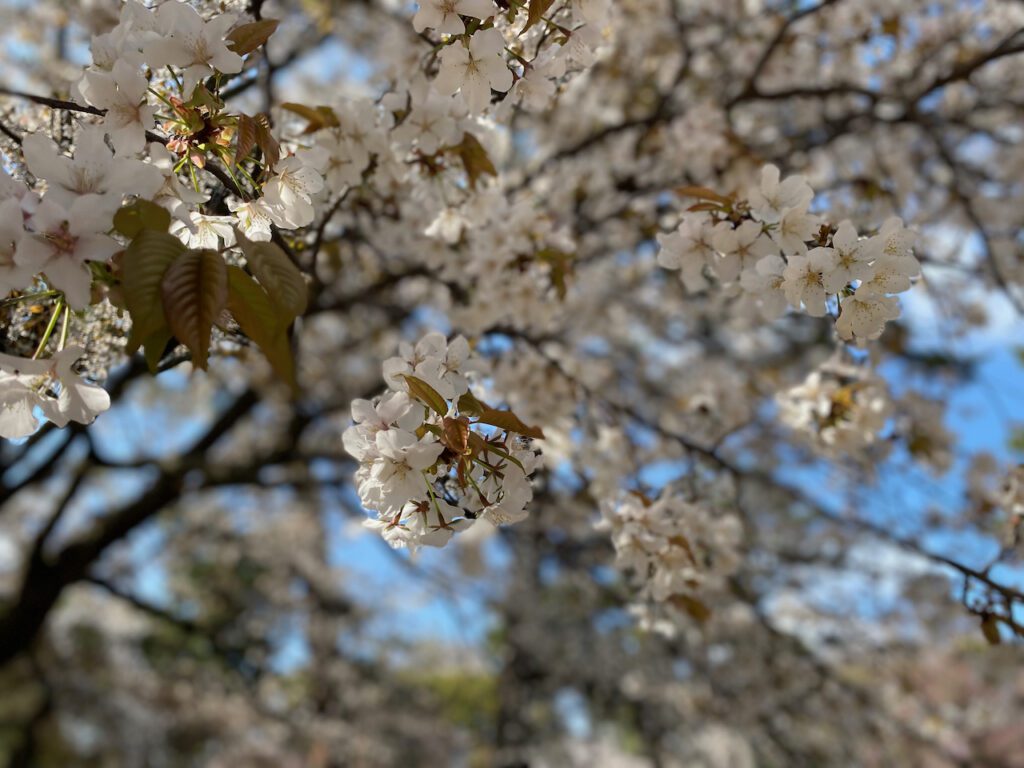
On the corner on which a mansion of the Konoe Family once stood, the cherry trees were in full bloom. No matter how dressed up we were, we were mere models to supplement the dominant, graceful, and impermanent beauty of nature. And we were all honored to be there together on that sunny spring afternoon.
After visiting Omiwa Shrine with my mother, Yuri-san and I parted from her and headed north along Yamanobe no Michi 山辺の道.
Stretching north and south on the foothills of Mt. Miwa, Yamanobe no Michi is known as one of the oldest roads in Japan. Both Kojiki 古事記 and Nihonshoki 日本書紀, Japan’s oldest written documents, mention this ancient road. Japan’s oldest road passing by Omiwa Shrine 大神神社, Japan’s oldest shrine… That pairs well.
While walking about 6 miles along this ancient road from Omiwa Shrine to Tenri Station, different emotions evoked.
Tranquility
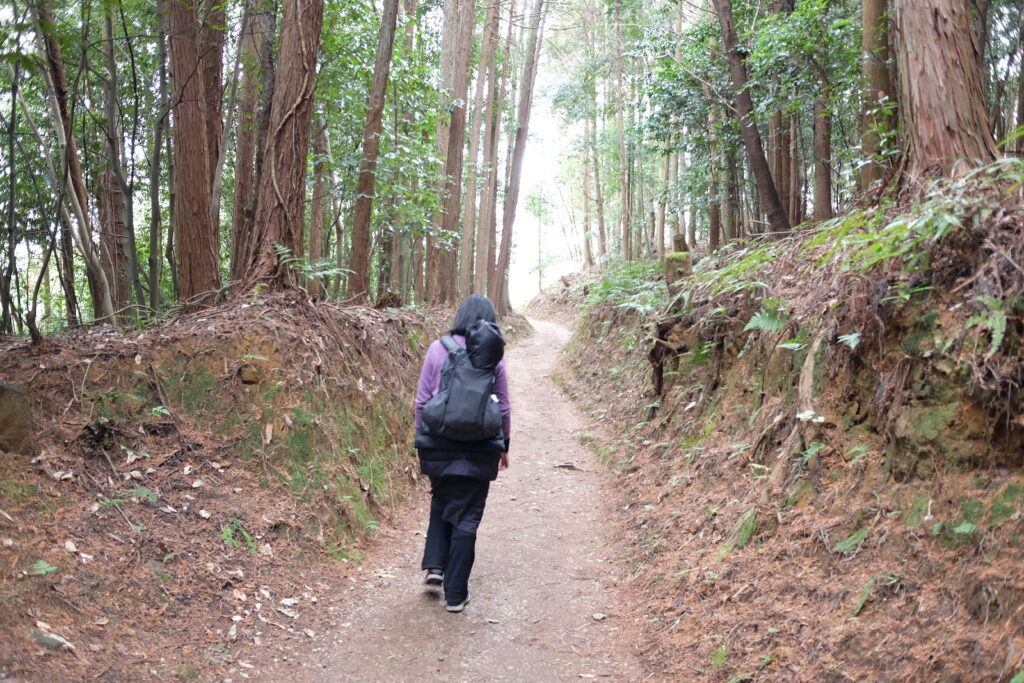
Yamanobe no michi – photo by Author
The path just off of Omiwa Jinja was unpaved, too narrow for a car to drive through. Tall trees stood on both sides for a while. Then the left side of the path became a little more open. But the path remained too narrow for a car. Yuri-san, who had walked this path before, led the way.
I was surprised by the quietness. What a difference it makes if there is no car passing by us! I heard birds chirping and tree branches swinging to the breeze. I heard a subtle sound my shoes made when making each step. These sounds were much gentler and more soothing than the noise of the car engine. In order to gain convenience, what have we lost from our daily lives?
Nostalgia
Stone monument of a poem by Kakinoueno Hitomaro – photo by Author
Here and there alongside the road were stone monuments with a poem and the name of the person who wrote it, engraved on the stone. Many poems were written by Kakinomotono Hitomaro柿本人麻呂. I found one written by Takechino Miko 高市皇子. Both names appear in Man’yōshū 万葉集, Japan’s oldest collection of Japanese poems.
After over 1400 years, I was stepping on the same road, looking at the same mountain, admiring the same beauty as these ancient poets did.
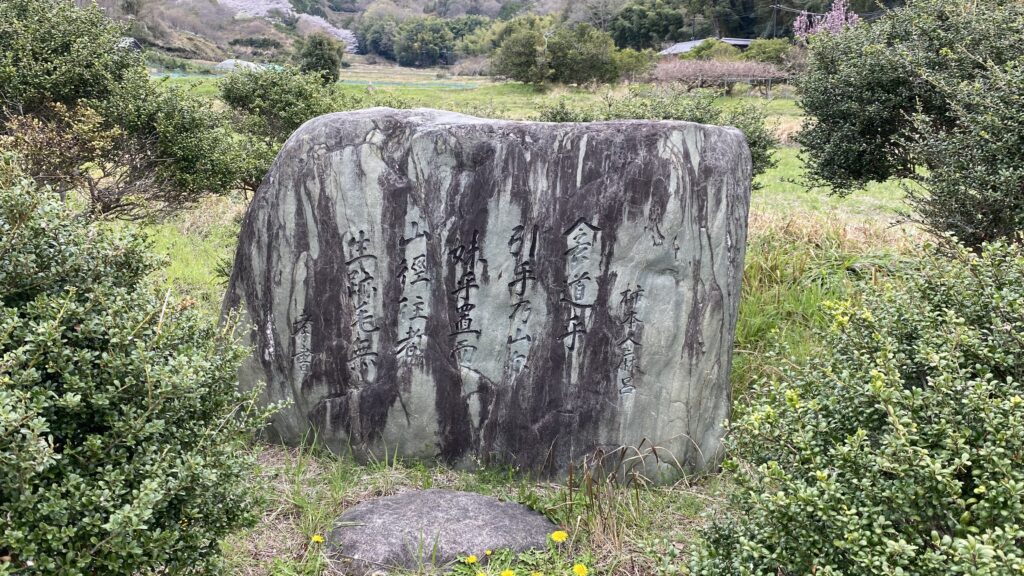
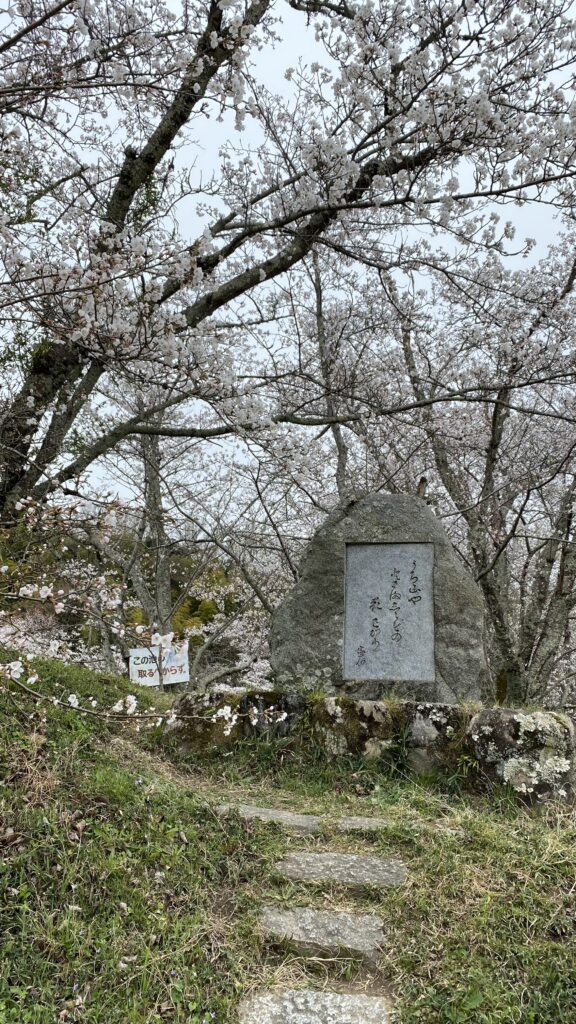
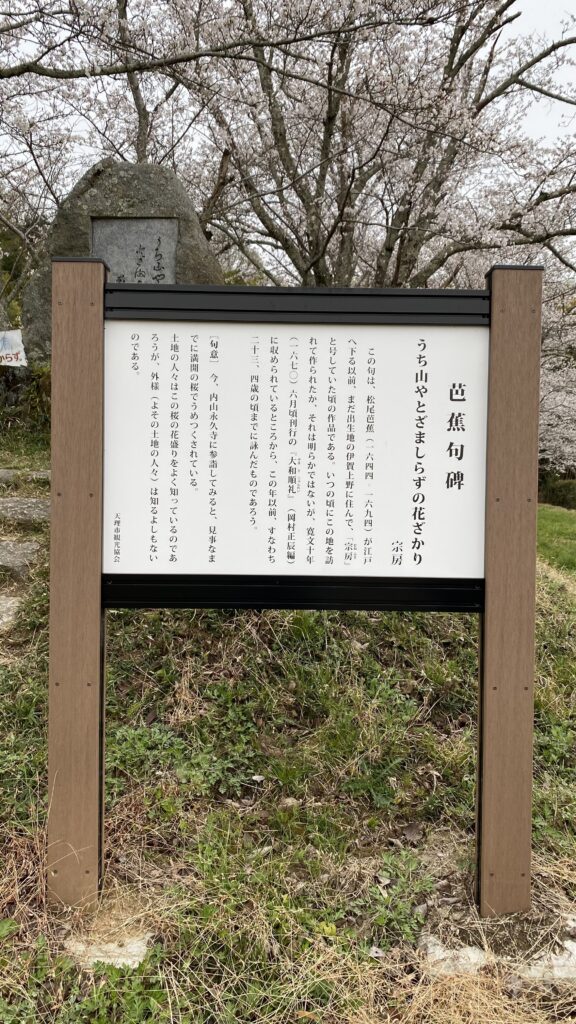
Monument of Matsuo Basho’s poem – photo by Author
Walking a little further, I found another stone monument with a poem. The name appeared as Munefusa 宗房, who is that? The wooden plaque that stood next to the stone monument stated that it was Matsuo Basho 松尾芭蕉 (1644 – 1694)’s another name when he was younger. Ah, even a master haiku poet in the 17th century paid a visit to honor their ancient predecessors.
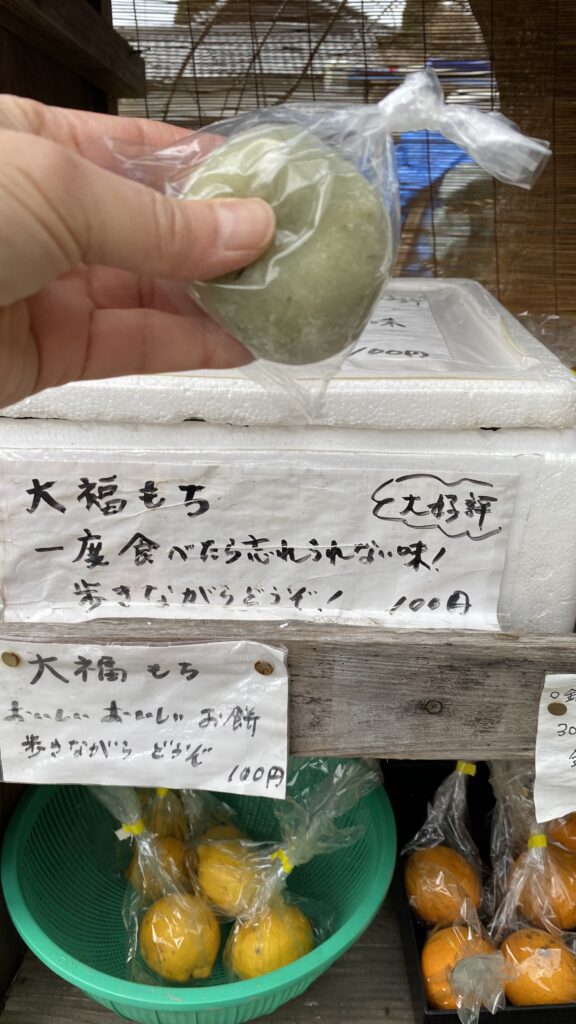
Honor system stand selling produce and sweets – photo by Author
Yamanobe no Michi mainly runs through the farmland. Although we didn’t see people around, we thanked their kind heart for leaving their produce and goodies they had made. A piece of mochi or rice cake for only 100 yen! Such an honor system seemed to remain the norm around here. Something that modern city life has long forgotten.
Dispair
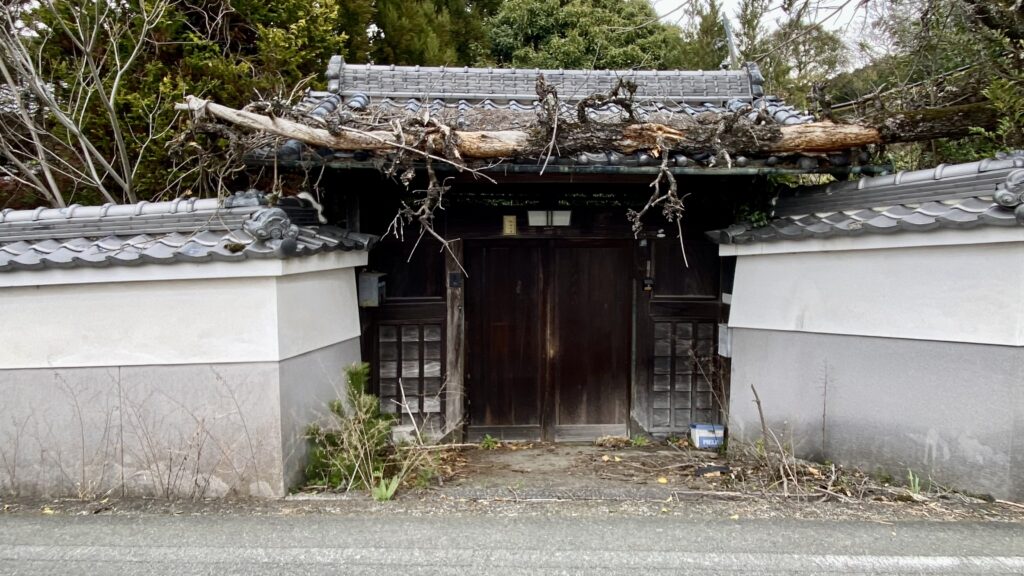
The front gate of an abandoned house – photo by Author
The houses along the road were mainly old-looking. Single-story farm houses surrounded by board fences. Houses with a large front yard, with branches of pine, persimmon, or cherry trees hanging over the fences. These houses resembled those that once stood in my parents’ hometown in Tokushima 50 years ago. Perhaps similar houses also used to fill the cities, but are rarely seen nowadays.
Looking closer, I noticed the front yard of many houses looked unattended. Windows were half open or broken. There was no sign of anybody living there anymore. I may be exaggerating, but at least a quarter of the houses in the neighborhood seemed abandoned.
When you are in the middle of Tokyo, you can’t believe that Japan is losing its people. The depopulation of Japan, however, looks so real when you visit a countryside like this.
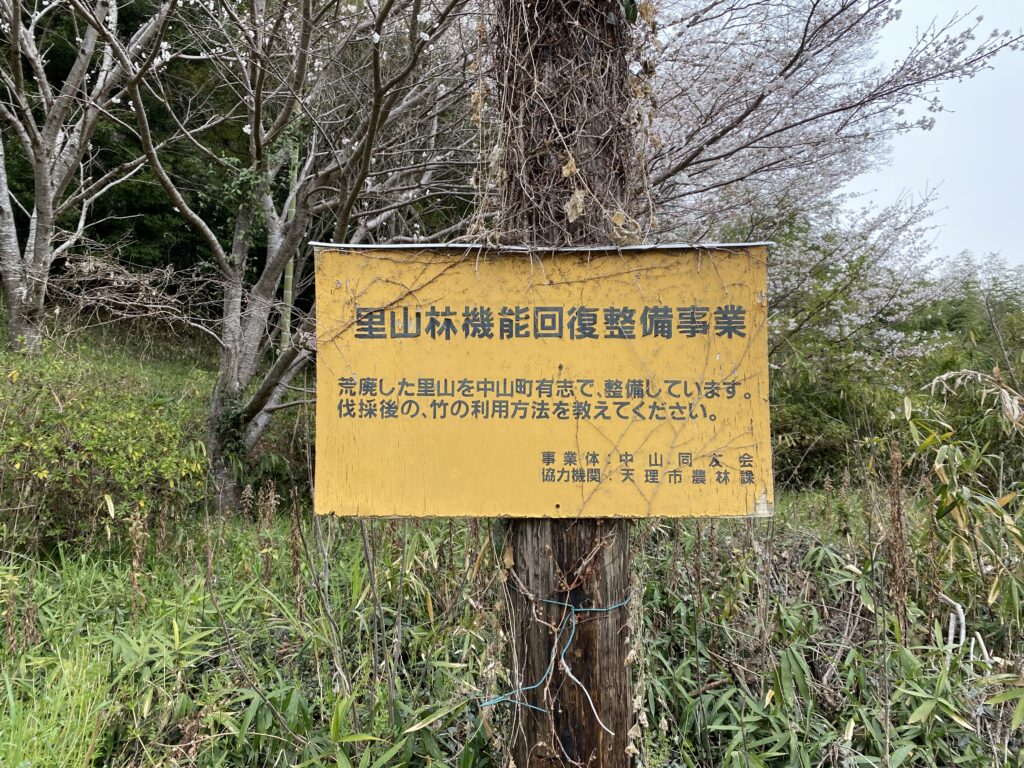
Signage on the tree – photo by Author
Along the road was also what used to be farmland, now abandoned. To whom does this land belong? To the family of that house, now nobody live?
The sign attached to a half-dead tree says, “Volunteers of Nakayama Town are maintaining the abandoned Satoyama 里山 woodland. Please tell us any idea how to make use of the bamboo trees that are cut down to clear the land.”
“Satoyama are usually located in the rural areas of Japan where agriculture, forestry and fisheries are the main industries. They are known as socio ecological production landscapes and seascapes, SEPLS in short. They consist of production ecosystems like secondary forests, farmlands, irrigation ponds, and grasslands as well as human settlements.
They are created by human activities to produce food and fuels, but eventually become irreplaceable habitats for a range of fauna and flora. Moreover, Satoyama serve multidimensional functions, in a broader context, including national land conservation and headwater conservation, while providing places for healing or leisure and inspiring the creation of art and literature.
Those ecosystem services from Satoyama, including necessary resources, safety and comfort, are co-created by both nature and continued human interventions.
Therefore, it is crucial to sonserve their biodiversity as they are inseparable from human activities.”
In abandoned Satoyama, invasive bamboo trees become the threat to its biodiversity. Hats off to the volunteers of Nakayama Town for their laborious efforts to eliminate the bamboo trees. Have they found a good solution to utilize the bamboo?
Hope
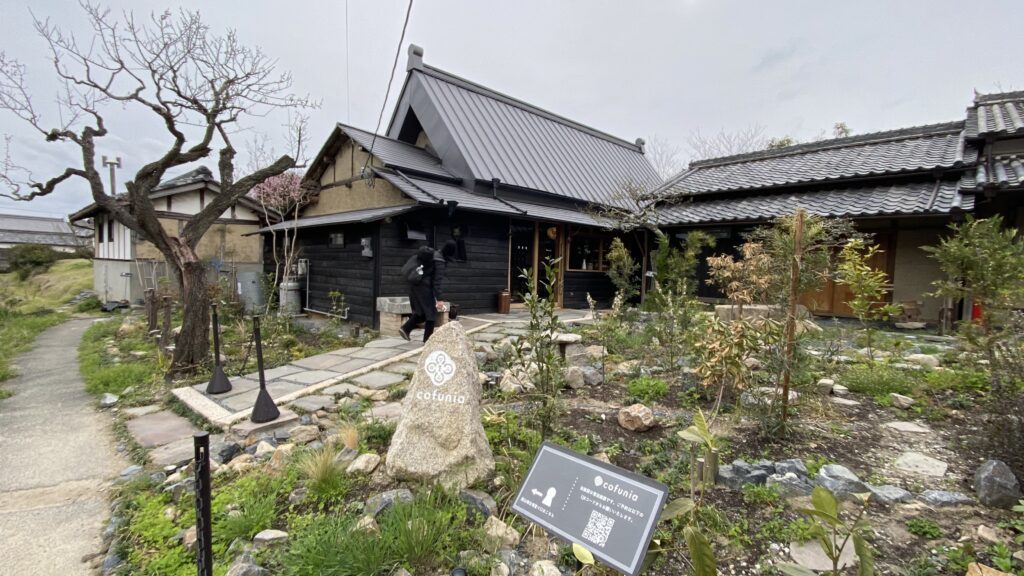
Cofnia – photo by Author
We stopped by at what looked like a café. Unfortunately it was not open, but the shopkeeper came out and explained about the building.
A young woman acquired an old house by the road that had been unoccupied for more than ten years. She raised over 5 mil. yen through and by collaborating with various organizations, resurrected the abandoned house as an inn, called Cofunia.
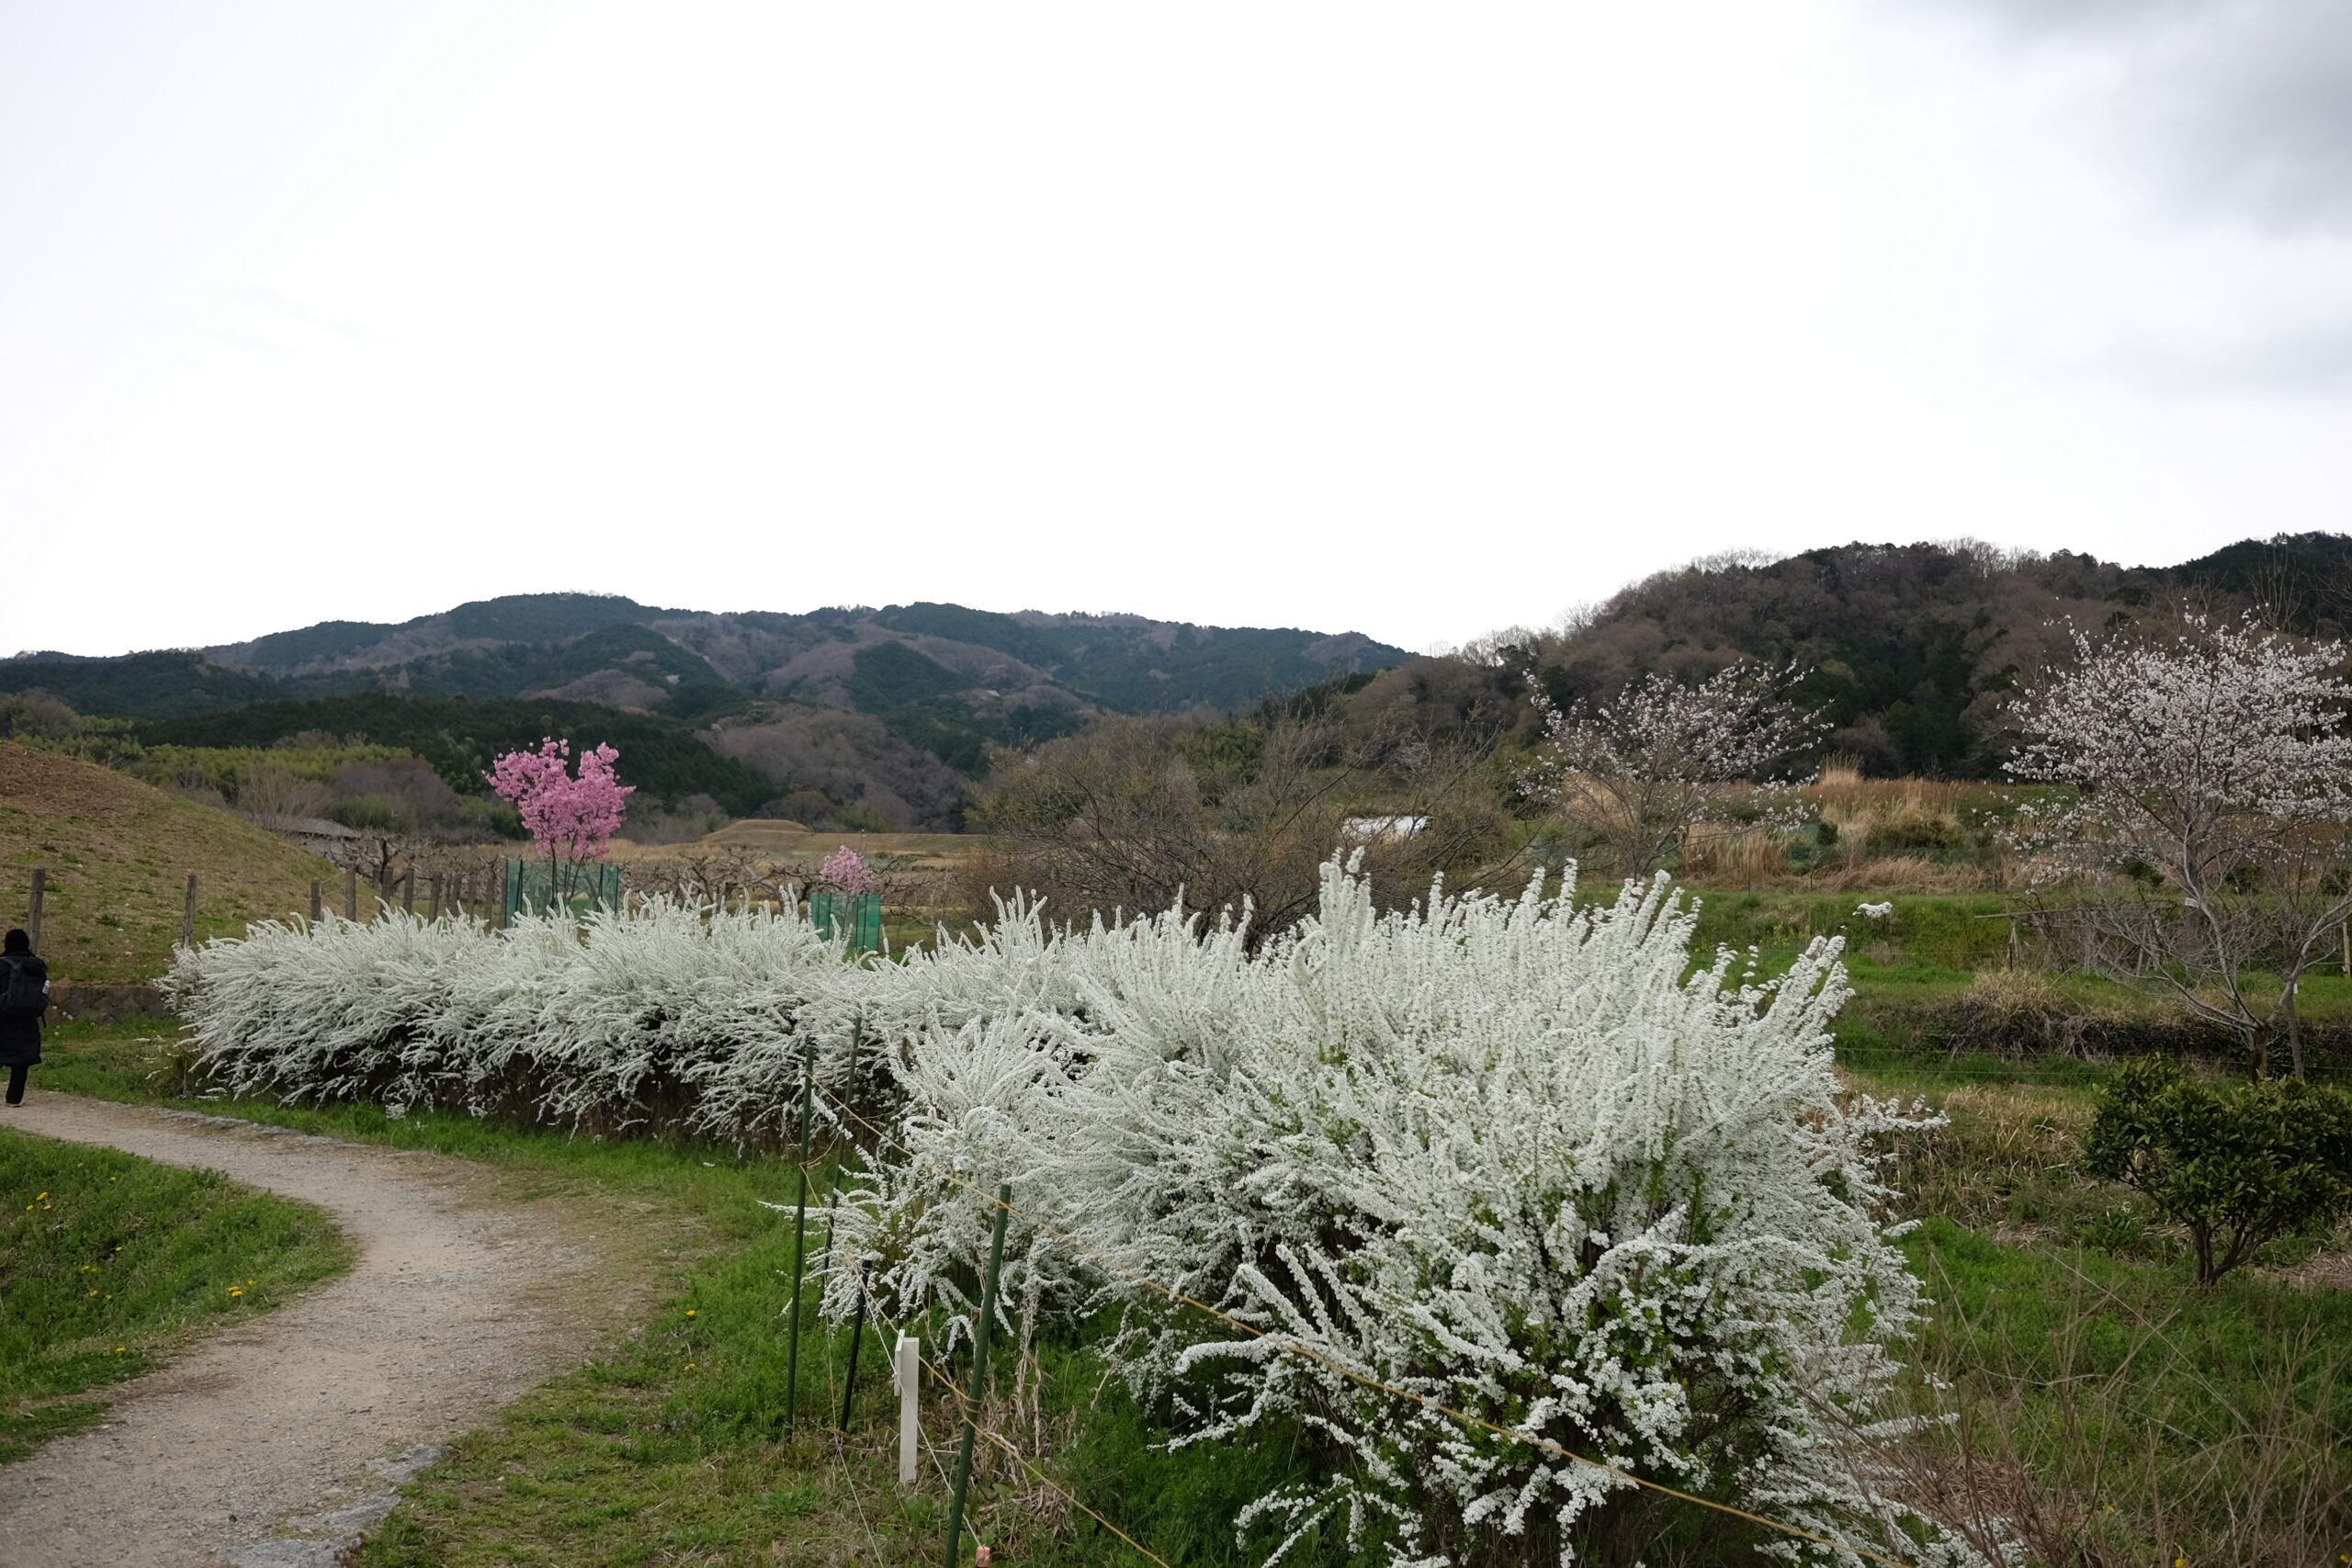
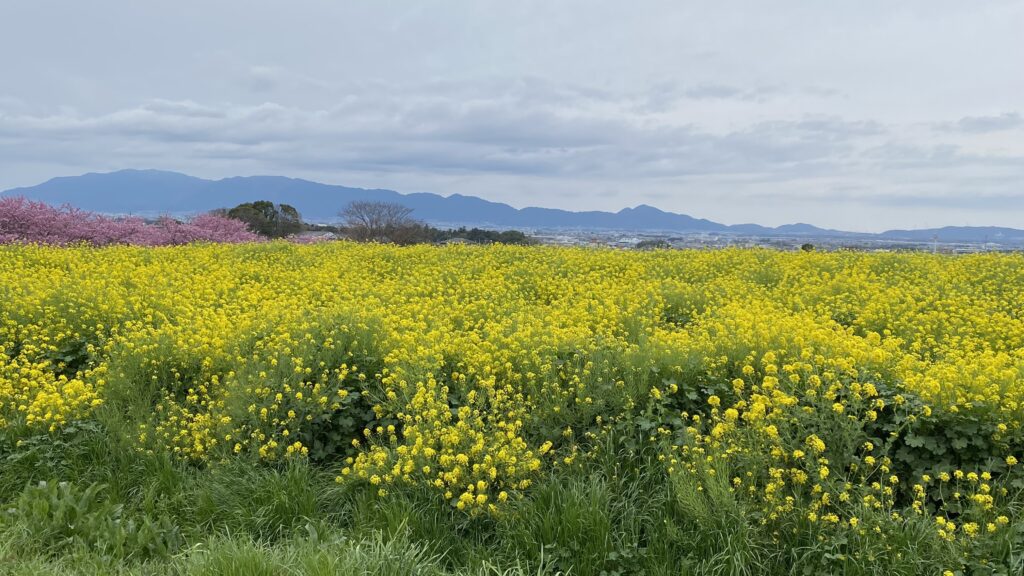
Rapeseed flowers – photo by Author
We came across a vast flower bed, full of bright yellow rapeseed flowers. An old man just came out of the vegetable field on the opposite side of the road. “Do you also grow these flowers?” I asked him.
“No,” he said. “This land belongs to Tenri High School.”
“When the school bought this farmland, their initial plan was to convert it to an athletic field. But the land is sloped, as you can see. If the land were flattened, the neighboring fields would become unstable. So the school changed its plan. They decided to keep the farmland and have their students maintain it.”
“The students grow vegetables on lower two-thirds of the land. The top one-third, where it stretches along the Yamanobe no Michi, is used as a flower garden. Here Seasonal flowers bloom all year round, so that whoever hikes on this road can enjoy the beauty of the flowers.”
The unique inn and the beautiful flower bed… Both are initiated by young people in Japan. I felt a sliver of hope.
People usually call Omiwa Shrine (大神神社)Miwa-san, as if it were their close friend. It is said to be the oldest shrine in Japan.
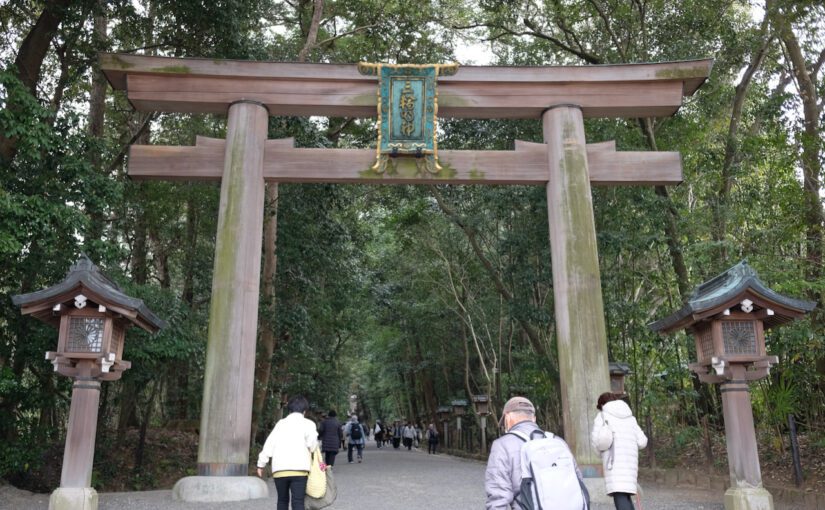
My mother is proud to have been visiting Miwa-san every first day of the month in the last 20 years or so. Rain or shine, she never misses leaving home before 9 in the morning, taking trains and a shuttle bus for a little over an hour, and passing through this torii gate once a month. For her, who easily gets bored with everything else, it is an amazing accomplishment. Do you see a little figure, the third from the left, carrying a large black backpack in this photo? That’s my mother.
Once in a while, I happen to be in Japan on the first day of the month. This spring was such a lucky occasion. I was staying in Kyoto for a few days, so was my friend Yuri-san. She also lives in Seattle, but happened to be visiting her family in Kyoto. Let’s get together in Kyoto and go somewhere on April 1st. Oh! April 1st! How about going to Miwa-san with my mother? Was my suggestion.
Yuri-san agreed. “How auspicious to visit a shrine that worships snakes in the year of the snake!” Thanks to her, I learned something new. She also suggested that we hike the Yamanobe no Michi 山辺の道after visiting Miwa-san. I agreed.
Yuri-san and I met at the entrance to the Kintetsu line of Kyoto Station. The JR line side, especially the entrance to the Shinkansen (bullet train), was jam-packed mainly with foreign tourists. Luckily, the Kintetsu line side was far less crowded. There were hardly any people in the limited express train that we got in, leaving Kyoto Station at 9:10 am, bound for Kashikojima.
We changed trains at Yamato Saidaiji and got off the train at Sakurai Station. My mother, coming from Osaka, also on the Kintetsu line, was waiting for us at the exit. A little relief that three of us got together with no hickup.
On foot, it takes at least 30 minutes from Sakurai Station to Miwa-san. On the first day of every month, however, a shuttle bus runs between Sakurai Station and the foot of Miwa-san to accommodate the monthly regulars like my mother. Yuri-san and I piggybacked on that service, and the three of us got on the shuttle bus.
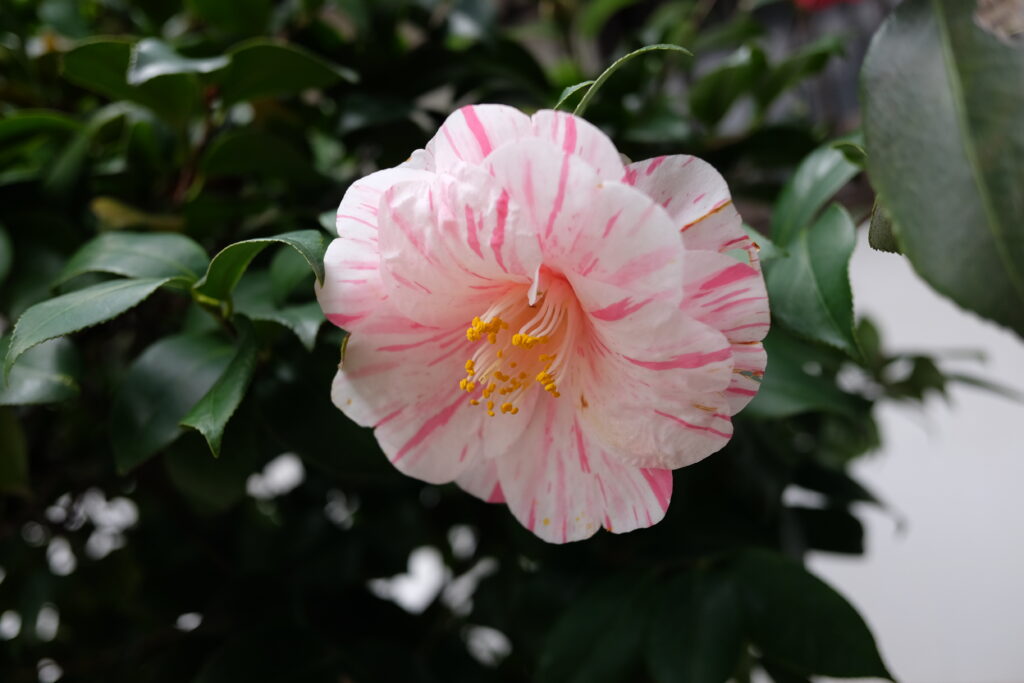
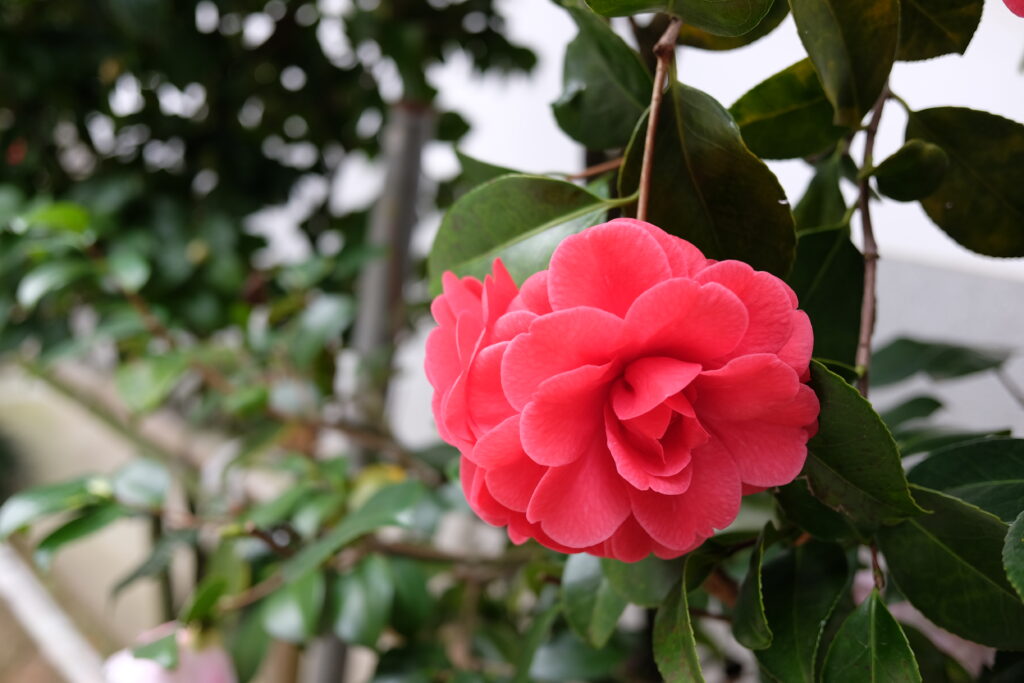
The bus went through a narrow road and arrived at Miwa Ebisu Shrine, a tiny sub-shrine of Miwa-san, where everyone got off. Cute camelia flowers were blooming on the hedges to welcome us.
Camelia flowers – photo by Author
Along the pathway from this sub-shrine to the main gate of Miwa-san, many stalls were lined up, selling local produce and freshly cooked goodies. Yuri-san and I were tempted to stop at each stall. Knowing the way around and also on her mission to complete her route before noon, my motherl led the way. She didn’t give us little time to meander and look around.
We arrived at the large torii gate.
My mother bowed down deeply in front of the gate. “You are not supposed to go through the gate in the middle. Stay on the right or left side when you go through under it.” If I had asked her why, she would have replied, “Because I was told to do so.” To her, it was a good enough reason. I simply followed her.
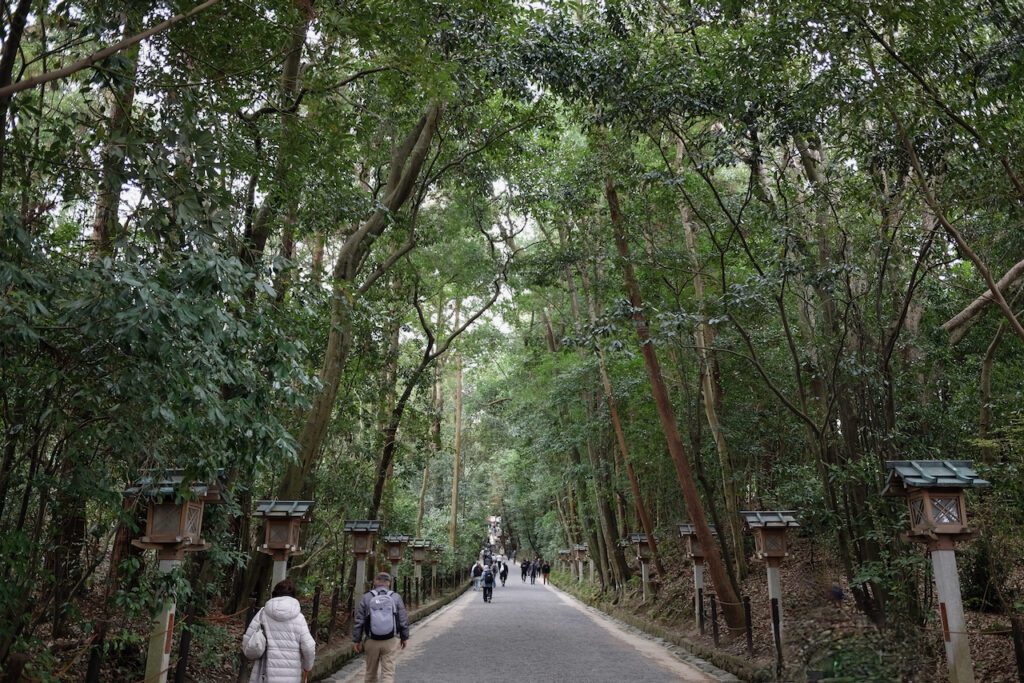
Sando参道 of Miwa-san – photo by Author
Beyond the torii gate was a long, straight gravel pathway, sandwiched with rows of tall trees and lanterns. Each lantern had the name of the people or the company that donated it. More people were walking toward the main shrine than walking back this way. It was still in the morning.
Even to a soul that doesn’t believe in any god, some sense of awe, humility, or purification should come up by walking along under this lush green. Not a single trash on the gravel road. Defused by he leaves and branches, the sunlight, however harsh it may be, softens by the time it reaches you. The air is crisp, and you notice you are breathing deeper than usual. It’s worth visiting any big shrine only to experience this magical feeling.
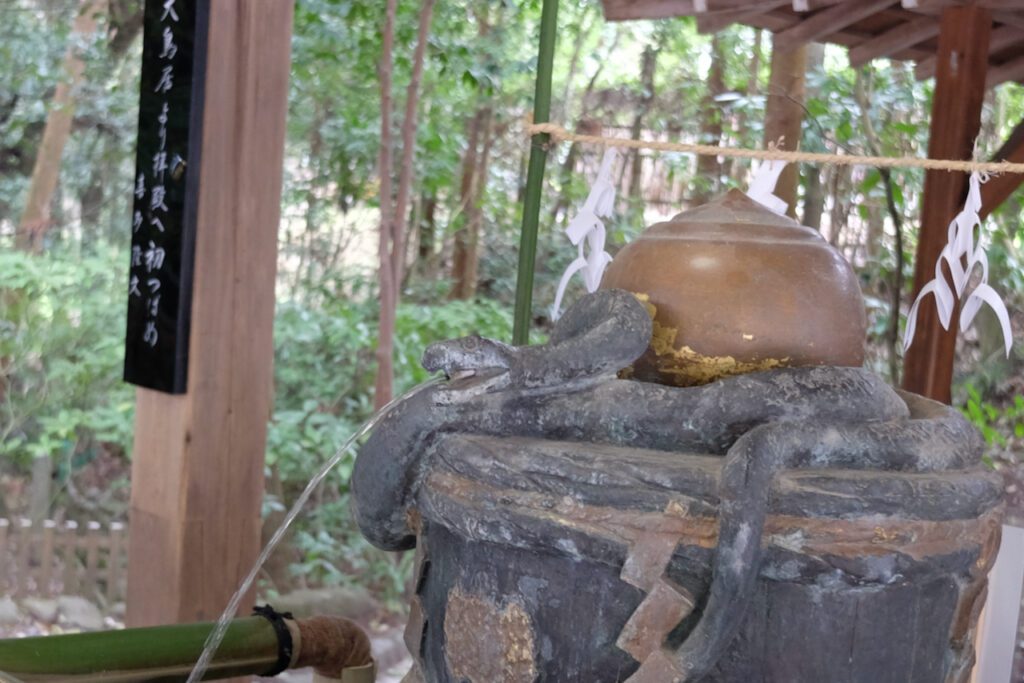
Snake shaped faucet – photo by Author
It is customary to clean your hands and mouth with water before visiting the main shrine. No exception here at Miwa-san. What is unique is that the shape of the faucet is a snake. What is the relationship between Miwa-san and a snake?
Miwa-san enshrines the god Omononushi no Okami 大物主大神. In both Kojiki古事記 and Nihon Shoki日本書紀, the two oldest books of Japanese history & mythology, a snake is depicted as one of this god’s incarnations.
According to Miwa-san’s official website:
“During the reign of Emperor Sujin, there was a princess named Yamatototobimomosohime who served as a shrine maiden, conveying the will of the gods and helping the emperor with his affairs.
This princess was to become the wife of Omononushi no Okami, but he would only visit her at night. She asked him if she could see his face. Okami thought this was a reasonable request and granted her request. He told her that he was in a box containing her comb, but never to be surprised by opening it.
Suspicious, the princess opened the box the next morning to find a small snake inside, which made her scream in shock. The god instantly transformed from a snake into a beautiful man and reproached her for breaking her promise. He then flew into the sky and returned to Mount Miwa, saying she would never see him again. The princess then regretted her actions and stabbed herself in the vagina with chopsticks, losing her life. For this reason, Momosohime’s grave came to be known as Hashihaka (Hashihaka Tomb). This sad story about Hashihaka, located at the foot of Mount Miwa, is recorded in the Nihon Shoki.”
A rather sad and scary story.
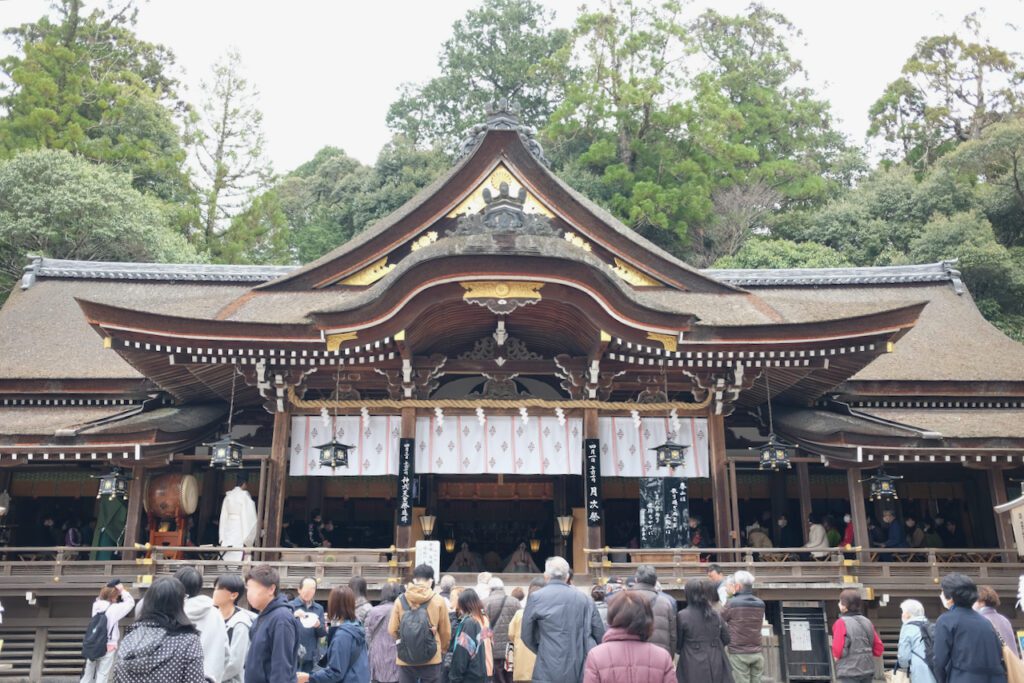
The Haiden of Miwa-san – photo by Author
On top of the steps is the haiden 拝殿, the worship hall. The monthly ritual had already started when we got there. Gagaku music was playing, with many people listening to it both inside and outside the building.
Another uniqueness of Miwa-san is that there is no honden 本殿, the main hall, that would normally exist beyond the haiden.
Usually, a certain object of worship is housed in the honden. For Miwa-san, however, the object of worship is the mountain itself. We bow down in front of the haiden to pay respect to this holy mountain, Mount Miwa, which stands behind the haiden.
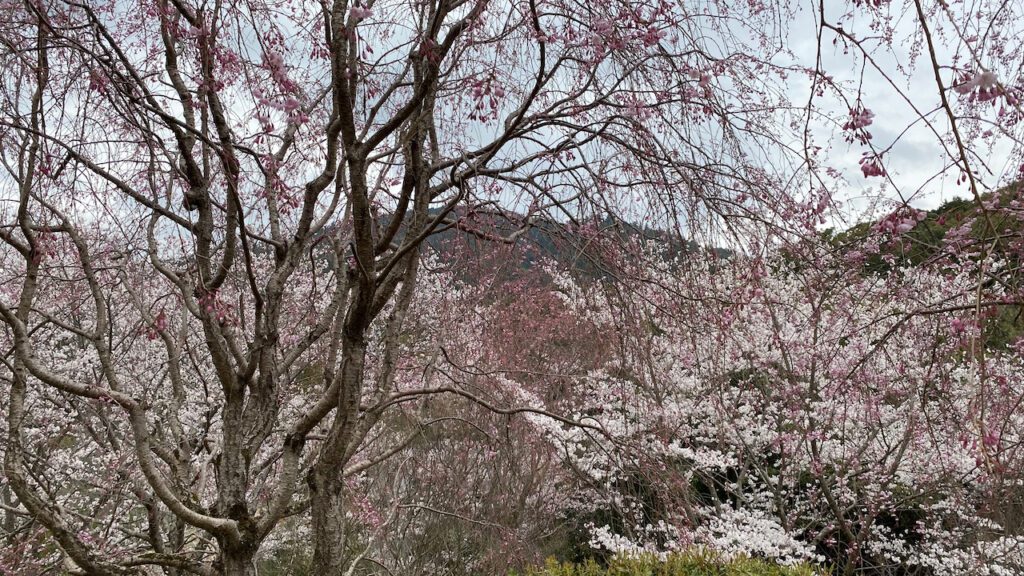
Mount Miwa from the observation deck – photo by Author
Mount Miwa is not visible from the front of the haiden. If you walk up to the observation deck, you can see it through the tree branches. On the day I visited, the cherry blossoms were in full bloom, decorating the graceful figure of the holy mountain.
One of my mother’s never-to-miss spots in Miwa-san is Kusuriido 薬井戸, where you can get holy water that would cure any illness. In her backpack she had six empty half-a-litter PET bottles. She would fill all the bottles with this holy water, carry them back to Osaka, and give three to her niece and keep three for herself. Is it this holy water, or the fact that she carries the water back home every month, that keeps her healthy? In either case, I have no complaints.
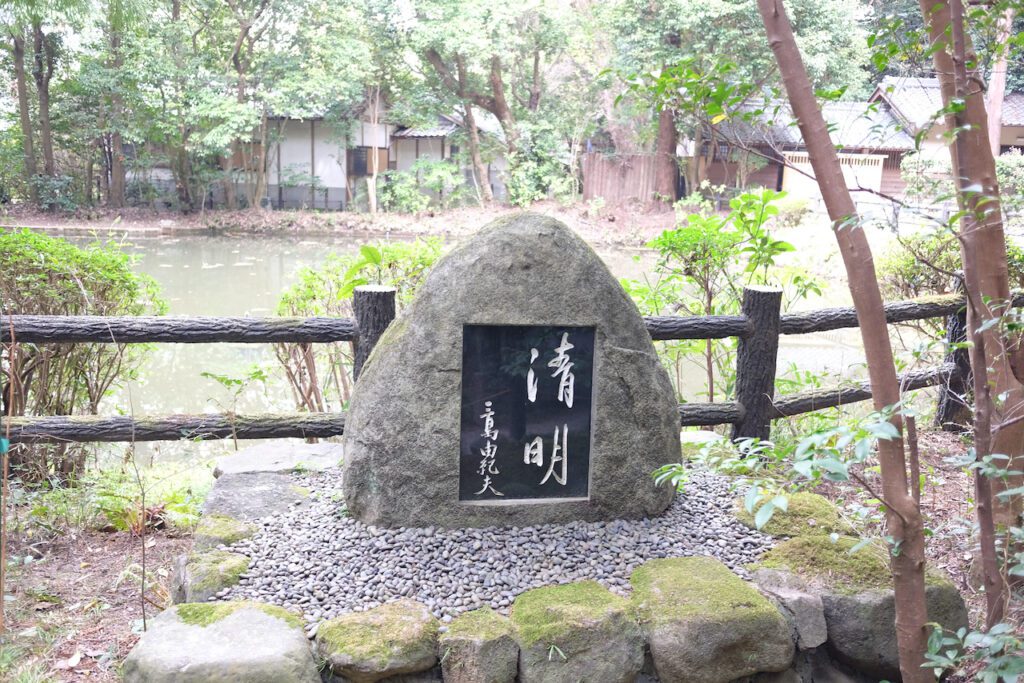
While my mother went rushing to the well, I was walking at my own pace along the passage leading to the well. On the left side of the passage, there was a pond, and I found a rather new stone monument. Intreagued, I went up closer.
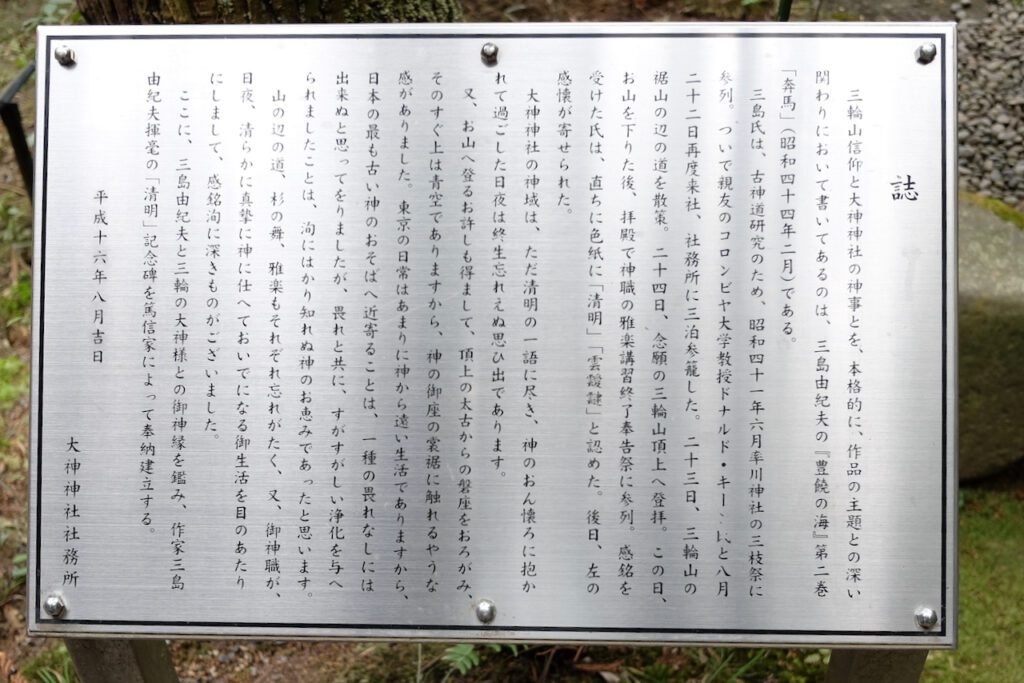
Stone monument of Mishiya Yukio’s handwriing – photo of Author
清明(seimei)- 三島由紀夫 (Mishima Yukio)… That famous author Mishima Yukio? Why is it here?
Another plaque by the monument explained why.
Plaque – photo by Author
(My translation)
“In his novel Runaway Horses (奔馬, Honba), the second in his Sea of Fertility tetralogy. Mishima Yukio depicted the faith in holy Mount Miwa and the religious rituals of Omiwa Shrine as the novel’s central theme.
To study ancient Shintoism, Mishima attended the Saikusa Festival of Isagawa Shrine (Omiwa Shrine’s sub shrine) in June, 1966. Mishima visited Omiwa Shrine again with Donald Keene on August 22, and stayed here for three nights. On the 23rd, he strolled around Yamanobe no Michi at the foot of Mount Miwa. On the 24th, he climbed up the peak of Mount Miwa. After coming down from the peak, he attended the Gagaku music ritual held in the haiden. Deeply impressed by the experience, Mishima wrote 晴明 (seimei=clear and bright) and 雲靉靆 (unaitai=cloudy and unclear) on the paper.
Later Mishima wrote to Omiwa Shrine.
‘The sacred area of Omiwa Shrine was nothing but 晴明. The days I spent being embraced by the god are an unforgettable experience in my life.
I was honored to be allowed to climb up Mt. Miwa. Looking down at the sacred stone at the peak, and looking up at the blue sky, I felt as if I was touching the base of the god’s seat.
My everyday life in Tokyo is so distant from any god, I never thought I could ever come closer to Japan’s oldest god without feeling awe. Not only awed, but I also felt invigorated and purified. What a blessing from the god beyond my imagination!
Yamanobe no Michi, graceful dancing, and Gagaku music were all worth remembering. Above all, I was deeply impressed by the priests’ relentless daily devotion day and night to the god.’
With the support of a generous donor, we erect the plaque of Mr. Mishima’s handwriting to cement the deep bond between him and Omiwa Shrine.
Heisei 16th Year (2004) August “
Is this plaque an indication that I have to read Sea of Fertility?
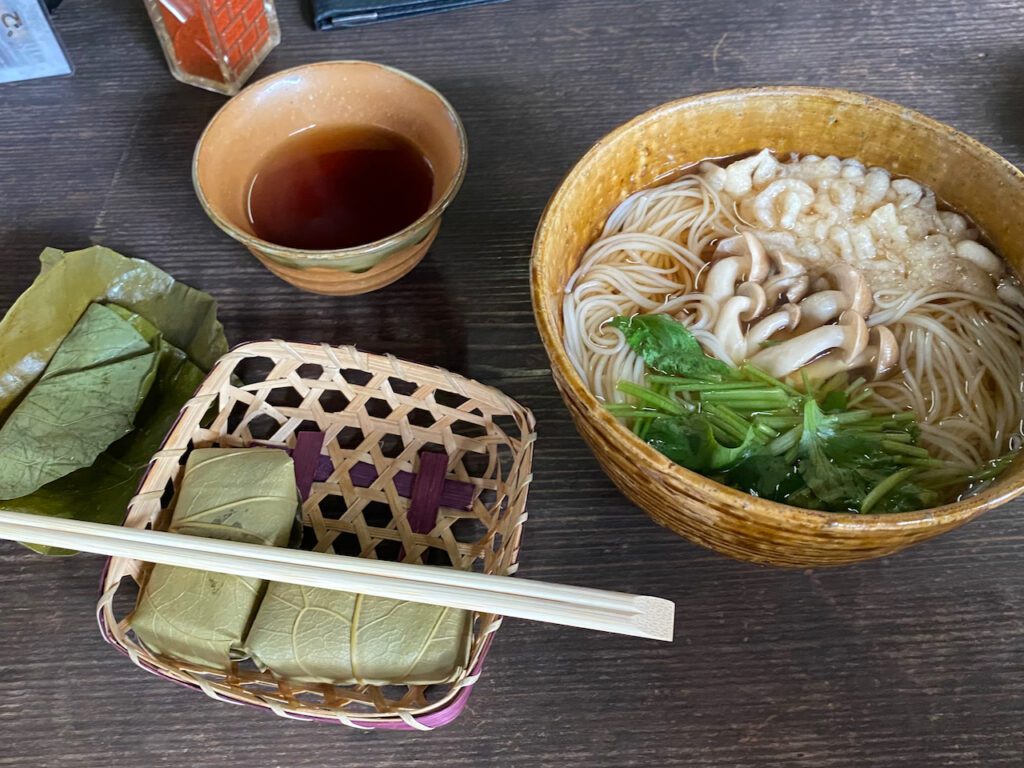
Miwa somen and Kakinoha sushi – photo by Author
My mother completed her monthly routine at Miwa-san. Yuri-san and I had enough morning exercise. Time for lunch!
Morisho converted their front yard of the old farm house into an outdoor restaurant. We ordered a lunch set, which contains the two local specialties: Somen and Kakinoha sushi.
Somen is very thin flour noodle. Morisho serves somen in thin dashi broth. Kakinoha sushi is wrapped around with a persimmon leaf. Thanks to the antimicrobial effect of the persimmon, sushi lasts for a couple of days.
After lunch, Yuri-san and I parted from my mother who went back to Osaka. Off to Yamanobeno michi… I never imagined it would be that long of a hike.
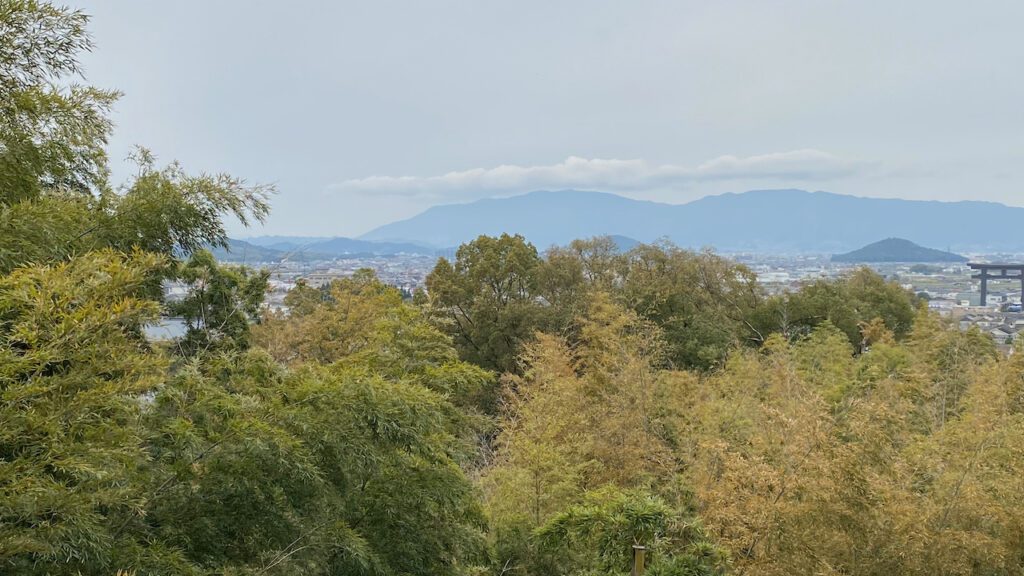
Overlooking Yamato Sanzan from Miwa-san’s observation deck – photo by Author