In the last several years, I have visited the two sisters whenever I go back to Kyoto. Rakufulin sisters, as I call them, produce beautiful obis. Each of their works of art has a story behind its design. As I got to know them better, I became more and more intrigued in their stories.
Each time we met, our phrase of saying good-by was always “let’s go out together in kimono nest time.” After repeating it so many times, we started to wonder if we were using this phrase in vain. But this spring, we finally made it a true statement!
The weather was perfect. Not too cold, not too hot. Above all, it was not raining. And the timing was perfect! According to the cherry blossom forecast, the cherry trees in Kyoto Imperial Palace were 70 – 80% in full bloom. We can’t afford to miss this opportunity! The night before my visit, I texted Reiko-san, the older sister, that I’m coming in kimono. So will she and Aiko-san, the younger sister, was her reply.
The next morning, I put on my new obi with my mother’s Oshima Tsumugi kimono and took a bus from Osaka to Kyoto. The bus was not crowded, so I lounged in the seat comfortably for about 80 minutes.
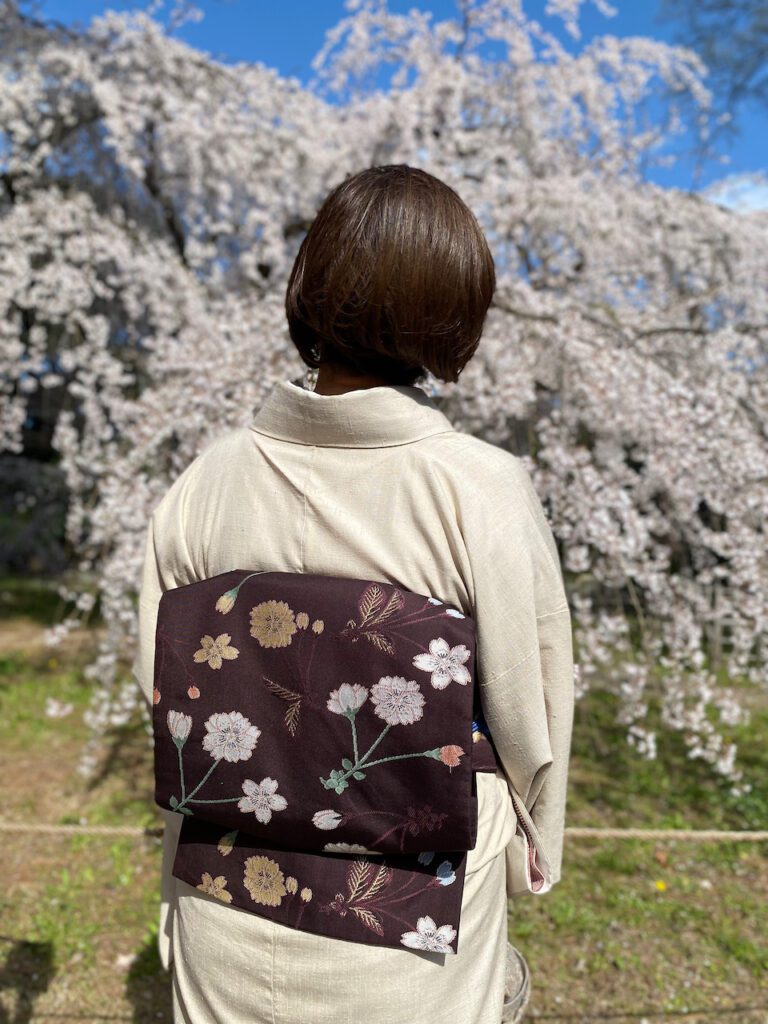
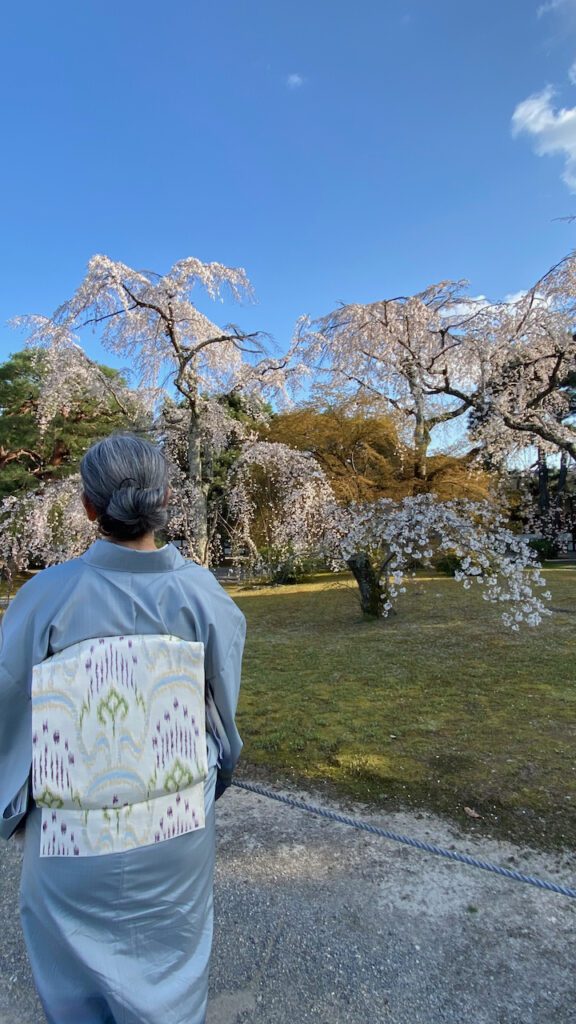
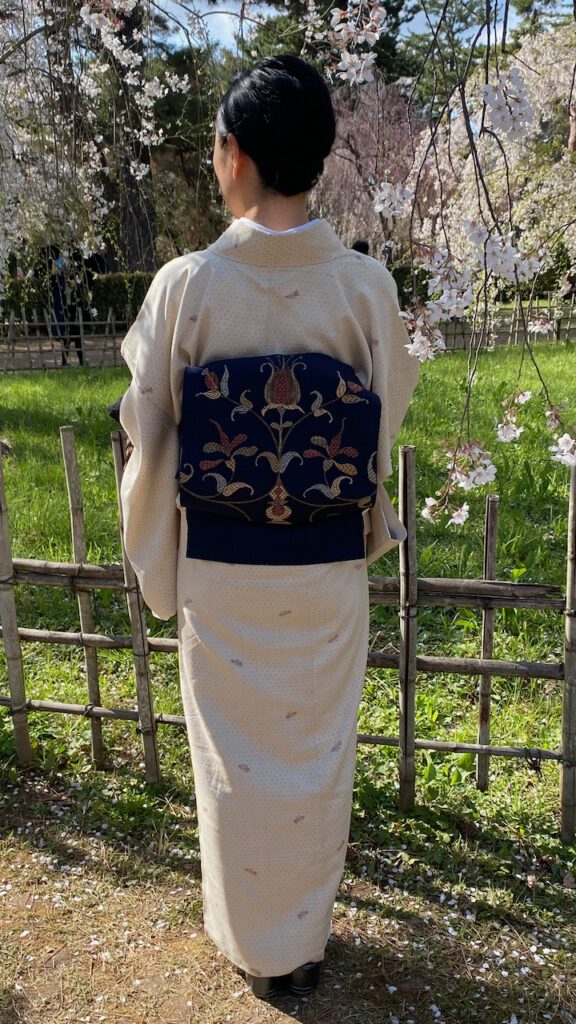
When I arrived at their office, both Reiko-san and Aiko-san welcomed me in their kimono. Reiko-san was wearing her mother’s old obi with a cherry blossoms design, and Aiko-san was wearing one designed by her grandfather, the founder of Rakufulin. After enjoying the seasonal bento box lunch, we walked to the north side of the Kyoto Imperial Palace together.
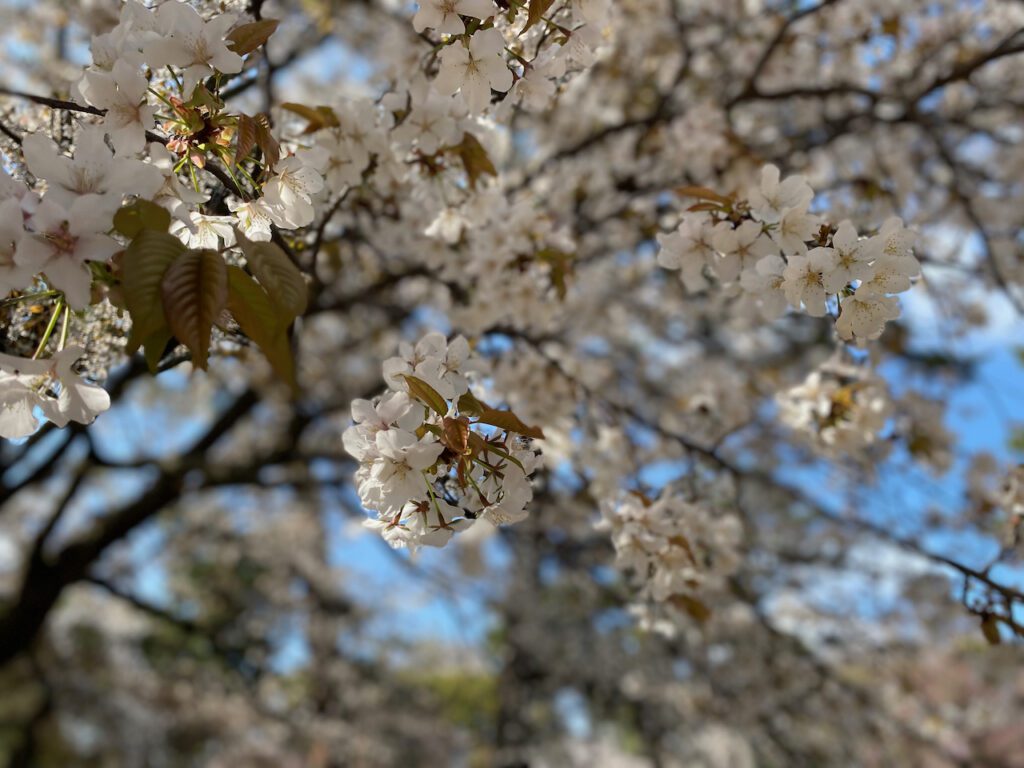
The design of Reiko-san’s obi has different kinds of cherry blossoms. Some are the kind that bloom early in the spring. Also Somei Yoshino, which blooms in mid-spring. Then blossoms of Yaezakura, which bloom later. The design gives Reiko-san an opportunity to wear this obi throughout the spring.
My new obi is designed by Reiko-san. She got an inspiration from the original pattern, called Taishi Kanto, of an ancient fabric housed in Horyuji Temple in Nara. The fabric is believed to have been used by Shotoku Taishi (574 – 622). With her choice of colors and the rhythm of the line, Reiko-san has resurrected the 1400-year-old design pattern to suit the obi of the 21st century.
Aiko-san’s obi is one of Rakufulin’s signature designs. Her grandfather traveled all around the world and collected textiles. Inspired by exotic patterns, he created one-of-a-kind designs fitted to obi.
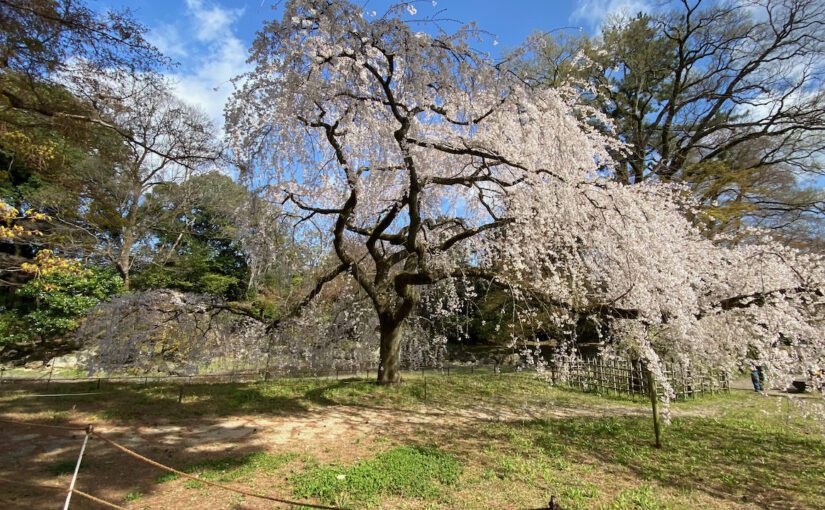
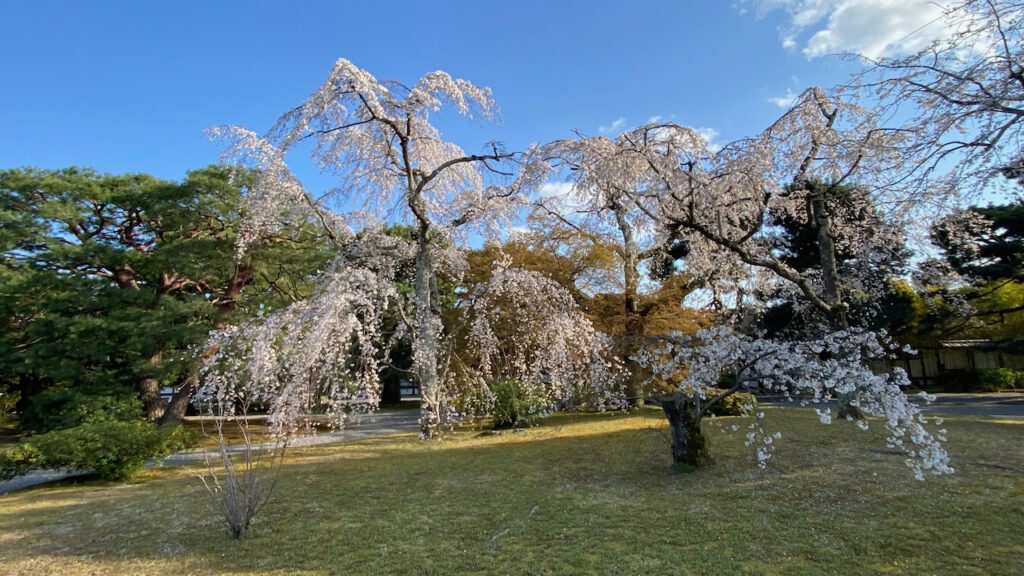
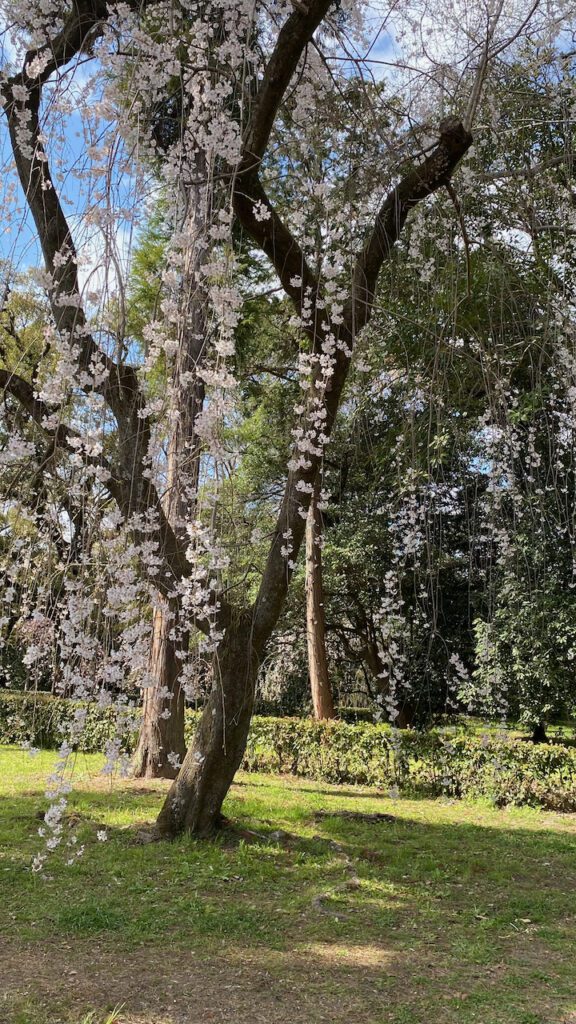
On the corner on which a mansion of the Konoe Family once stood, the cherry trees were in full bloom. No matter how dressed up we were, we were mere models to supplement the dominant, graceful, and impermanent beauty of nature. And we were all honored to be there together on that sunny spring afternoon.
After visiting Omiwa Shrine with my mother, Yuri-san and I parted from her and headed north along Yamanobe no Michi 山辺の道.
Stretching north and south on the foothills of Mt. Miwa, Yamanobe no Michi is known as one of the oldest roads in Japan. Both Kojiki 古事記 and Nihonshoki 日本書紀, Japan’s oldest written documents, mention this ancient road. Japan’s oldest road passing by Omiwa Shrine 大神神社, Japan’s oldest shrine… That pairs well.
While walking about 6 miles along this ancient road from Omiwa Shrine to Tenri Station, different emotions evoked.
Tranquility
Yamanobe no michi – photo by Author
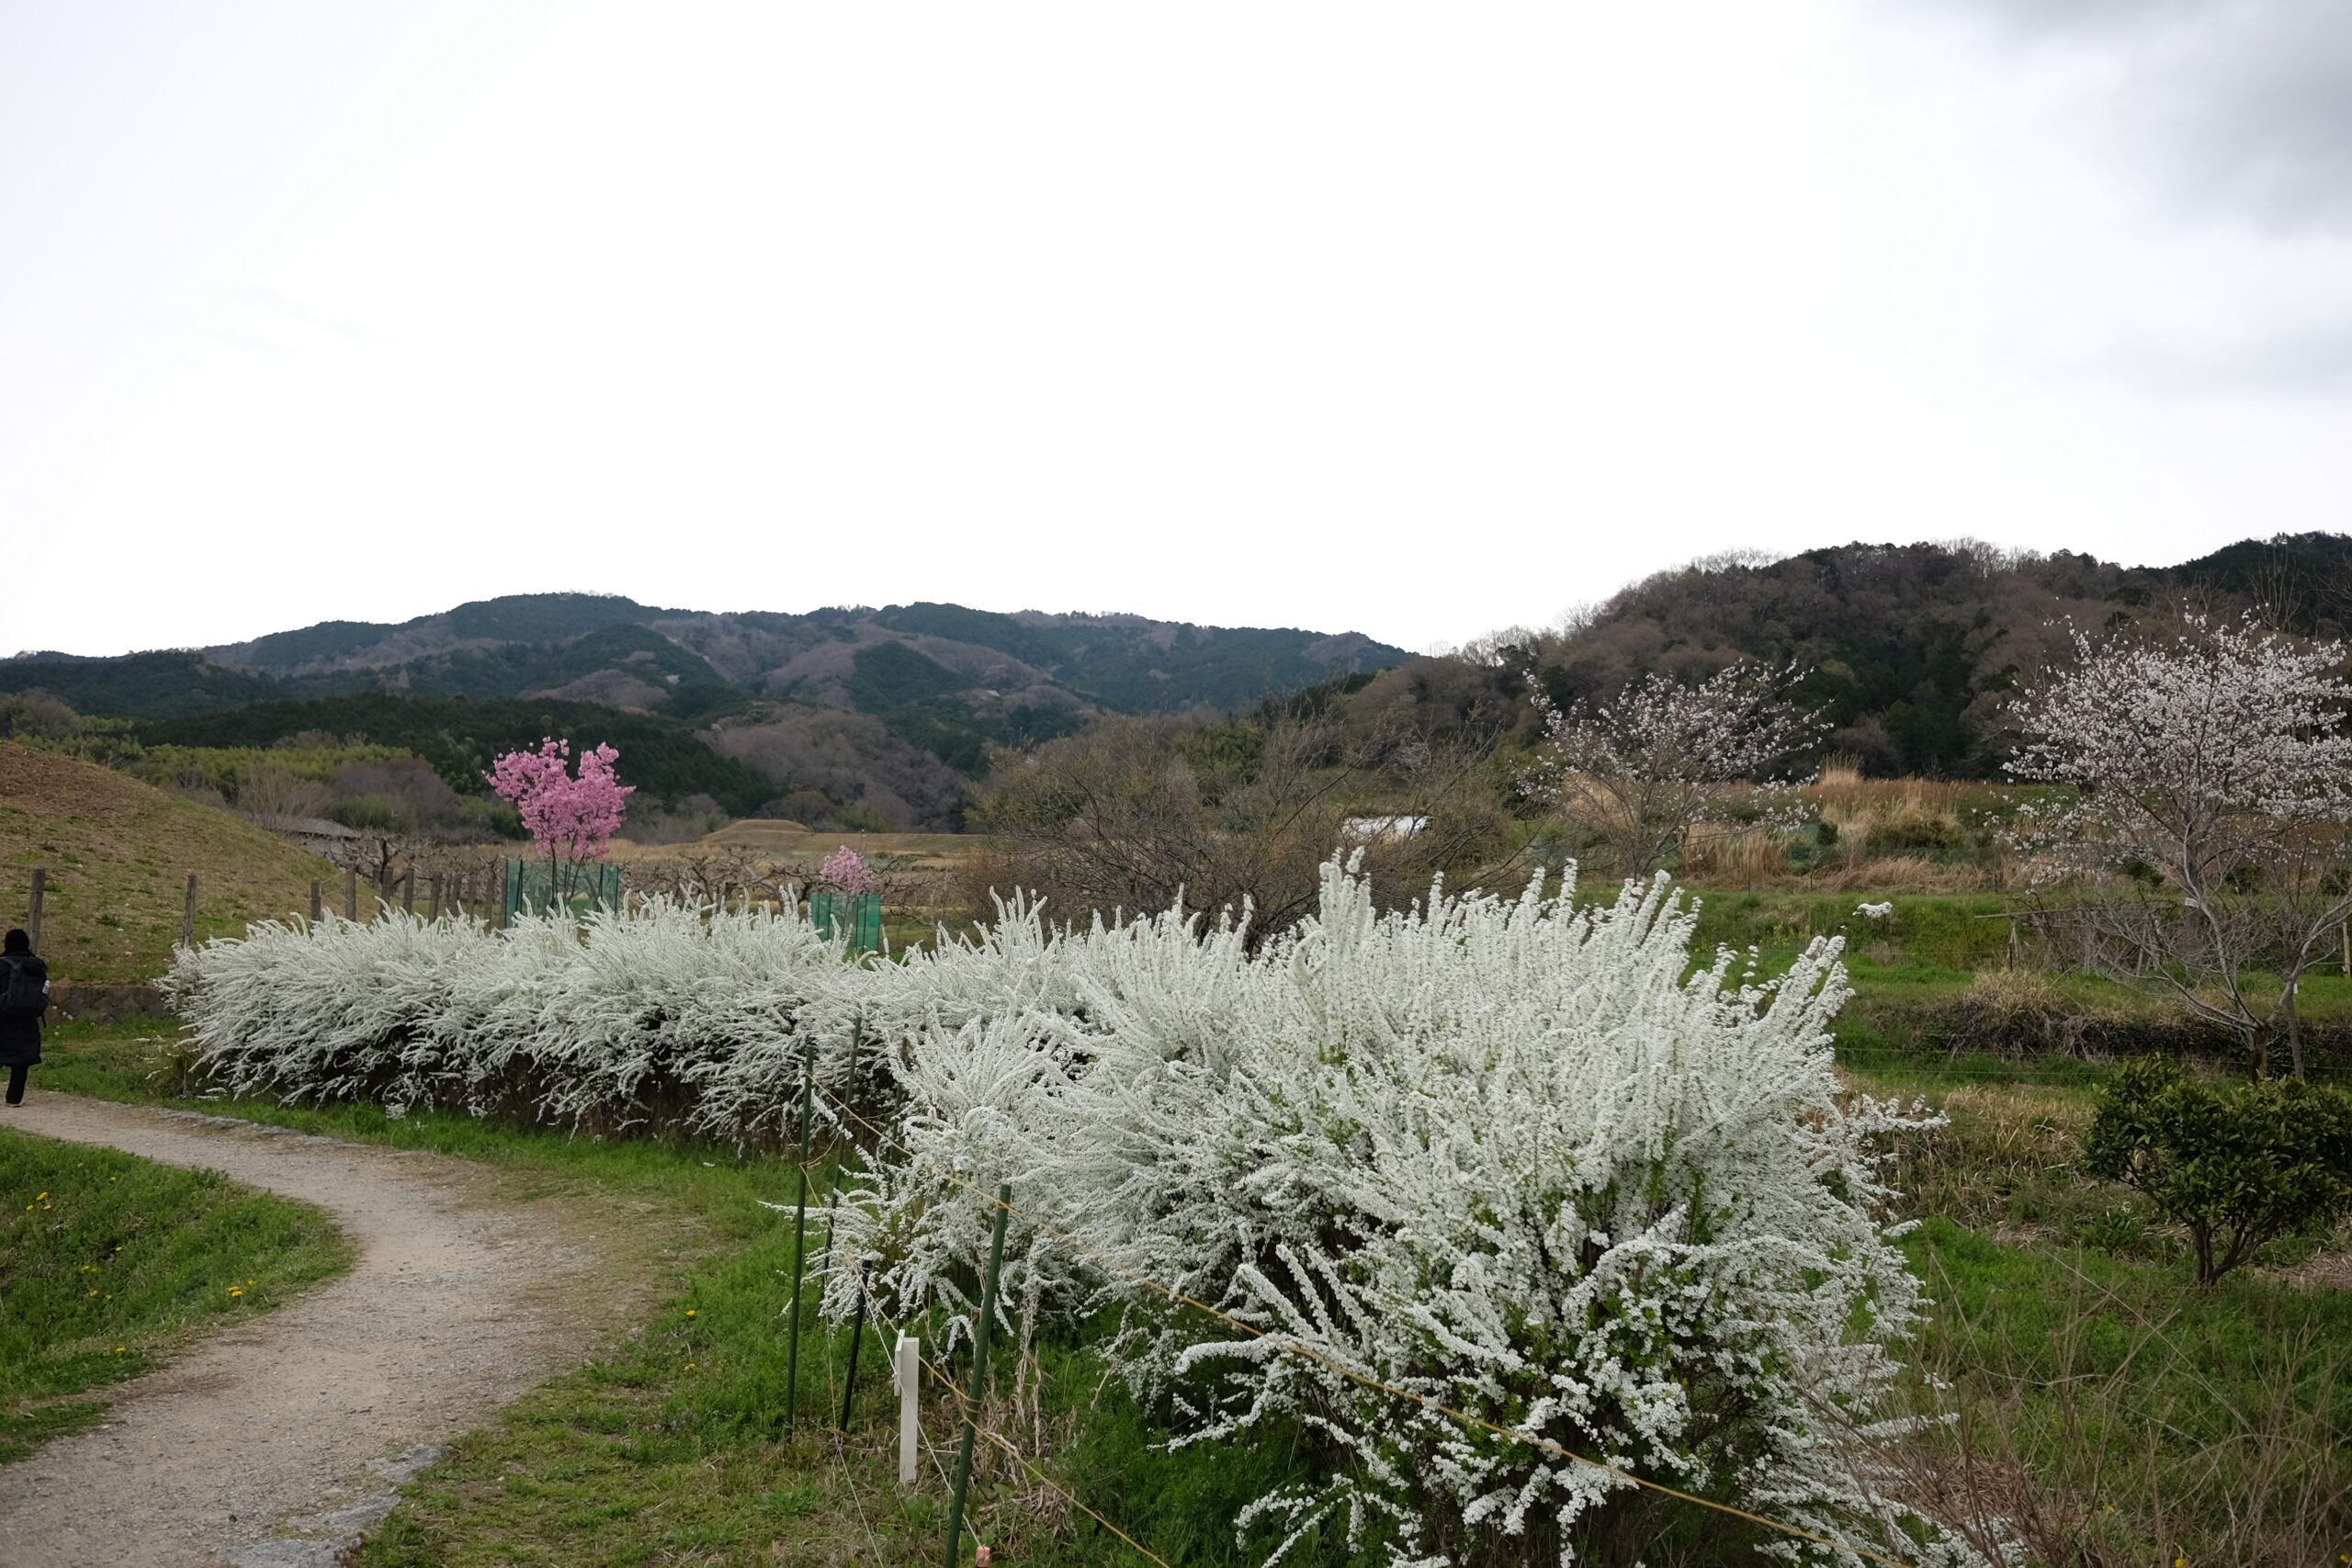
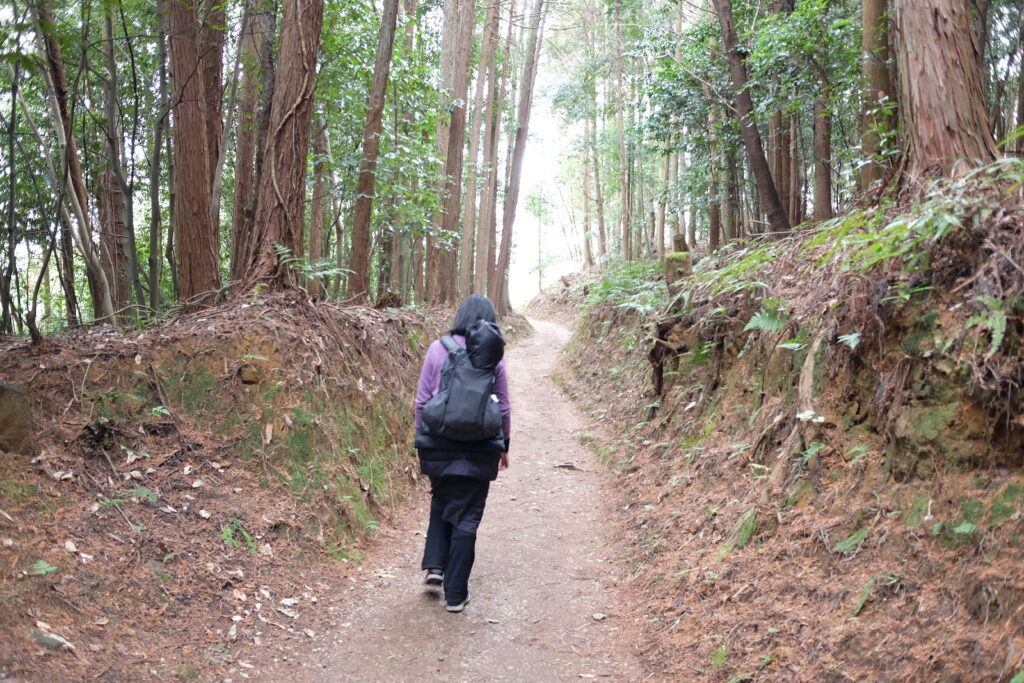
The path just off of Omiwa Jinja was unpaved, too narrow for a car to drive through. Tall trees stood on both sides for a while. Then the left side of the path became a little more open. But the path remained too narrow for a car. Yuri-san, who had walked this path before, led the way.
I was surprised by the quietness. What a difference it makes if there is no car passing by us! I heard birds chirping and tree branches swinging to the breeze. I heard a subtle sound my shoes made when making each step. These sounds were much gentler and more soothing than the noise of the car engine. In order to gain convenience, what have we lost from our daily lives?
Nostalgia
Stone monument of a poem by Kakinoueno Hitomaro – photo by Author
Here and there alongside the road were stone monuments with a poem and the name of the person who wrote it, engraved on the stone. Many poems were written by Kakinomotono Hitomaro柿本人麻呂. I found one written by Takechino Miko 高市皇子. Both names appear in Man’yōshū 万葉集, Japan’s oldest collection of Japanese poems.
After over 1400 years, I was stepping on the same road, looking at the same mountain, admiring the same beauty as these ancient poets did.
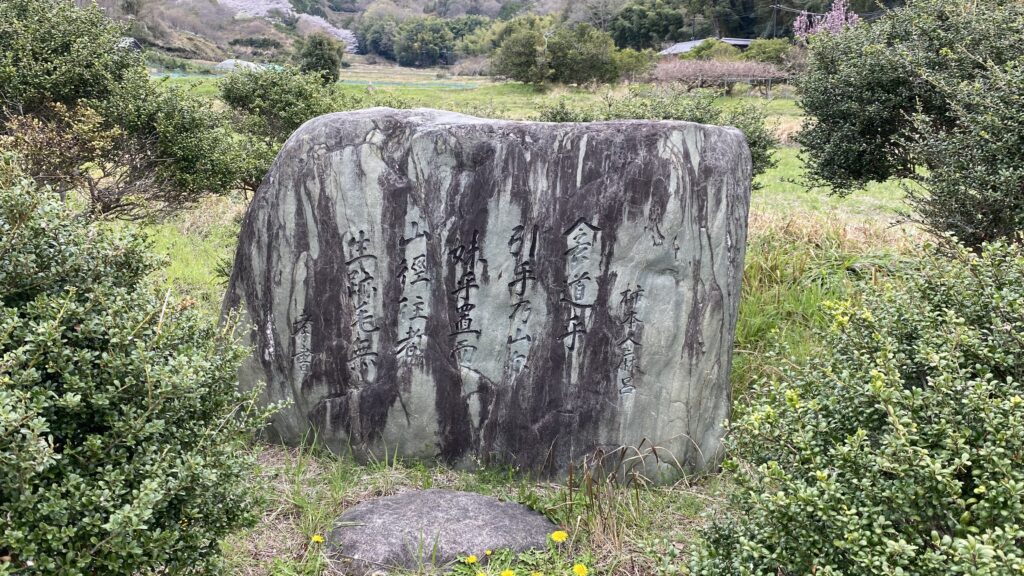
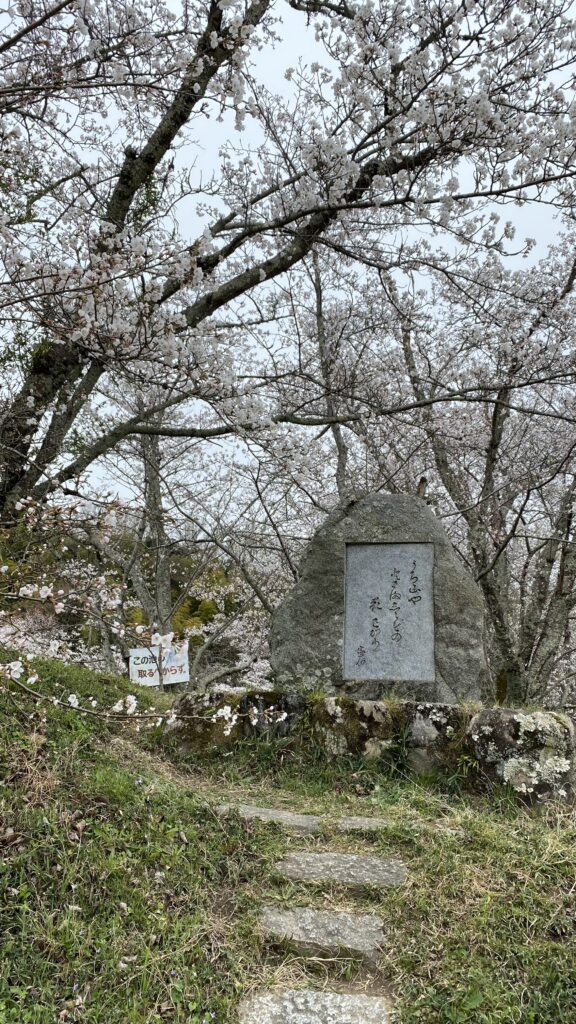
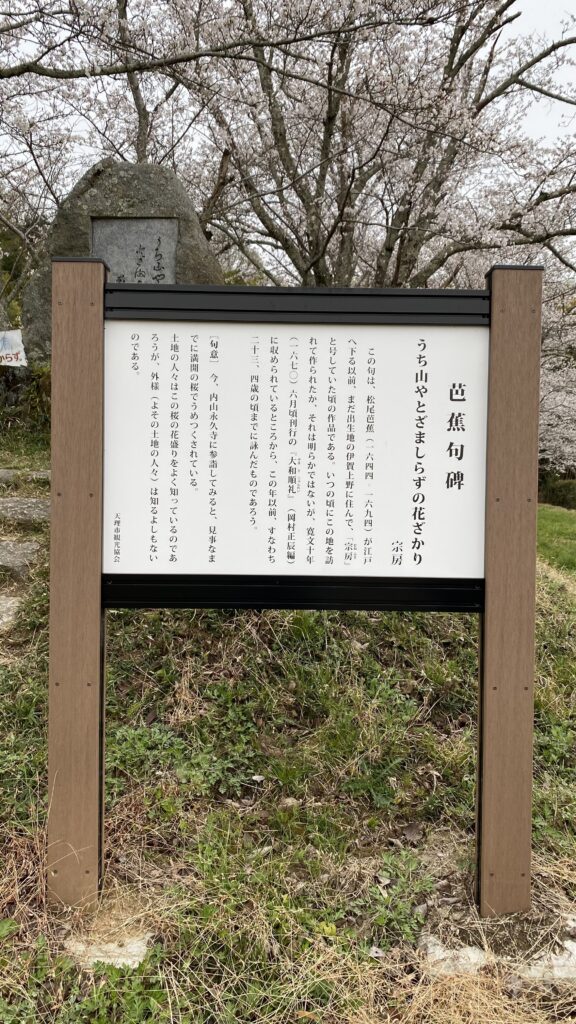
Monument of Matsuo Basho’s poem – photo by Author
Walking a little further, I found another stone monument with a poem. The name appeared as Munefusa 宗房, who is that? The wooden plaque that stood next to the stone monument stated that it was Matsuo Basho 松尾芭蕉 (1644 – 1694)’s another name when he was younger. Ah, even a master haiku poet in the 17th century paid a visit to honor their ancient predecessors.
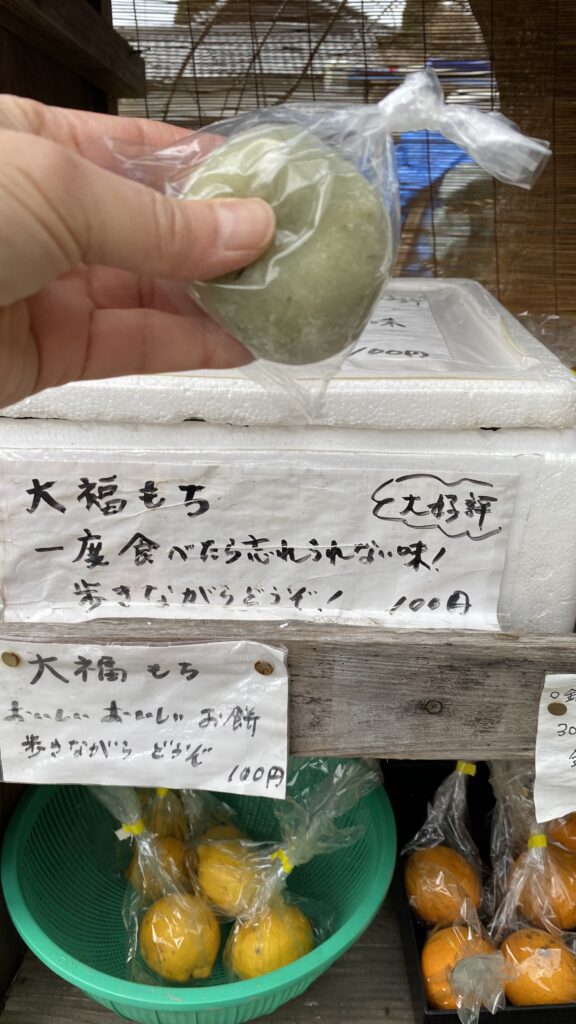
Honor system stand selling produce and sweets – photo by Author
Yamanobe no Michi mainly runs through the farmland. Although we didn’t see people around, we thanked their kind heart for leaving their produce and goodies they had made. A piece of mochi or rice cake for only 100 yen! Such an honor system seemed to remain the norm around here. Something that modern city life has long forgotten.
Dispair
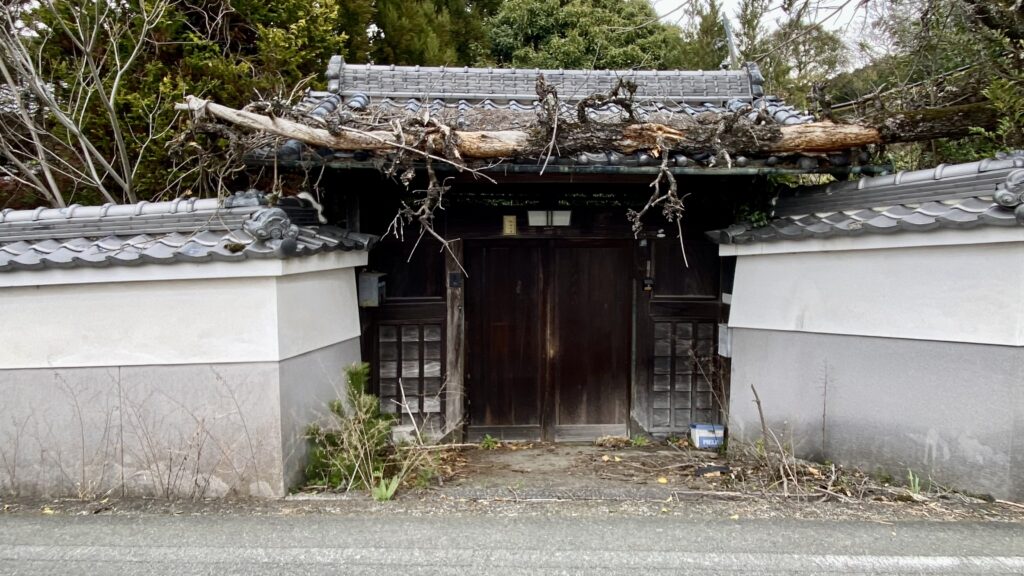
The front gate of an abandoned house – photo by Author
The houses along the road were mainly old-looking. Single-story farm houses surrounded by board fences. Houses with a large front yard, with branches of pine, persimmon, or cherry trees hanging over the fences. These houses resembled those that once stood in my parents’ hometown in Tokushima 50 years ago. Perhaps similar houses also used to fill the cities, but are rarely seen nowadays.
Looking closer, I noticed the front yard of many houses looked unattended. Windows were half open or broken. There was no sign of anybody living there anymore. I may be exaggerating, but at least a quarter of the houses in the neighborhood seemed abandoned.
When you are in the middle of Tokyo, you can’t believe that Japan is losing its people. The depopulation of Japan, however, looks so real when you visit a countryside like this.
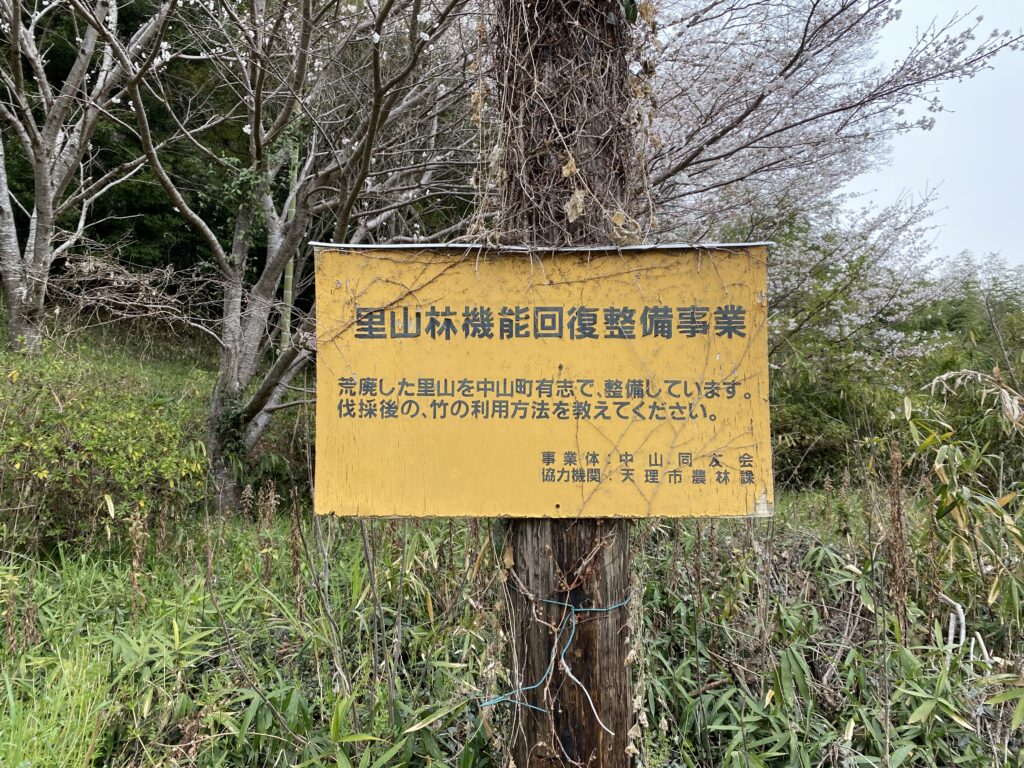
Signage on the tree – photo by Author
Along the road was also what used to be farmland, now abandoned. To whom does this land belong? To the family of that house, now nobody live?
The sign attached to a half-dead tree says, “Volunteers of Nakayama Town are maintaining the abandoned Satoyama 里山 woodland. Please tell us any idea how to make use of the bamboo trees that are cut down to clear the land.”
“Satoyama are usually located in the rural areas of Japan where agriculture, forestry and fisheries are the main industries. They are known as socio ecological production landscapes and seascapes, SEPLS in short. They consist of production ecosystems like secondary forests, farmlands, irrigation ponds, and grasslands as well as human settlements.
They are created by human activities to produce food and fuels, but eventually become irreplaceable habitats for a range of fauna and flora. Moreover, Satoyama serve multidimensional functions, in a broader context, including national land conservation and headwater conservation, while providing places for healing or leisure and inspiring the creation of art and literature.
Those ecosystem services from Satoyama, including necessary resources, safety and comfort, are co-created by both nature and continued human interventions.
Therefore, it is crucial to sonserve their biodiversity as they are inseparable from human activities.”
In abandoned Satoyama, invasive bamboo trees become the threat to its biodiversity. Hats off to the volunteers of Nakayama Town for their laborious efforts to eliminate the bamboo trees. Have they found a good solution to utilize the bamboo?
Hope
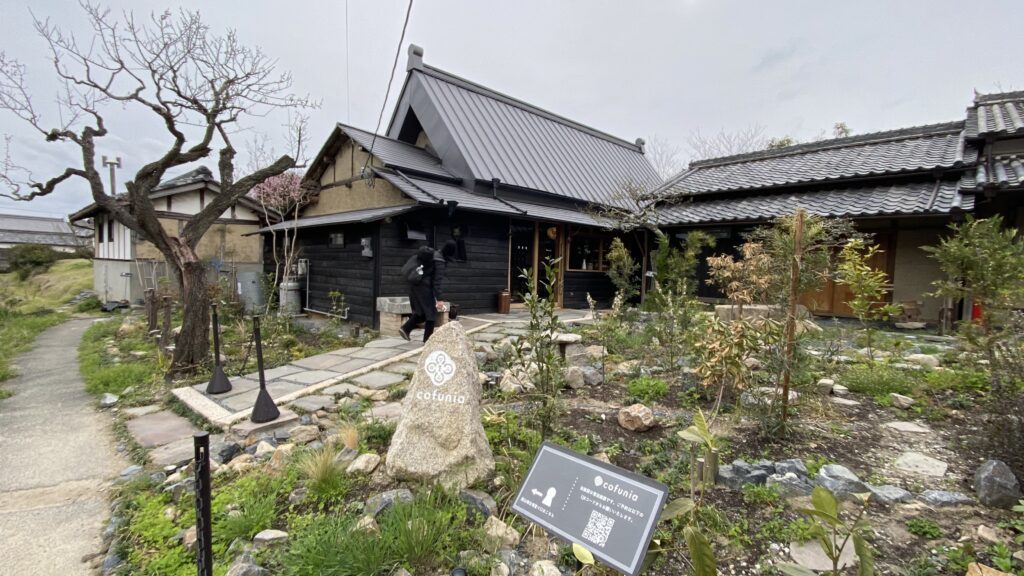
Cofnia – photo by Author
We stopped by at what looked like a café. Unfortunately it was not open, but the shopkeeper came out and explained about the building.
A young woman acquired an old house by the road that had been unoccupied for more than ten years. She raised over 5 mil. yen through and by collaborating with various organizations, resurrected the abandoned house as an inn, called Cofunia.
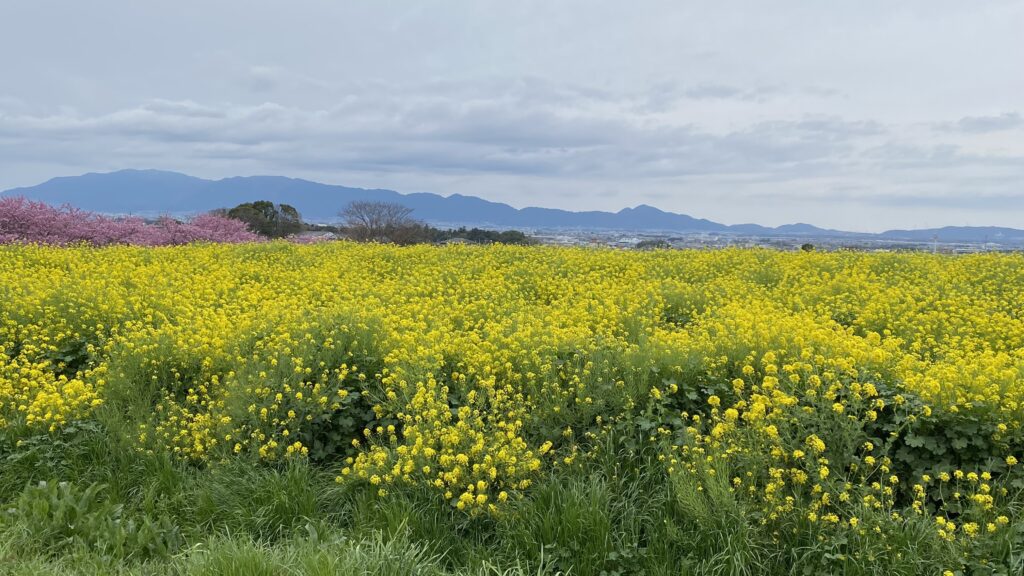
Rapeseed flowers – photo by Author
We came across a vast flower bed, full of bright yellow rapeseed flowers. An old man just came out of the vegetable field on the opposite side of the road. “Do you also grow these flowers?” I asked him.
“No,” he said. “This land belongs to Tenri High School.”
“When the school bought this farmland, their initial plan was to convert it to an athletic field. But the land is sloped, as you can see. If the land were flattened, the neighboring fields would become unstable. So the school changed its plan. They decided to keep the farmland and have their students maintain it.”
“The students grow vegetables on lower two-thirds of the land. The top one-third, where it stretches along the Yamanobe no Michi, is used as a flower garden. Here Seasonal flowers bloom all year round, so that whoever hikes on this road can enjoy the beauty of the flowers.”
The unique inn and the beautiful flower bed… Both are initiated by young people in Japan. I felt a sliver of hope.
People usually call Omiwa Shrine (大神神社)Miwa-san, as if it were their close friend. It is said to be the oldest shrine in Japan.
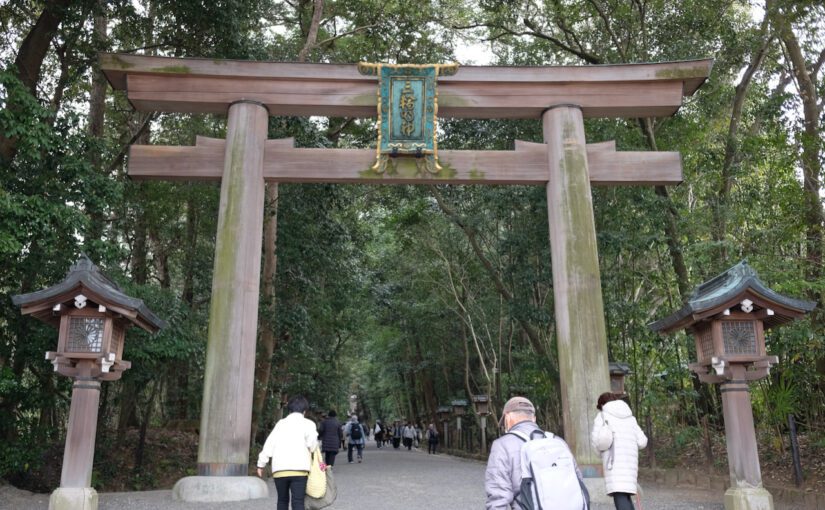
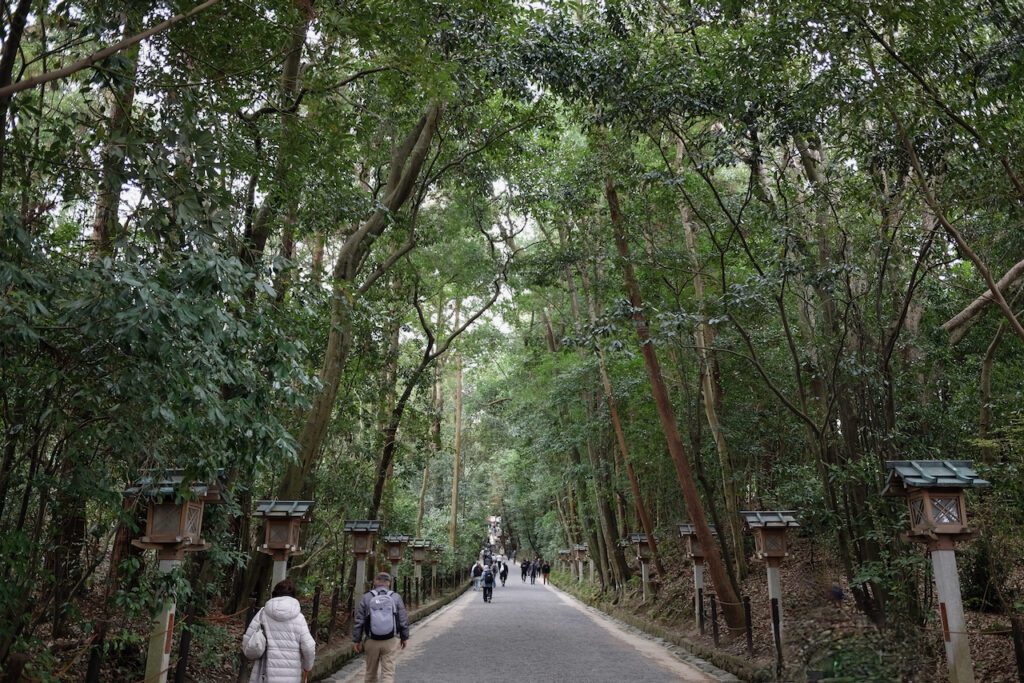
My mother is proud to have been visiting Miwa-san every first day of the month in the last 20 years or so. Rain or shine, she never misses leaving home before 9 in the morning, taking trains and a shuttle bus for a little over an hour, and passing through this torii gate once a month. For her, who easily gets bored with everything else, it is an amazing accomplishment. Do you see a little figure, the third from the left, carrying a large black backpack in this photo? That’s my mother.
Once in a while, I happen to be in Japan on the first day of the month. This spring was such a lucky occasion. I was staying in Kyoto for a few days, so was my friend Yuri-san. She also lives in Seattle, but happened to be visiting her family in Kyoto. Let’s get together in Kyoto and go somewhere on April 1st. Oh! April 1st! How about going to Miwa-san with my mother? Was my suggestion.
Yuri-san agreed. “How auspicious to visit a shrine that worships snakes in the year of the snake!” Thanks to her, I learned something new. She also suggested that we hike the Yamanobe no Michi 山辺の道after visiting Miwa-san. I agreed.
Yuri-san and I met at the entrance to the Kintetsu line of Kyoto Station. The JR line side, especially the entrance to the Shinkansen (bullet train), was jam-packed mainly with foreign tourists. Luckily, the Kintetsu line side was far less crowded. There were hardly any people in the limited express train that we got in, leaving Kyoto Station at 9:10 am, bound for Kashikojima.
We changed trains at Yamato Saidaiji and got off the train at Sakurai Station. My mother, coming from Osaka, also on the Kintetsu line, was waiting for us at the exit. A little relief that three of us got together with no hickup.
On foot, it takes at least 30 minutes from Sakurai Station to Miwa-san. On the first day of every month, however, a shuttle bus runs between Sakurai Station and the foot of Miwa-san to accommodate the monthly regulars like my mother. Yuri-san and I piggybacked on that service, and the three of us got on the shuttle bus.
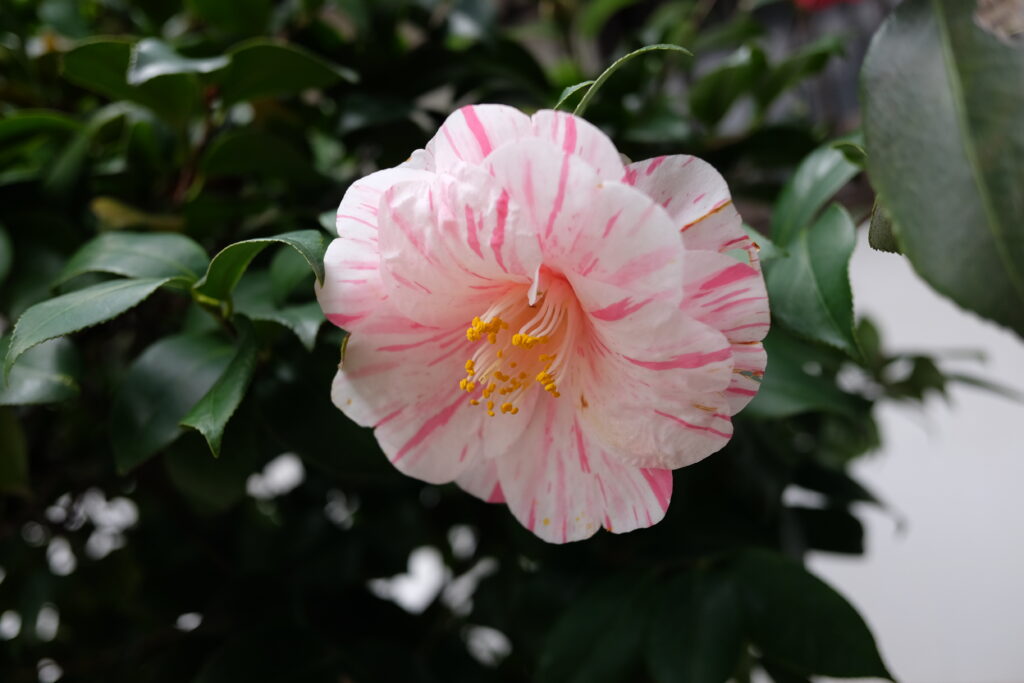
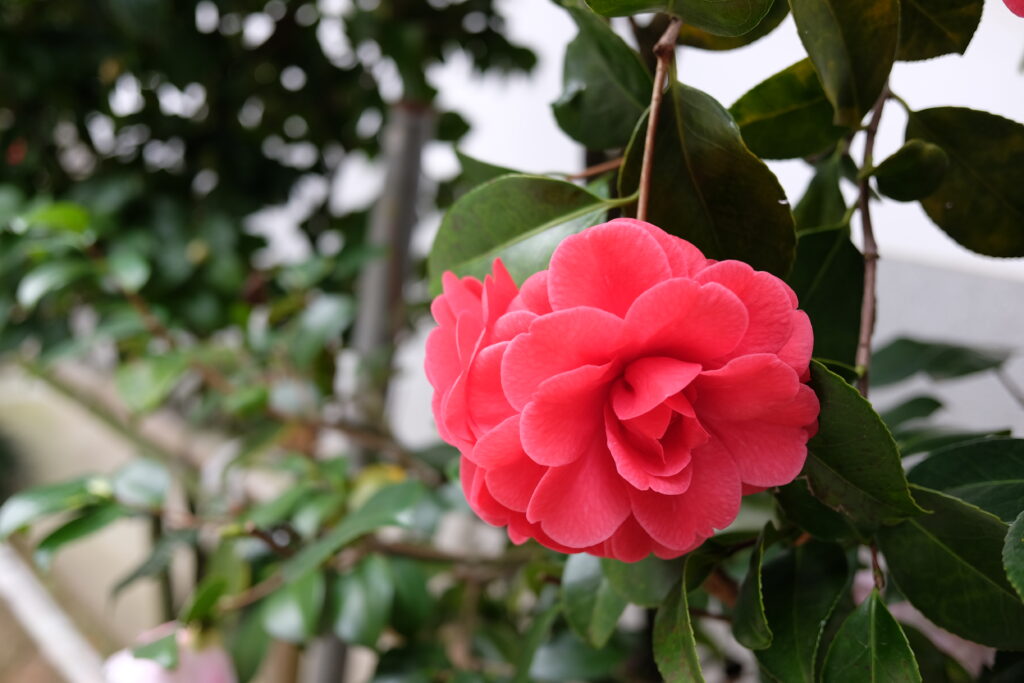
The bus went through a narrow road and arrived at Miwa Ebisu Shrine, a tiny sub-shrine of Miwa-san, where everyone got off. Cute camelia flowers were blooming on the hedges to welcome us.
Camelia flowers – photo by Author
Along the pathway from this sub-shrine to the main gate of Miwa-san, many stalls were lined up, selling local produce and freshly cooked goodies. Yuri-san and I were tempted to stop at each stall. Knowing the way around and also on her mission to complete her route before noon, my motherl led the way. She didn’t give us little time to meander and look around.
We arrived at the large torii gate.
My mother bowed down deeply in front of the gate. “You are not supposed to go through the gate in the middle. Stay on the right or left side when you go through under it.” If I had asked her why, she would have replied, “Because I was told to do so.” To her, it was a good enough reason. I simply followed her.
Sando参道 of Miwa-san – photo by Author
Beyond the torii gate was a long, straight gravel pathway, sandwiched with rows of tall trees and lanterns. Each lantern had the name of the people or the company that donated it. More people were walking toward the main shrine than walking back this way. It was still in the morning.
Even to a soul that doesn’t believe in any god, some sense of awe, humility, or purification should come up by walking along under this lush green. Not a single trash on the gravel road. Defused by he leaves and branches, the sunlight, however harsh it may be, softens by the time it reaches you. The air is crisp, and you notice you are breathing deeper than usual. It’s worth visiting any big shrine only to experience this magical feeling.
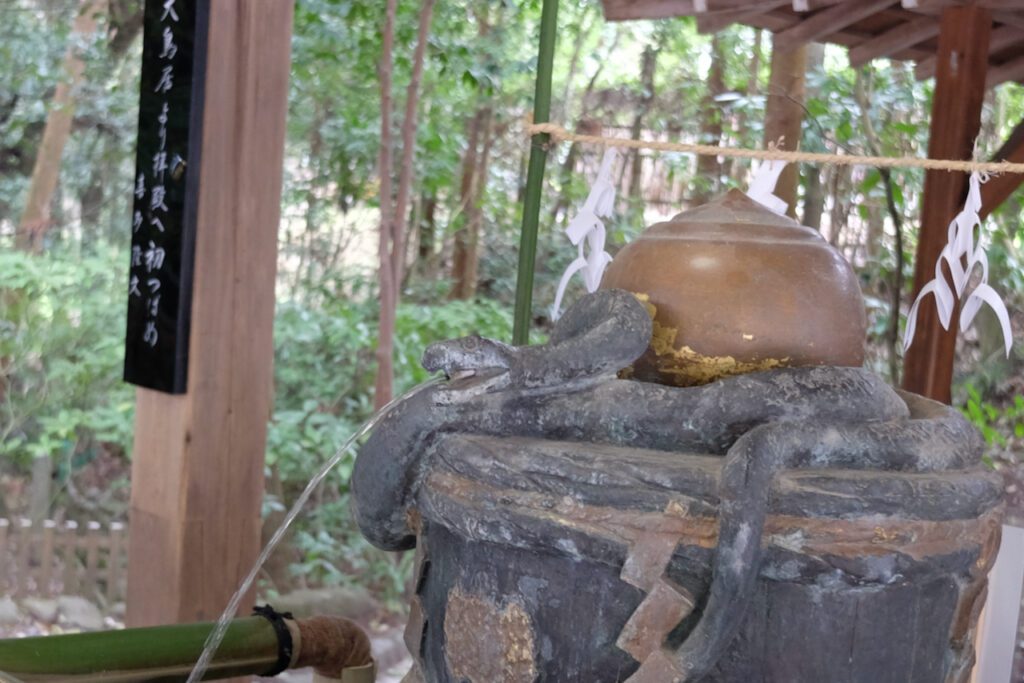
Snake shaped faucet – photo by Author
It is customary to clean your hands and mouth with water before visiting the main shrine. No exception here at Miwa-san. What is unique is that the shape of the faucet is a snake. What is the relationship between Miwa-san and a snake?
Miwa-san enshrines the god Omononushi no Okami 大物主大神. In both Kojiki古事記 and Nihon Shoki日本書紀, the two oldest books of Japanese history & mythology, a snake is depicted as one of this god’s incarnations.
According to Miwa-san’s official website:
“During the reign of Emperor Sujin, there was a princess named Yamatototobimomosohime who served as a shrine maiden, conveying the will of the gods and helping the emperor with his affairs.
This princess was to become the wife of Omononushi no Okami, but he would only visit her at night. She asked him if she could see his face. Okami thought this was a reasonable request and granted her request. He told her that he was in a box containing her comb, but never to be surprised by opening it.
Suspicious, the princess opened the box the next morning to find a small snake inside, which made her scream in shock. The god instantly transformed from a snake into a beautiful man and reproached her for breaking her promise. He then flew into the sky and returned to Mount Miwa, saying she would never see him again. The princess then regretted her actions and stabbed herself in the vagina with chopsticks, losing her life. For this reason, Momosohime’s grave came to be known as Hashihaka (Hashihaka Tomb). This sad story about Hashihaka, located at the foot of Mount Miwa, is recorded in the Nihon Shoki.”
A rather sad and scary story.
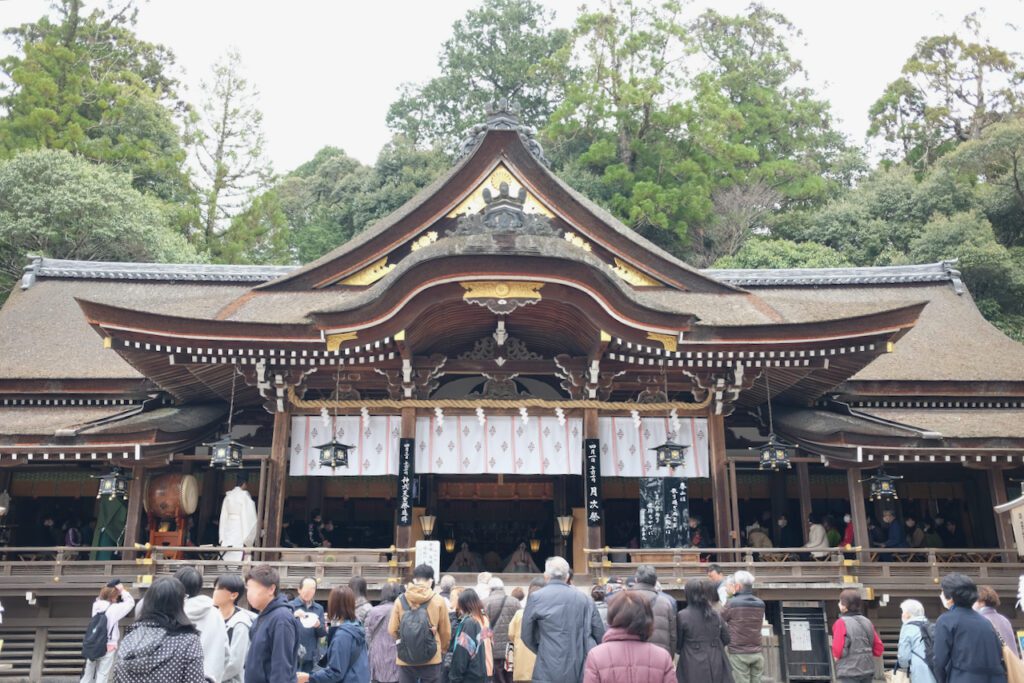
The Haiden of Miwa-san – photo by Author
On top of the steps is the haiden 拝殿, the worship hall. The monthly ritual had already started when we got there. Gagaku music was playing, with many people listening to it both inside and outside the building.
Another uniqueness of Miwa-san is that there is no honden 本殿, the main hall, that would normally exist beyond the haiden.
Usually, a certain object of worship is housed in the honden. For Miwa-san, however, the object of worship is the mountain itself. We bow down in front of the haiden to pay respect to this holy mountain, Mount Miwa, which stands behind the haiden.
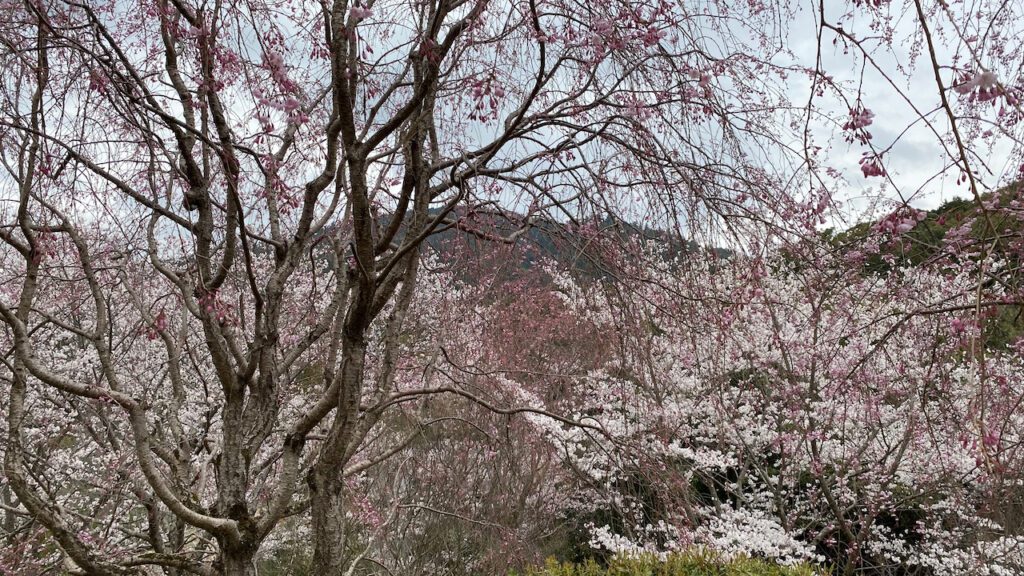
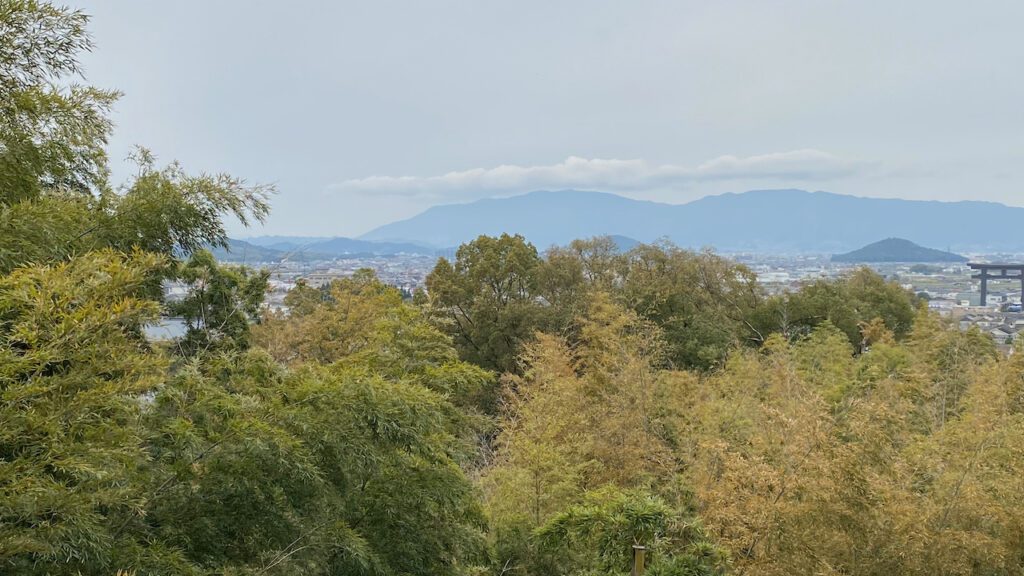
Mount Miwa from the observation deck – photo by Author
Mount Miwa is not visible from the front of the haiden. If you walk up to the observation deck, you can see it through the tree branches. On the day I visited, the cherry blossoms were in full bloom, decorating the graceful figure of the holy mountain.
One of my mother’s never-to-miss spots in Miwa-san is Kusuriido 薬井戸, where you can get holy water that would cure any illness. In her backpack she had six empty half-a-litter PET bottles. She would fill all the bottles with this holy water, carry them back to Osaka, and give three to her niece and keep three for herself. Is it this holy water, or the fact that she carries the water back home every month, that keeps her healthy? In either case, I have no complaints.
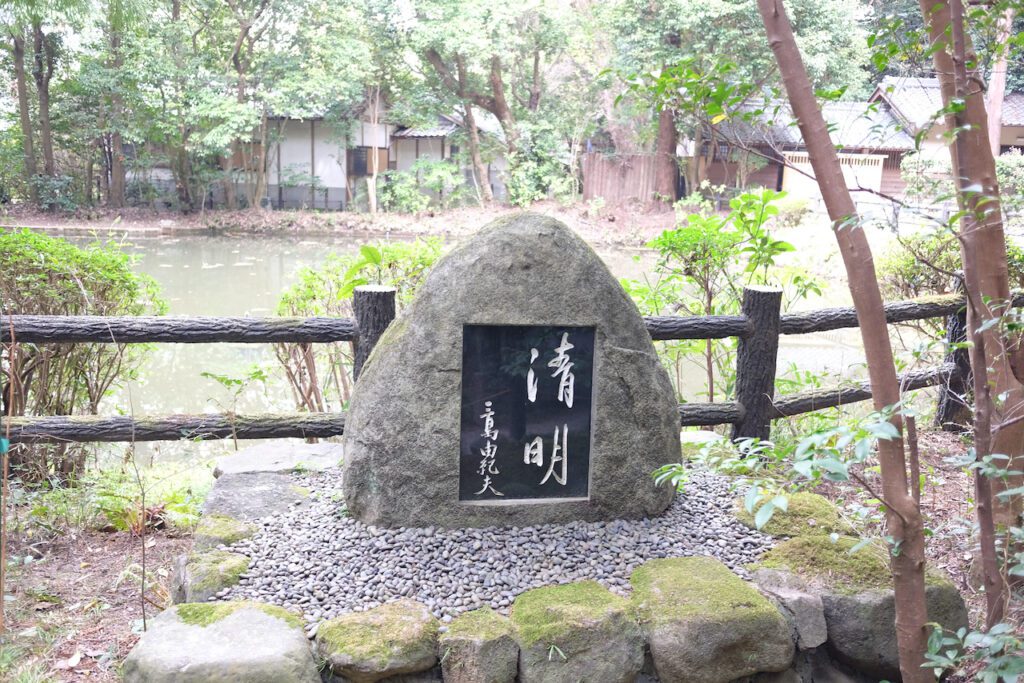
While my mother went rushing to the well, I was walking at my own pace along the passage leading to the well. On the left side of the passage, there was a pond, and I found a rather new stone monument. Intreagued, I went up closer.
Stone monument of Mishiya Yukio’s handwriing – photo of Author
清明(seimei)- 三島由紀夫 (Mishima Yukio)… That famous author Mishima Yukio? Why is it here?
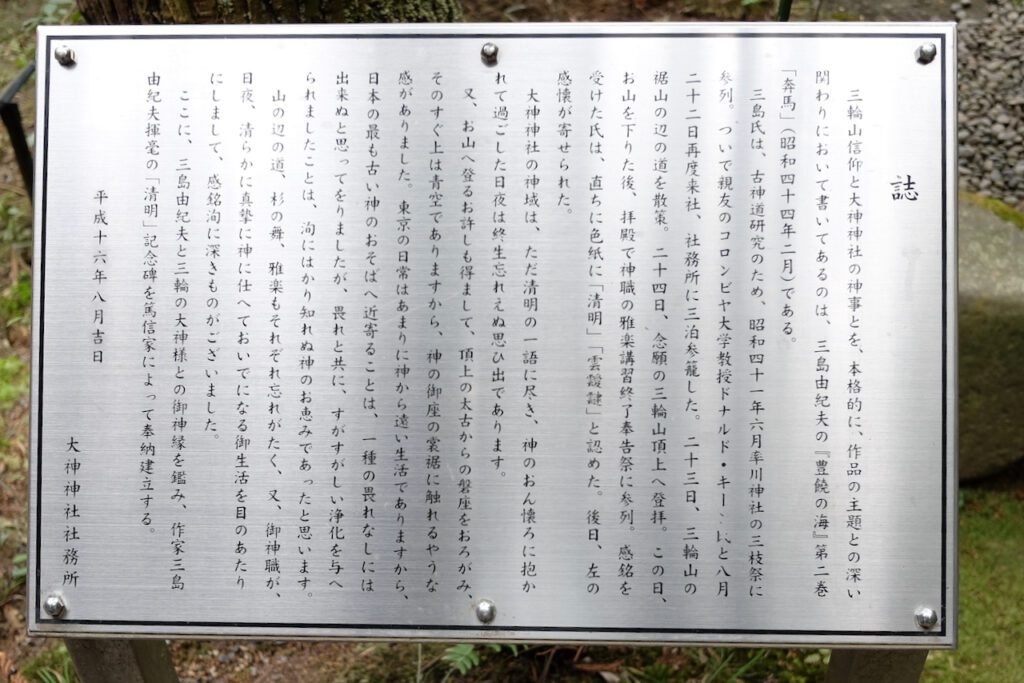
Another plaque by the monument explained why.
Plaque – photo by Author
(My translation)
“In his novel Runaway Horses (奔馬, Honba), the second in his Sea of Fertility tetralogy. Mishima Yukio depicted the faith in holy Mount Miwa and the religious rituals of Omiwa Shrine as the novel’s central theme.
To study ancient Shintoism, Mishima attended the Saikusa Festival of Isagawa Shrine (Omiwa Shrine’s sub shrine) in June, 1966. Mishima visited Omiwa Shrine again with Donald Keene on August 22, and stayed here for three nights. On the 23rd, he strolled around Yamanobe no Michi at the foot of Mount Miwa. On the 24th, he climbed up the peak of Mount Miwa. After coming down from the peak, he attended the Gagaku music ritual held in the haiden. Deeply impressed by the experience, Mishima wrote 晴明 (seimei=clear and bright) and 雲靉靆 (unaitai=cloudy and unclear) on the paper.
Later Mishima wrote to Omiwa Shrine.
‘The sacred area of Omiwa Shrine was nothing but 晴明. The days I spent being embraced by the god are an unforgettable experience in my life.
I was honored to be allowed to climb up Mt. Miwa. Looking down at the sacred stone at the peak, and looking up at the blue sky, I felt as if I was touching the base of the god’s seat.
My everyday life in Tokyo is so distant from any god, I never thought I could ever come closer to Japan’s oldest god without feeling awe. Not only awed, but I also felt invigorated and purified. What a blessing from the god beyond my imagination!
Yamanobe no Michi, graceful dancing, and Gagaku music were all worth remembering. Above all, I was deeply impressed by the priests’ relentless daily devotion day and night to the god.’
With the support of a generous donor, we erect the plaque of Mr. Mishima’s handwriting to cement the deep bond between him and Omiwa Shrine.
Heisei 16th Year (2004) August “
Is this plaque an indication that I have to read Sea of Fertility?
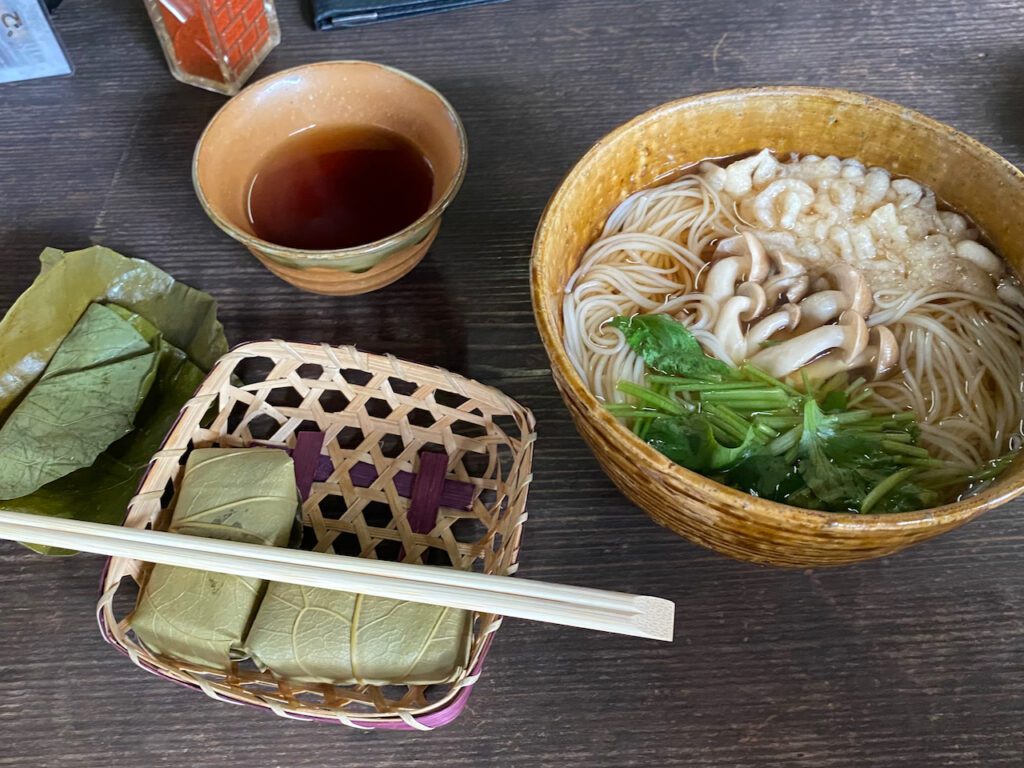
Miwa somen and Kakinoha sushi – photo by Author
My mother completed her monthly routine at Miwa-san. Yuri-san and I had enough morning exercise. Time for lunch!
Morisho converted their front yard of the old farm house into an outdoor restaurant. We ordered a lunch set, which contains the two local specialties: Somen and Kakinoha sushi.
Somen is very thin flour noodle. Morisho serves somen in thin dashi broth. Kakinoha sushi is wrapped around with a persimmon leaf. Thanks to the antimicrobial effect of the persimmon, sushi lasts for a couple of days.
After lunch, Yuri-san and I parted from my mother who went back to Osaka. Off to Yamanobeno michi… I never imagined it would be that long of a hike.
Overlooking Yamato Sanzan from Miwa-san’s observation deck – photo by Author
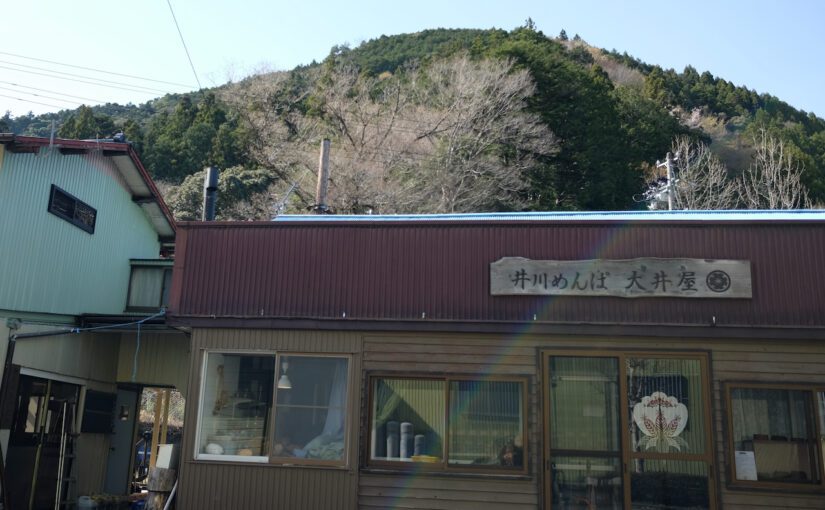
Hana picked me up at the Shizuoka Station and we headed north. After about an hour’s drive, we reached Oiya 大井屋, the shop and the studio where Hana chose to work after graduating from the Traditional Arts Super College of Kyoto (TASK).
The shop looked far from fashionable boutiques in Tokyo or Kyoto. Why a young woman like Hana had chosen this place as her workplace, I wondered.
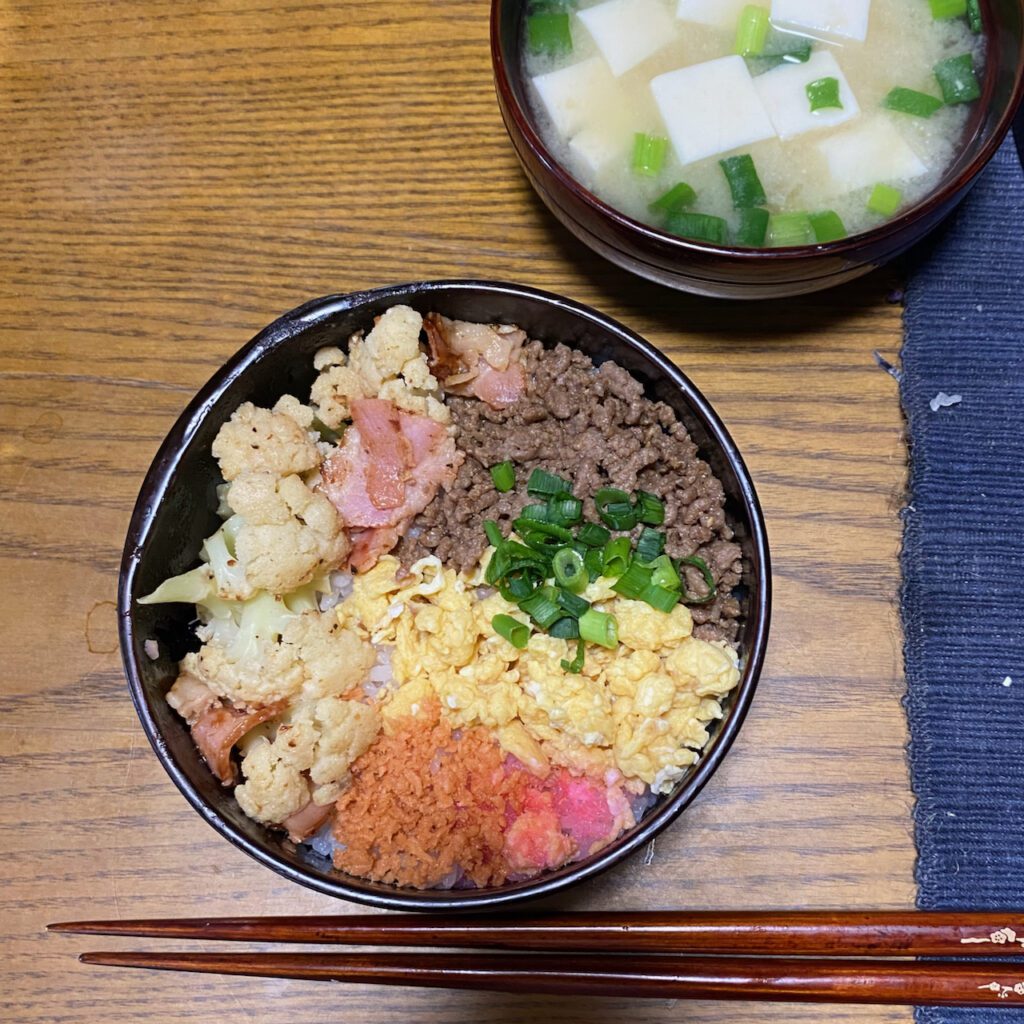
Mr. Maeda, Hana’s boss, greeted me with a big smile. “Let’s have lunch together.” Hana had already prepared lunch for three of us, neatly packed in, nothing else, their own Oigawa Mempa.
Hana’s bento in their Oigawa Mempa – photo by Author
What is Mempa
A thinly-sliced wood is bent to form the side of the container… While similar types of this woodworking technique are found throughout Japan, it varies depending on the regions as to which wood is used, how the coating is done, and what people call them. In the Oigawa region, the mountainside of Shizuoka Prefecture, people call such wood containers “Mempa.”
Hinoki cypress trees that grow locally are used for the body. Strips made of the local cherry tree bark are used to stitch together the edges. Kakishibu is used for the undercoat, and Urushi sap for the overcoat.
Oiya is the only place remaining to make this type of wooden lunch boxes exactly the same way as has historically been made, using only natural materials.
Shaping, Bending, Stitching, and Gluing
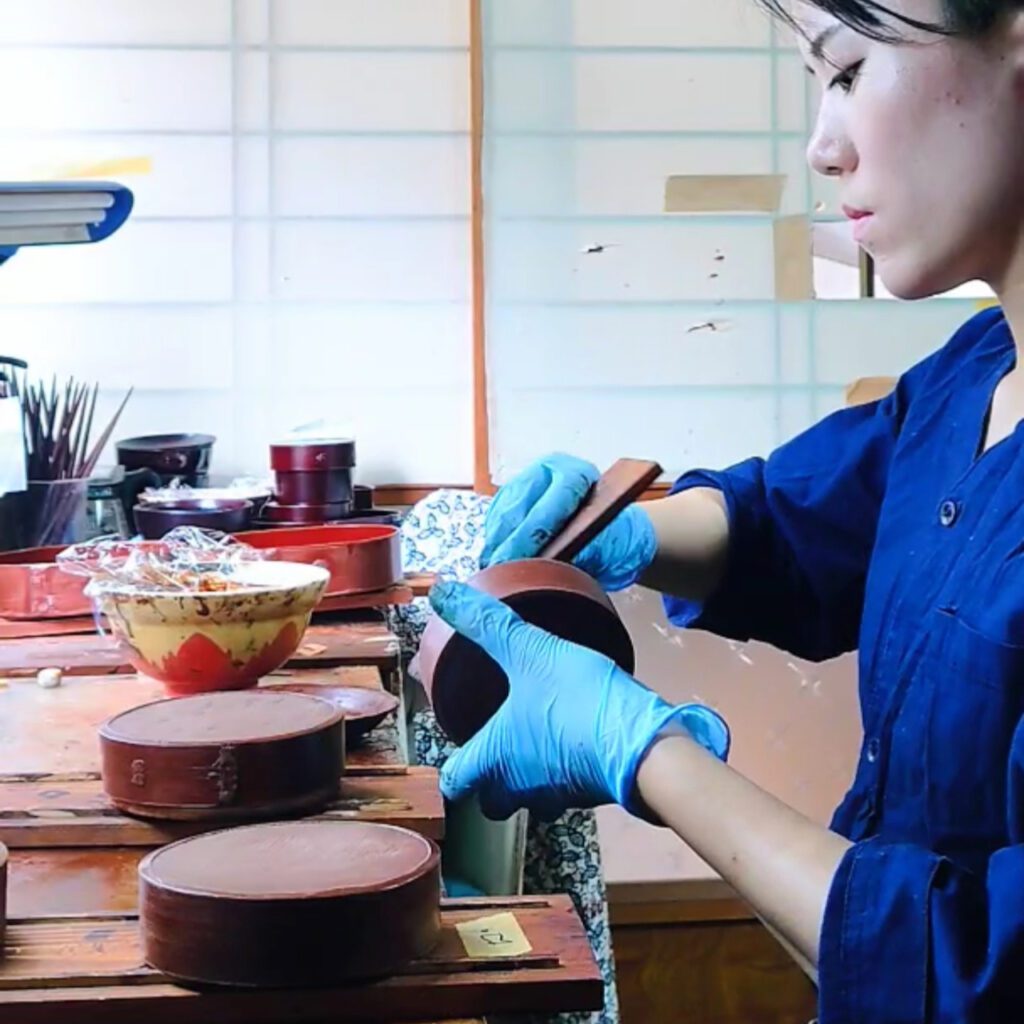
After lunch, Hana and Mr. Maeda led me to the workspace to walk me through the process of making their Mempa.
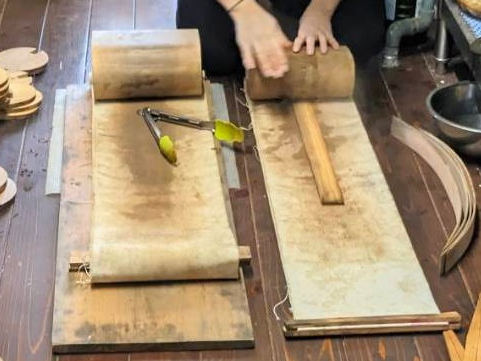
Hinoki Cypress wood board is first boiled in hot water so that it becomes soft enough to bend. By rolling it with a cylinder-shaped tool several times, the boiled board is gradually bent.
Hana is making the side board bent – photo by Hana with permission
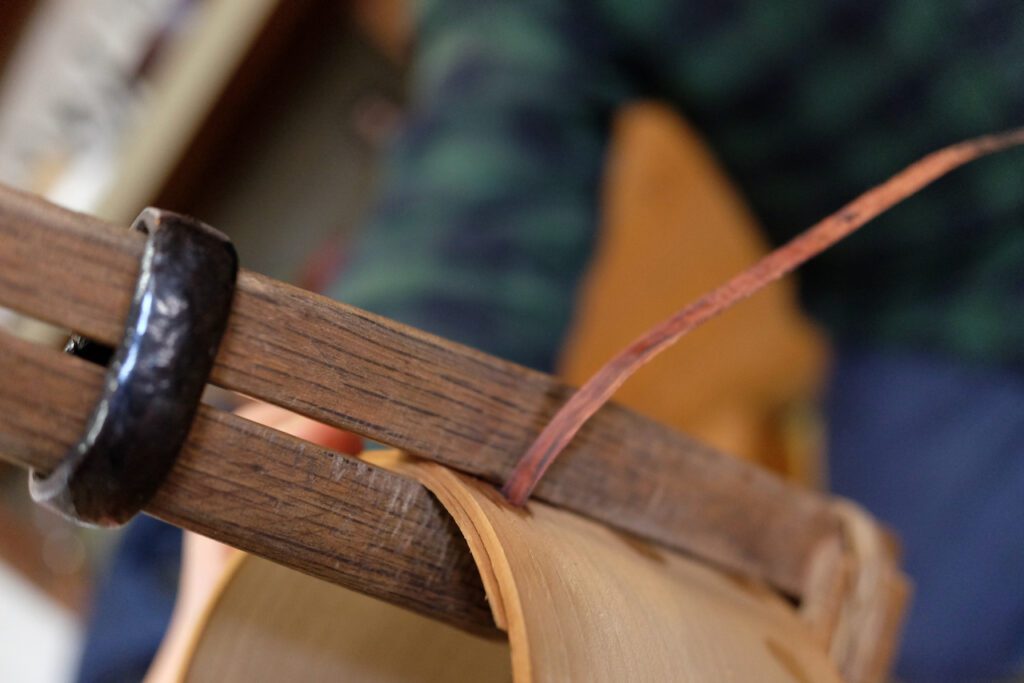
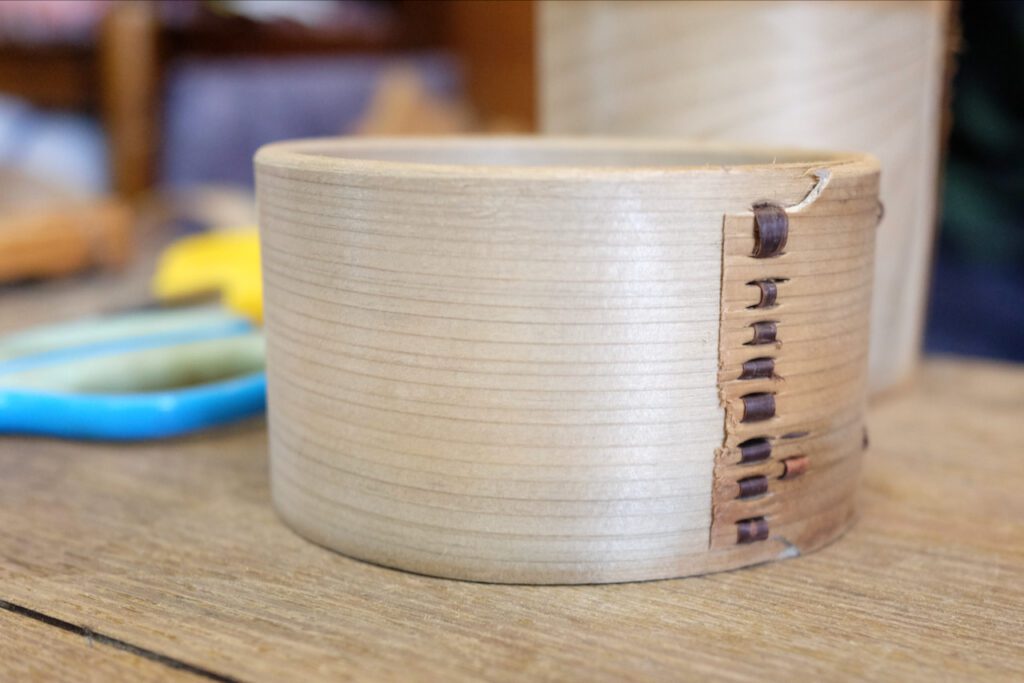
By holding the edges of the board together with a special tool, they cut out slits and stitch together the edges with the cherry bark strip.
Stitching the edges of the bent wood with the strip of cherry bark – photo by Author
The side body is made by bending thinly sliced hinoki cypress. The edges are stitched together with a strip of cherry bark – photo by Author
Once the side of the container is formed, they put it together with the bottom part.
The bottom of the lunch box is also made of hinoki cypress– photo by Author
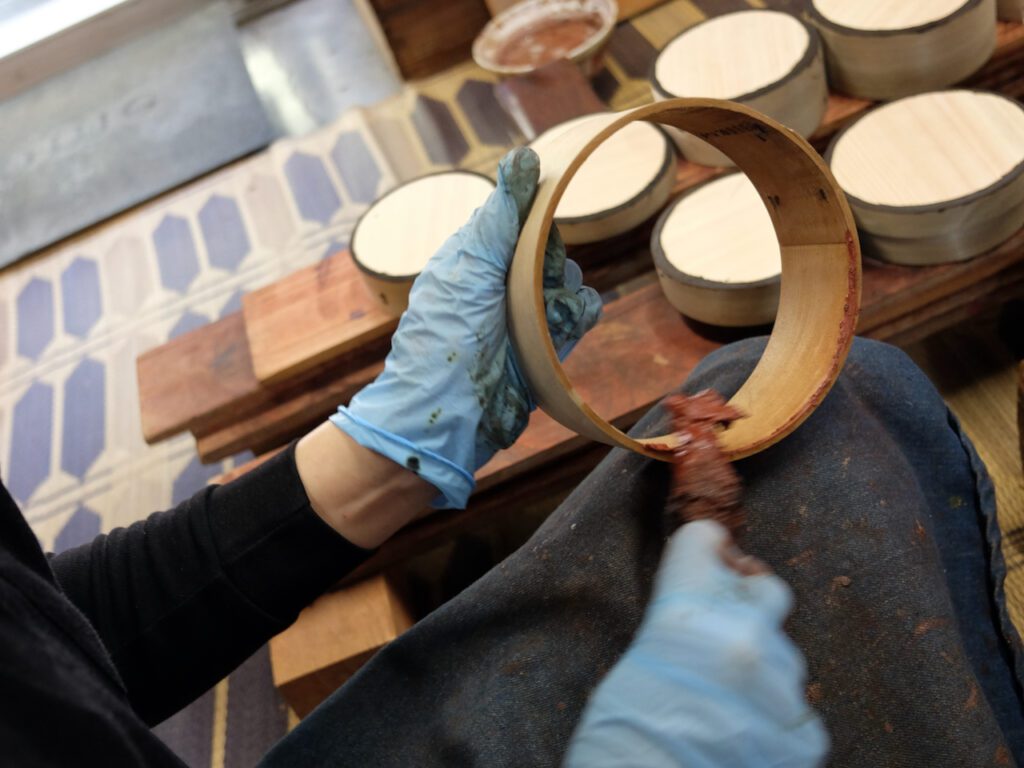
Mugi Urushi 麦漆, paste made by mixing Urushi sap and flour, is used to glue together the bottom and the side of the container. The gluten of flour mixed with Urushi creates a strong bond once the paste dries.
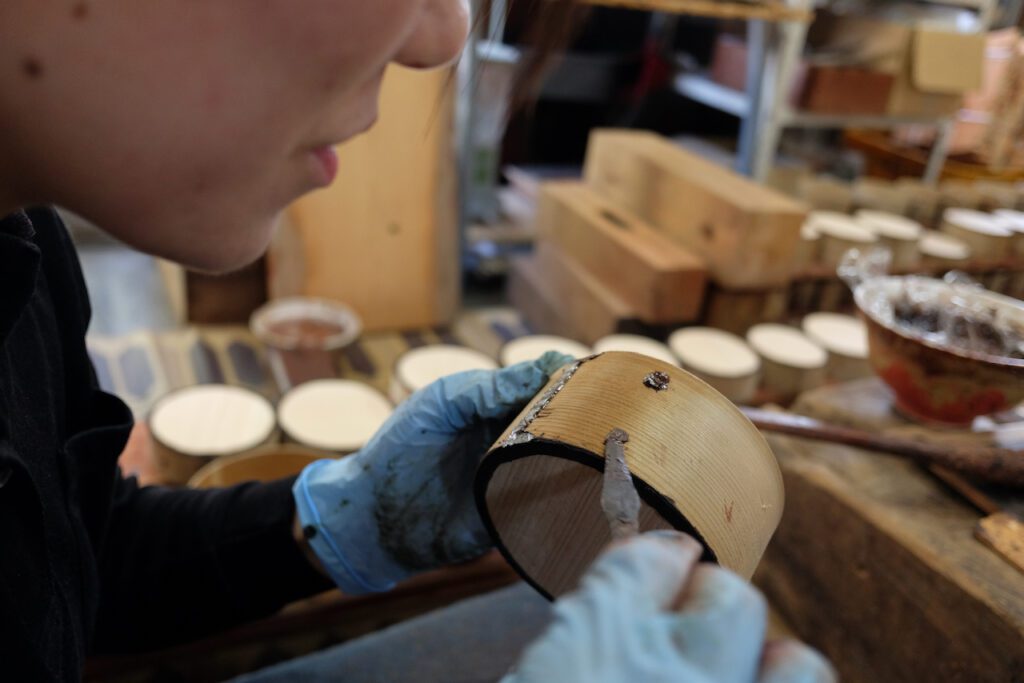
Next Sabi Urushi 錆漆is applied on top of the stitches and the gap between the bottom and the side of the container. Sabi Urushi is a mixture of Urushi sap and diatomite. With finer particles, Sabi Urushi gives a smoother texture than Mugi Urushi, as well as filling the tiny gaps.
Hana applies Mugi Urushi麦漆 to glue together the bottom and the side of the container – photo by Author
Hana applies Sabi Urushi錆漆 onto the threaded bark to smooth out – Photo by Author
Both Mugi Urushi and Sabi Urushi are applied, now drying – photo by Author
Mugi Urushi hardens after a day or so, but it takes at least 3 in the summer and almost 2 weeks in the winter for Sabi Urushi to completely harden.
Undercoating, Overcoating, and Decorating the Surface
The next step is to undercoat the body with Kakishibu.
Kakishibu 柿渋 is the fermented juice of unripe persimmons. For centuries in Japan, Kakishibu has been used to protect wood, fabrics, and paper from moisture, insects, and fungi. Its antiseptic and antibacterial properties have now been scientifically proven.
For Oigawa Mempa, they apply kakishibu undercoating 4 or 5 times. Why apply kakishibu so many times?
Hinoki cypress is a comparatively soft wood, therefore, it is easy to bend. “Soft” also means it is easily scratched. By applying kakishibu 4 or 5 times, the wood becomes harder and more resilient to scratches, as well as lighter, because the moisture in the wood is eliminated.
“We apply Kakishibu on a sunny day, in a workspace outside in the shade. After each time we apply Kakishibu, we place it under the sun. When the layer is dried, we apply another layer. We repeat this process 5 or 6 times. Interestingly, I can feel the wood gets noticeably tighter and lighter after the third or fourth layer,” says Hana.
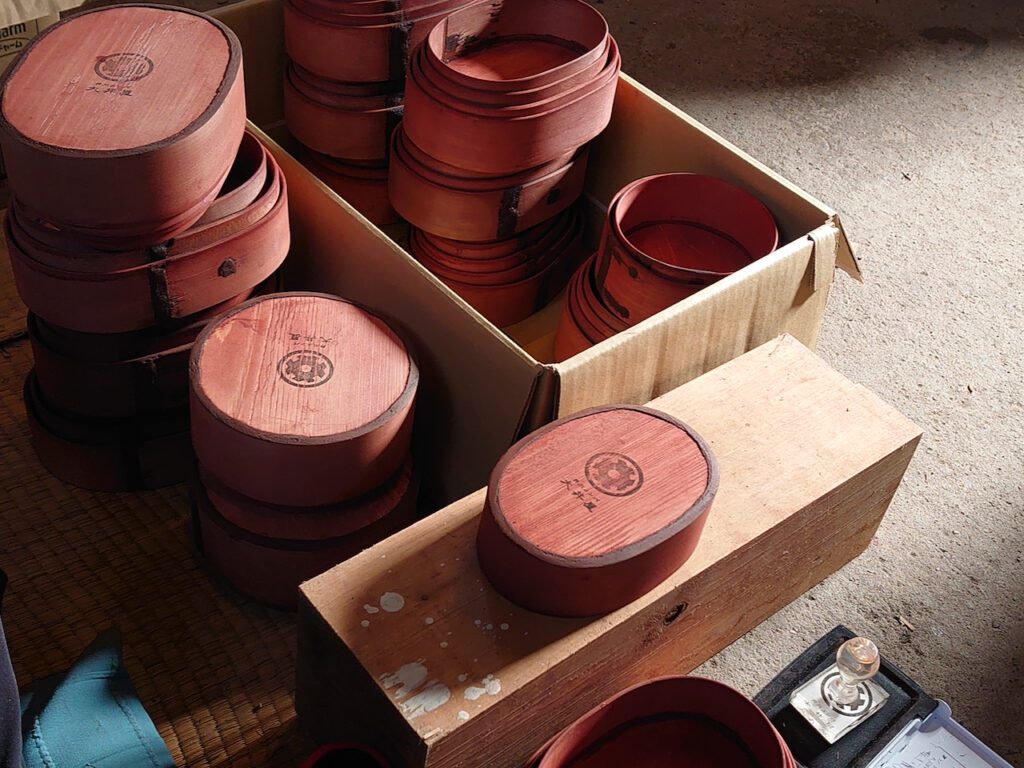
Oigawa Mempa after Kakishibu is applied and dried – photo by Hana with permission
Once the Kakishibu undercoat is applied, now it’s time to apply Urushi overcoat.
The beautiful, shiny surface is the signature characteristic of Urushi. Also, it adds water resilience, strength, and durability to the surface. It also has antibacterial properties. No wonder Urushi has been used for bowls, plates, and almost every form of food and drink containers in Japan for centuries.
Hana is applying Urushi overcoat – photo by Hana with permission
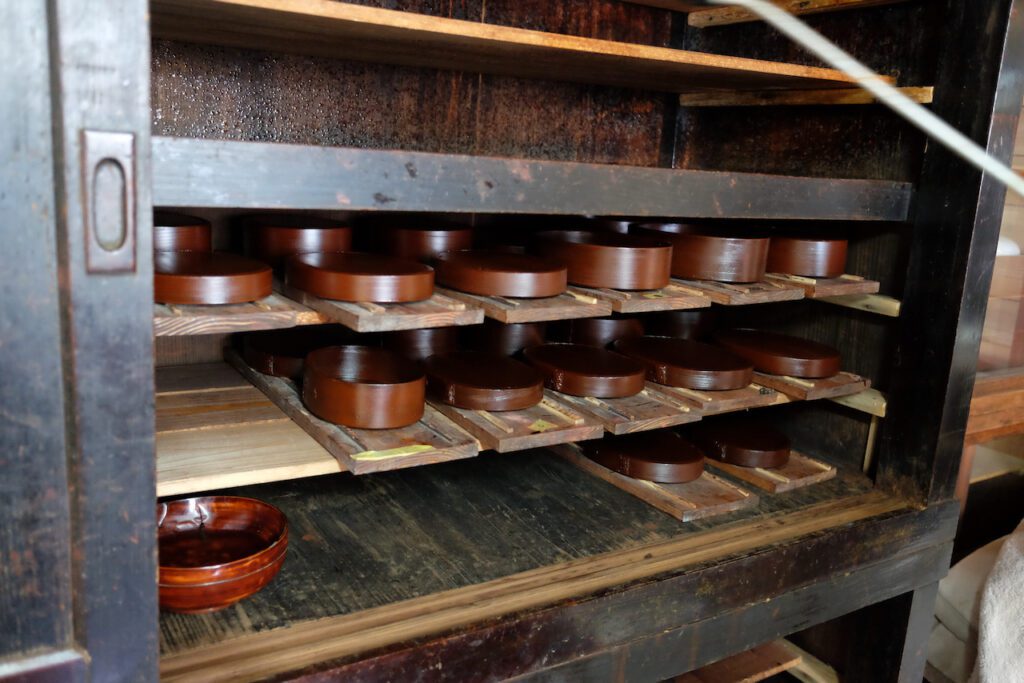
Urushi is an interesting material. Although people call the process “drying Urushi,” it’s actually a chemical reaction of hardening the substance, which requires high humidity. Once the overcoat is applied, the containers are kept in the “muro, ” the cabinet full of shelves. Mr. Maeda opened the sliding door of the muro, where the containers were dried. Before closing the door, he sprayed water onto the shelves to make sure to keep the humidity in the muro at about 80%.
Mr. Maeda is spraying water onto the shelves – Photo by Author
The surface hardens in about a day in the muro. Urushi may still irritate the skin until it completely hardens. Oiya waits at least a week before moving the containers to the storefront.
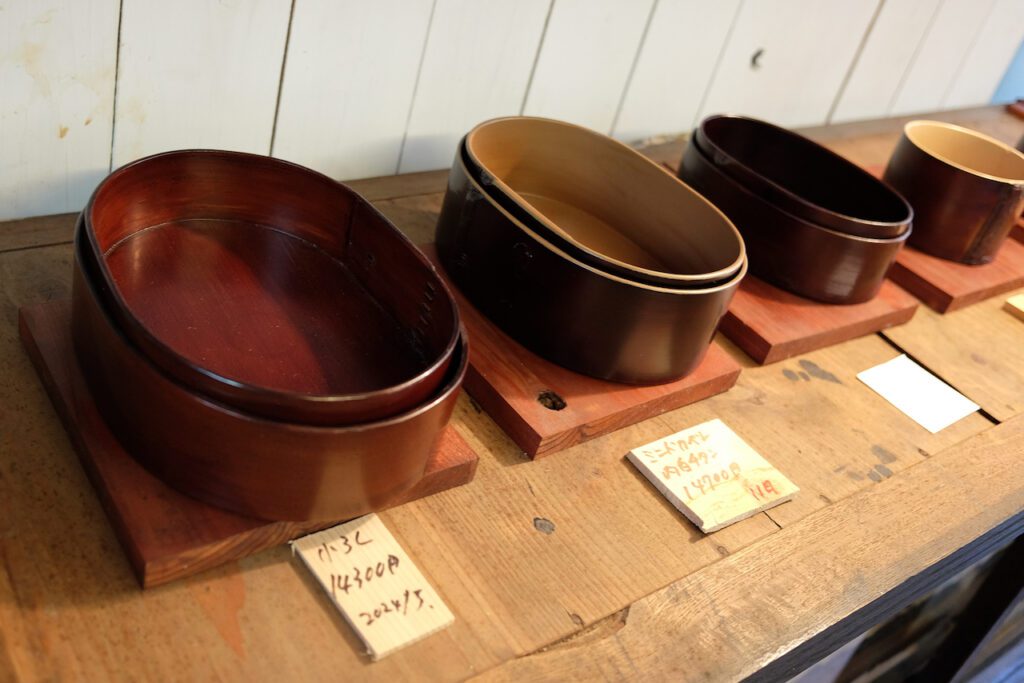
Each Mempa displayed in the showcase has a tag that tells when it was taken out from the muro. Oiya suggests that customers wait for two months in the summer or three months in the winter before they start using the Mempa they purchased.
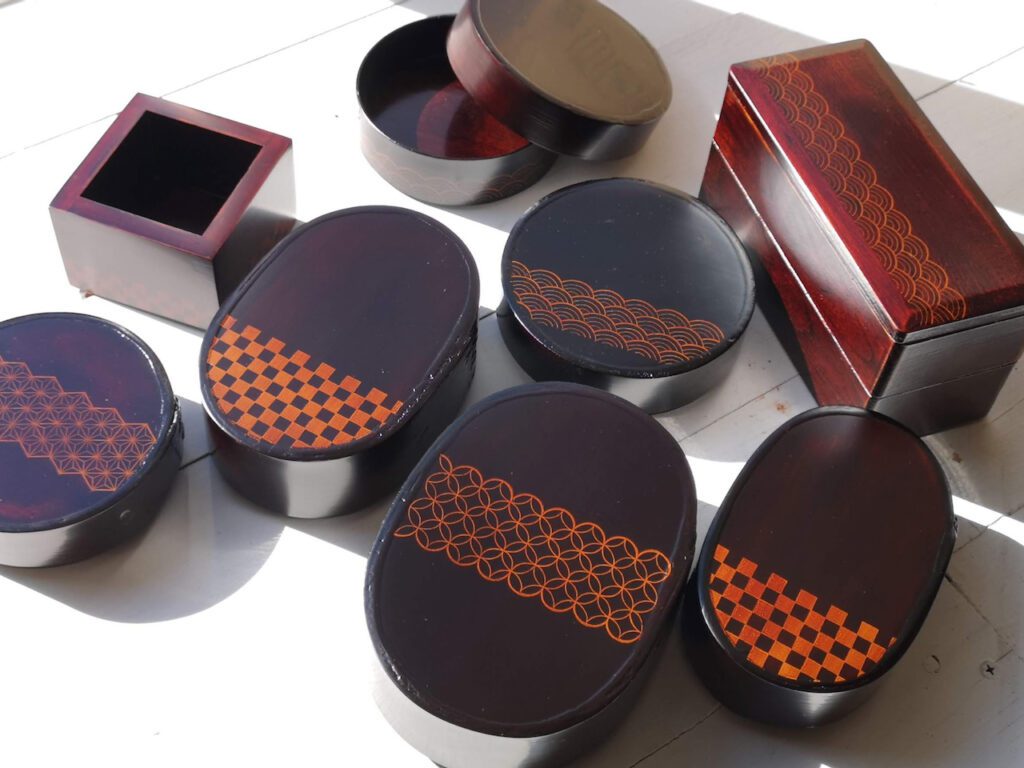
Completed Mempa on display – photo by Author
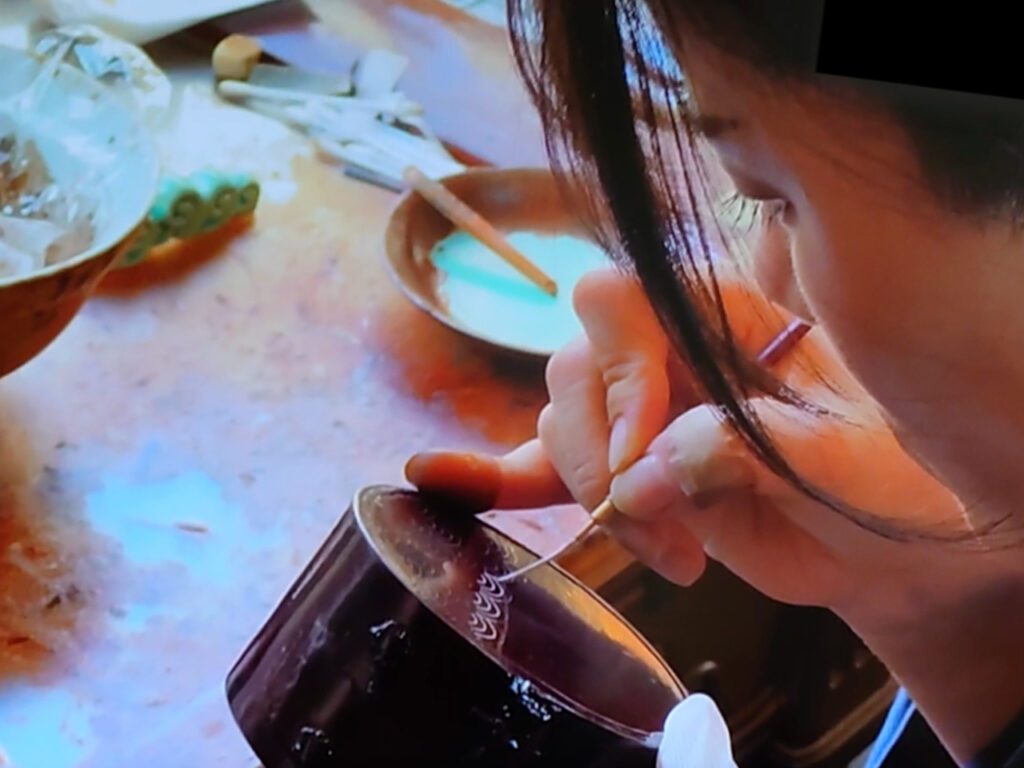
Oiya’s Mempa used to have just a plain surface. For Hana, who learned Makie 蒔絵 design at TASK, the plain surface has become a new canvas to try new designs. She first added Japan’s traditional designs. Now she takes orders for custom designs.
Hana is applying Makie designs on the lid – photo by Hana with permission
Mempa with Hana’s Makie designs – photos by Hana with permission
So how long does it take to make a Mempa? About how many Mempa does Oiya make in one batch?
From the start, when they cut the wooden boards, to finish, when they put them on the storefront, it takes about 3 months. For each batch, they make 80 to 90 Mempa. With two of them, they are making roughly one Mempa a day.
***
Every summer, they make their own Kakishibu from organic persimmons that are locally harvested. They purchase rough Urushi生漆 from a wholesaler, but they don’t depend on a third party to refine it. They don’t mix any thinning solution to Urushi. Rather, they make Urushi softer by painstakingly mixing it in the sunlight.
Mr. Maeda shows no compromise when it comes to the materials they use and the process they use to make their Mempa.
“Mempa is used to store our food, which is indispensable for our body and health. How can we compromise its quality?” says Mr. Maeda.
Beside him, Hana was nodding each time Mr. Maeda made his comments. I remembered that Hana had mentioned in her essay that her dream job would be to make lacquerware that are used by people every day. Kudos to Hana for making her dream come true.
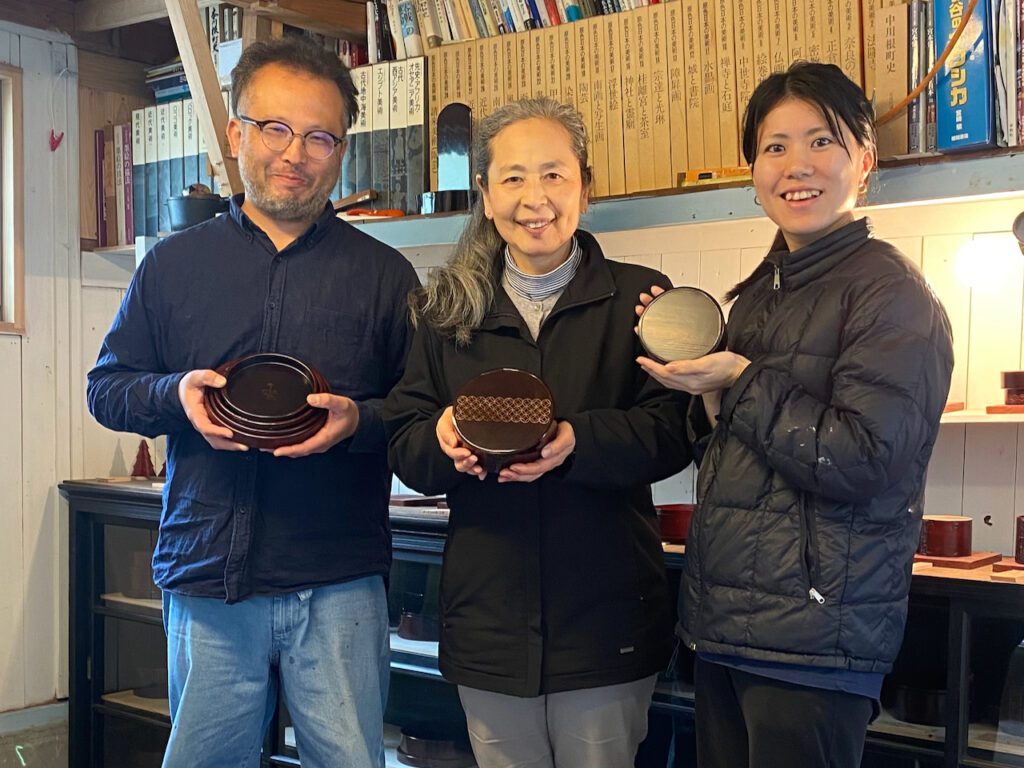
Mr. Maeda, Hana, and me with Mempa in our hands – photo by Author
Hana will be coming to Seattle this summer. For the Mempa I ordered, I asked her to design something that depicts Seattle. What kind of design will she come up with? I look forward to finding out!